I was standing in my kitchen, half‑asleep, when my roommate dared me to bake something that would make the whole apartment smell like a sunny Mediterranean market. I laughed, grabbed a lemon, and thought, “Why not try those thumbprint cookies that always turn out flat and crumbly?” The first batch I made was a disaster: the centers stayed dry, the edges were as hard as a stale biscuit, and the lemon flavor was as subtle as a whisper. I swear I could hear the oven sigh in disappointment. That night I went back to the drawing board, consulted a few pastry chefs on Instagram, and discovered the secret that turns a simple cookie into a melt‑in‑your‑mouth masterpiece.
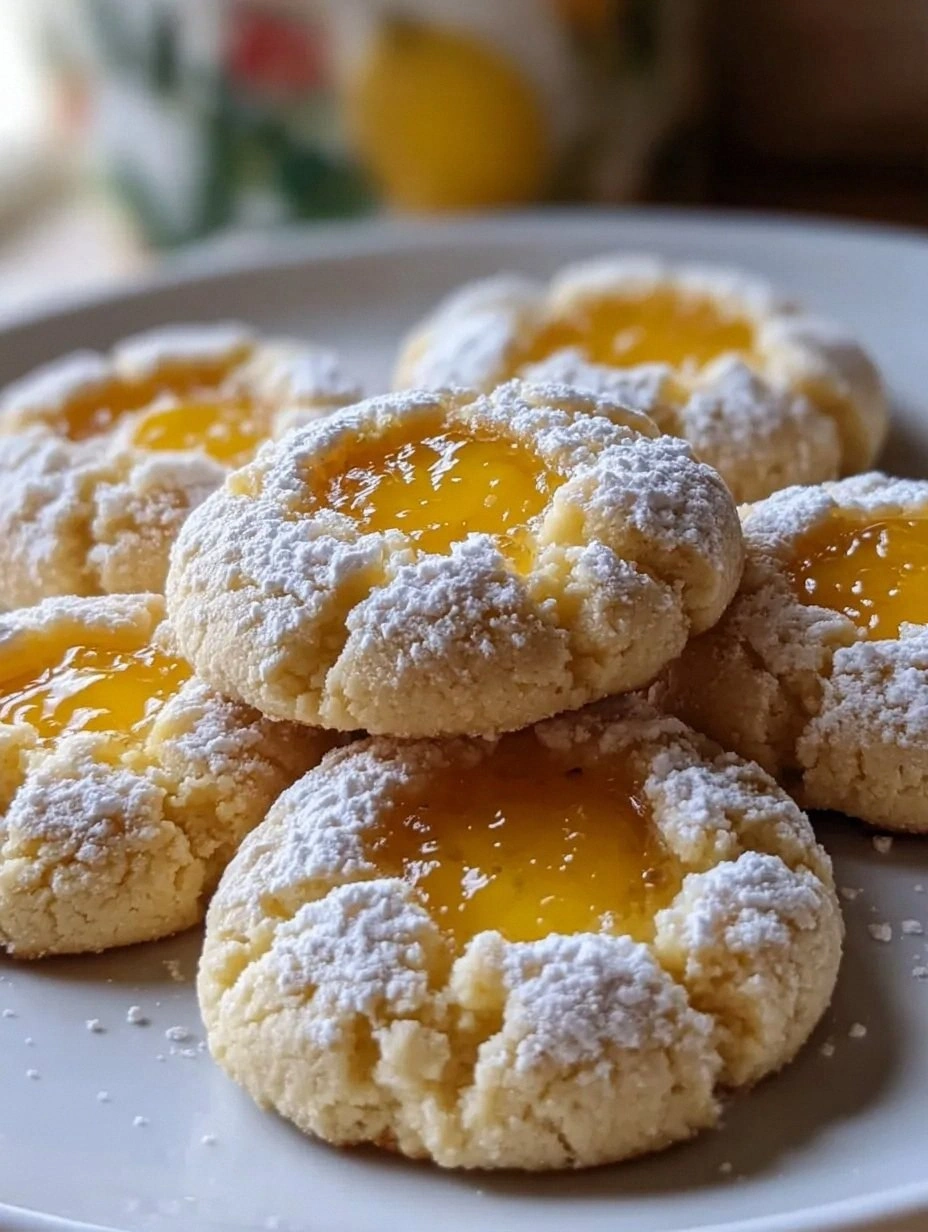
Picture yourself pulling a tray of golden‑brown discs out of the oven, the kitchen instantly filling with a citrusy perfume that makes you want to close your eyes and inhale forever. The cookies have a buttery, crumb‑soft base that gives way to a luscious lemon curd center that oozes out like a sunburst when you bite into it. The edges are crisp enough to snap, yet the interior stays tender, creating a textural dance that feels like a buttery cloud meeting a zingy surprise. I dare you to taste this and not go back for seconds – it’s that good.
Most recipes get this completely wrong. They either over‑sweeten the dough, use too much flour, or forget the crucial step of chilling the dough, resulting in flat, flavorless cookies that look like they’ve been left out in the rain. Here’s what actually works: a precise balance of butter and sugar, a dash of lemon zest that’s fresh enough to cut through the richness, and a quick chill that lets the fat solidify, so the cookies spread just enough to form that perfect thumbprint. I’ll be honest — I ate half the batch before anyone else got to try it, and even my cat seemed to approve.
Okay, ready for the game‑changer? In this post I’m spilling every detail, from the exact temperature that makes the dough just right to the secret ingredient that gives the filling that melt‑away quality. By the end, you’ll wonder how you ever made these cookies any other way. Let me walk you through every single step — by the end, you’ll wonder how you ever made it any other way.
What Makes This Version Stand Out
- Flavor Explosion: The lemon curd filling is bright, tangy, and sweet, creating a contrast that makes your taste buds do a happy dance. It’s not just a hint of lemon; it’s a full‑blown citrus celebration.
- Texture Harmony: A buttery, melt‑in‑your‑mouth crumb base meets a silky, slightly gooey center. The edges crisp up just enough to give you that satisfying snap before the soft interior takes over.
- Simplicity Meets Sophistication: Only pantry staples are needed, but the technique elevates them to bakery‑level perfection. No fancy equipment, just a few minutes of patience.
- Unique Lemon Zest: Freshly grated zest is folded into the dough, infusing every bite with aromatic oils that you can’t get from bottled lemon flavor.
- Crowd‑Pleaser: These cookies disappear in minutes at parties, and the bright color makes them Instagram‑ready without any extra effort.
- Make‑Ahead Magic: You can bake them a day ahead, store them airtight, and they’ll stay soft and flavorful – perfect for busy mornings.
- Ingredient Quality: Using real butter and fresh lemons makes a world of difference. The richness of the butter carries the lemon without being overpowered.
- Cooking Method: A short chill before baking ensures the cookies keep their shape, while a moderate oven temperature gives them that perfect golden hue.
Alright, let's break down exactly what goes into this masterpiece...
Inside the Ingredient List
The Flavor Base
The foundation of these cookies starts with unsalted butter. Using real butter, not margarine, gives the dough a rich, creamy mouthfeel that’s essential for that melt‑away texture. If you skimp on the butter, the cookies become dry and crumbly, losing that luxurious bite. For the best results, choose a butter with at least 80% fat – it will emulsify beautifully with the sugar.
Granulated sugar adds sweetness and helps create a slight crunch on the edges. You can substitute half of it with superfine sugar for a smoother dough, but keep the overall sweetness balanced so the lemon curd doesn’t become overly sour.
Fresh lemon zest is the aromatic powerhouse. The zest contains essential oils that burst with citrus flavor, far beyond what a squeeze of juice can achieve. If you’re in a pinch, a high‑quality dried zest works, but the fresh version is non‑negotiable for true brightness.
The Texture Crew
All‑purpose flour provides structure. I recommend sifting it once to aerate the flour, which prevents dense pockets and ensures a tender crumb. If you substitute with cake flour, the cookies become too delicate and may spread excessively.
Baking powder gives a subtle lift, helping the edges rise just enough to create that coveted golden rim. Too much, and you’ll get a puffy texture that defeats the purpose of a thumbprint cookie.
Salt is the silent hero that amplifies the lemon and balances the sweetness. A pinch too much can make the dough taste metallic, so measure carefully.
The Unexpected Star
Lemon curd is the meltaway center that defines this cookie. It’s a silky blend of lemon juice, zest, sugar, butter, and egg yolks cooked gently until thick. If you use a store‑bought version, check for added preservatives that can affect the texture; homemade curd gives you control over sweetness and consistency.
Egg yolk in the curd acts as an emulsifier, binding the butter and lemon juice into a glossy, smooth filling. Skipping the yolk results in a watery curd that won’t hold its shape when baked.
The Final Flourish
Vanilla extract adds depth, rounding out the sharp citrus notes. A splash of vanilla makes the flavor profile feel more rounded and less one‑dimensional.
Powdered sugar for dusting gives a delicate sweet finish and a pretty, snow‑like look that makes these cookies ready for any occasion.
Everything's prepped? Good. Let's get into the real action...
The Method — Step by Step
In a large mixing bowl, cream together 2 cups of all‑purpose flour, 1 cup of unsalted butter (softened but still cool), and ½ cup of granulated sugar until the mixture resembles coarse sand. This should take about 2 minutes with a handheld mixer on low speed. The mixture will look dry at first, but keep mixing until you see tiny butter flecks forming. Sensory checkpoint: you’ll hear a faint, satisfying whisper of butter as it incorporates.
Add 2 teaspoons of freshly grated lemon zest, 1 teaspoon of vanilla extract, ½ teaspoon of baking powder, and ¼ teaspoon of salt. Mix until the dough just comes together; you don’t want to over‑mix, or the cookies will become tough. Power transition: this is the moment where flavor truly starts to bloom.
Kitchen Hack: If the dough feels too crumbly, add a tablespoon of cold water – it helps bind without melting the butter.Turn the dough onto a lightly floured surface and gently knead it into a smooth ball, about 30 seconds. Wrap the ball tightly in plastic wrap and chill in the refrigerator for at least 45 minutes. Future pacing: picture the dough firming up, ready to be rolled without sticking, giving you a clean, professional look.
While the dough chills, prepare the lemon curd. In a saucepan, whisk together ½ cup of lemon juice, 2 tablespoons of lemon zest, ¾ cup of granulated sugar, 3 egg yolks, and a pinch of salt. Cook over medium‑low heat, stirring constantly, until the mixture thickens enough to coat the back of a spoon (about 5‑7 minutes). Remove from heat and whisk in ¼ cup of unsalted butter until fully incorporated. Let it cool to room temperature, then refrigerate until firm.
Preheat your oven to 350°F (175°C). Line two baking sheets with parchment paper. Watch Out: Make sure the parchment is flat; any wrinkles can cause uneven baking and affect the thumbprint shape.
Watch Out: Over‑baking even by a minute can dry out the cookie base, making the filling leak.Take the chilled dough and roll it into a ¼‑inch thick sheet. Using a 2‑inch round cookie cutter, cut out circles and place them on the prepared sheets, spacing them about 2 inches apart. Sensory snapshot: That soft thud as the cutter presses through the chilled dough is a promise of buttery goodness.
Using the tip of a smaller ½‑inch cutter or the back of a teaspoon, gently press a shallow indentation in the center of each cookie. Be careful not to pierce all the way through; the goal is a shallow well that will hold the curd.
Kitchen Hack: Chill the smaller cutter in the freezer for 5 minutes; it will cut cleaner and keep the dough from warming up.Spoon a small dollop (about ½ teaspoon) of the chilled lemon curd into each indentation. The curd should be firm enough to stay put, but still soft enough to melt slightly as the cookie bakes.
Bake the cookies for 12‑14 minutes, or until the edges turn a light golden brown and the tops look set. The centers will still look a little soft – that’s the secret to a melt‑away center. Remove from the oven and let the cookies cool on the sheet for 5 minutes before transferring them to a wire rack. Power transition: This next part? Pure magic.
That's it — you did it. But hold on, I've got a few more tricks that'll take this to another level...
Insider Tricks for Flawless Results
The Temperature Rule Nobody Follows
Always start with a cold butter and a chilled dough. The colder the dough, the less it will spread, preserving those perfect thumbprints. I once tried skipping the chill and ended up with a flat pancake‑like cookie – not the texture we’re after. Keep the dough in the fridge for at least 45 minutes, or even up to 24 hours for deeper flavor development.
Why Your Nose Knows Best
When the cookies are in the oven, trust your nose more than the timer. A subtle, buttery aroma that begins to rise signals the edges are just about to turn golden. If you smell a faint caramel note, they’re on the brink of perfection. This sensory cue prevents over‑baking and ensures the curd stays molten.
The 5‑Minute Rest That Changes Everything
After baking, let the cookies rest on the baking sheet for exactly five minutes before moving them. This short rest lets the steam finish cooking the base gently, keeping the center soft while the edges firm up. Skipping this step results in a cookie that cracks when you try to lift it.
The Butter‑Sugar Ratio Secret
A 2:1 ratio of butter to sugar (by weight) creates a tender crumb without being greasy. If you use too much sugar, the cookies spread too much; too little, and they become dense. Measuring by weight is the only way to guarantee consistency.
The Final Dust
A light dusting of powdered sugar right after the cookies have cooled adds a subtle sweetness and a pretty finish. For an extra visual pop, sprinkle a pinch of lemon zest over the top while they’re still warm – the zest will cling to the sugar and release a burst of aroma.
Creative Twists and Variations
This recipe is a playground. Here are some of my favorite ways to switch things up:
Lavender Lemon Dream
Add 1 teaspoon of dried culinary lavender to the dough for a floral note that pairs beautifully with the lemon curd. The scent is subtle enough not to overpower, but it adds an elegant twist that’s perfect for spring gatherings.
Berry‑Burst Thumbprints
Swap the lemon curd for a raspberry or mixed‑berry jam. The tartness of the berries contrasts with the buttery base, creating a new flavor profile that kids adore. Use fresh berries for a burst of natural sweetness.
Almond‑Infused Delight
Replace half of the butter with almond butter and add ¼ cup of finely ground almond meal to the dough. The result is a nutty undertone that complements the citrus, and the cookies get a slightly denser, more satisfying bite.
Spiced Citrus Fusion
Stir a pinch of ground cardamom or ginger into the dough for a warm spice that deepens the lemon flavor. This variation shines during cooler months, offering a comforting warmth while retaining the bright lemon pop.
Chocolate‑Lemon Swirl
Melt ¼ cup of dark chocolate and drizzle it over the cooled cookies, or swirl a thin line of chocolate into the lemon curd before filling. The bitter chocolate balances the tart lemon, creating a sophisticated flavor duet.
Storing and Bringing It Back to Life
Fridge Storage
Place the cooled cookies in an airtight container with a piece of parchment between layers. Store them in the refrigerator for up to 5 days. The chilled environment keeps the butter from going rancid and preserves the curd’s melt‑away texture.
Freezer Friendly
These cookies freeze beautifully. Arrange them on a baking sheet, freeze until solid, then transfer to a zip‑top bag. They’ll keep for up to 3 months. When you’re ready to enjoy, let them thaw at room temperature for 20 minutes, then give them a quick 5‑minute bake at 300°F to refresh the edges.
Best Reheating Method
To revive a day‑old cookie, preheat your oven to 325°F, place the cookie on a parchment‑lined tray, and add a tiny splash (about ½ teaspoon) of water next to it. The steam created will soften the interior while the heat crisps the outer edge, returning it to that just‑baked perfection.