I was in the middle of a snowstorm, the kind that makes the world feel like a giant, frosted cupcake, when my roommate dared me to create a dessert that could warm the soul without actually turning on the oven. I stared at my pantry, saw a lonely bag of almond flour, a bar of dark chocolate, and a jar of peppermint extract that had been gathering dust since last Christmas, and thought, why not combine the comfort of hot chocolate with the delicate elegance of a French macaron? The first attempt was a disaster—flat shells, a bitter center, and a kitchen that smelled more like burnt sugar than holiday magic. But after a few trial runs, a lot of patience, and a sprinkle of stubbornness, I finally cracked the code, and the result was nothing short of a winter miracle.
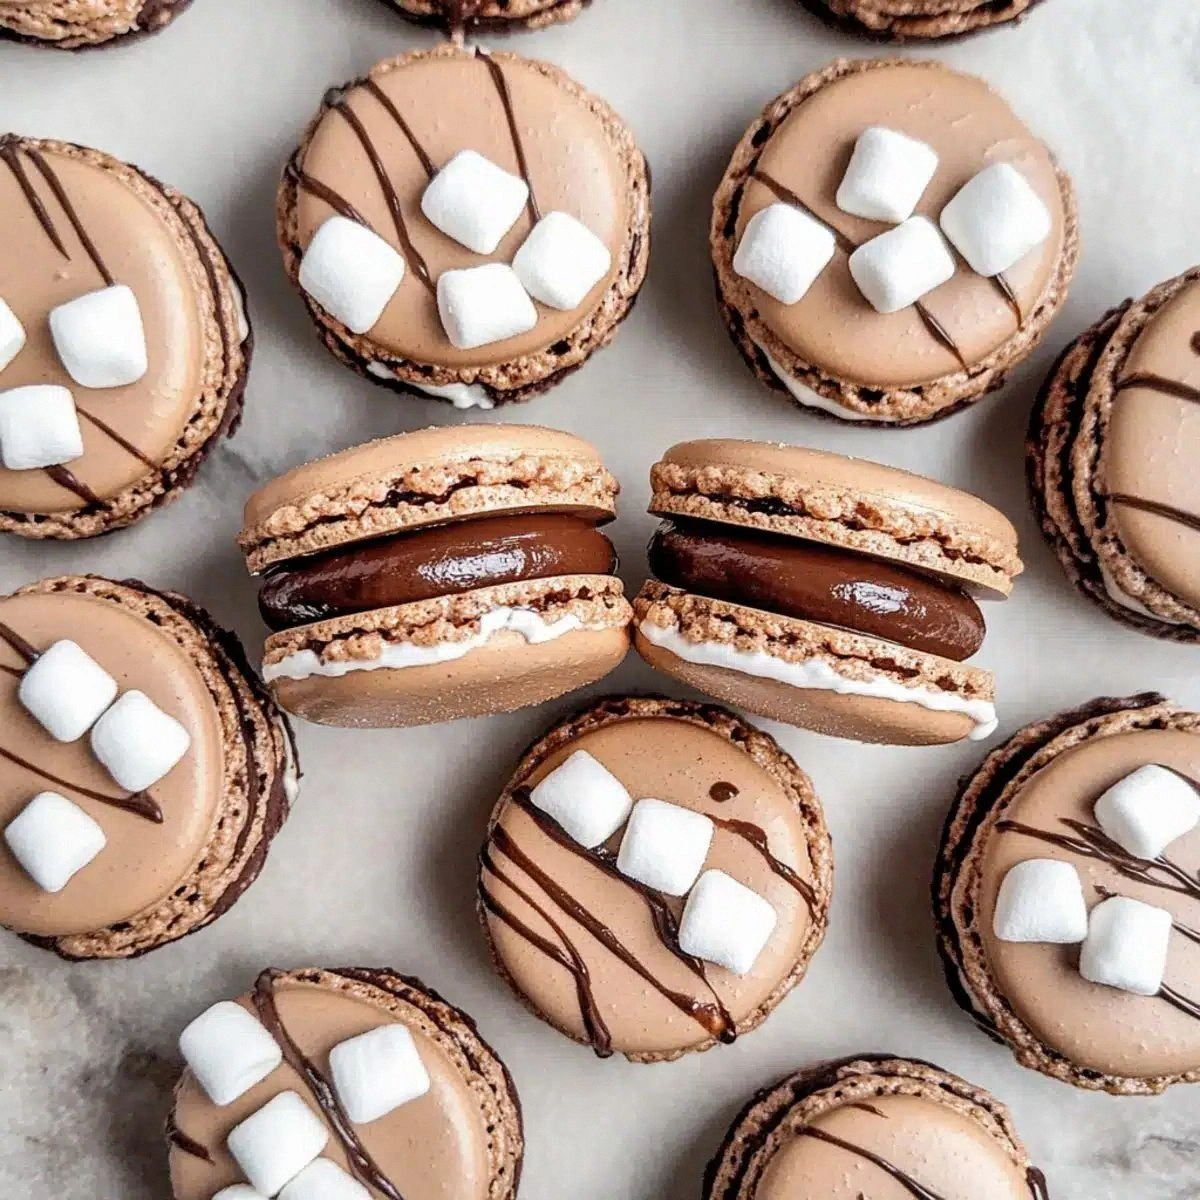
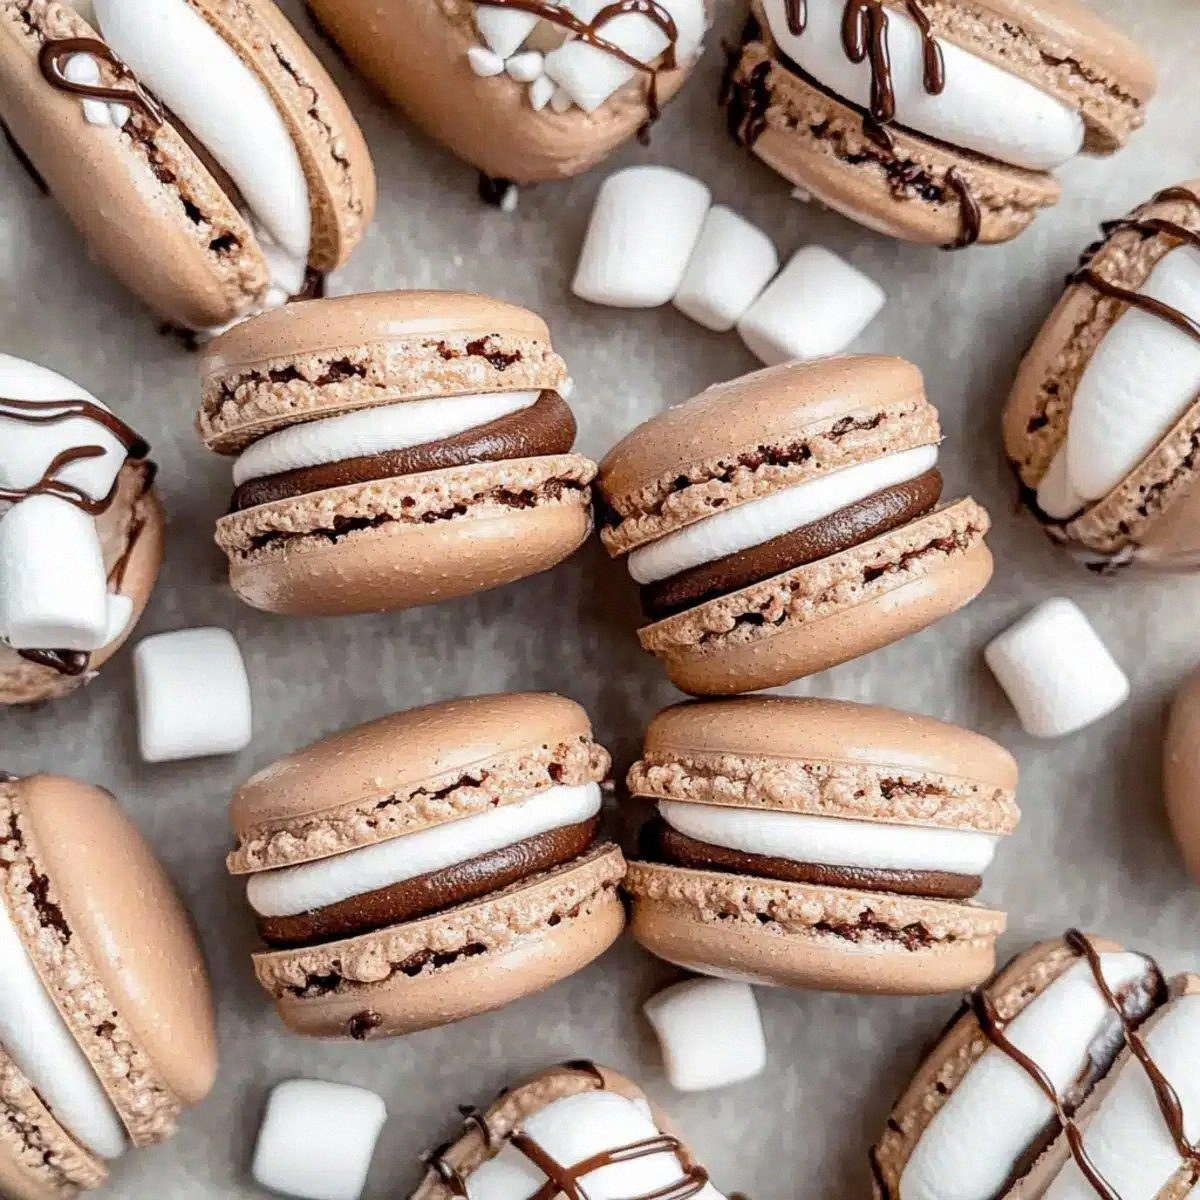
Picture this: a tray of glossy, chocolate‑kissed shells, their tops speckled with tiny marshmallows that melt just enough to give a soft, pillowy bite. When you bite in, the shell gives a gentle snap, then gives way to a silky, molten chocolate ganache that swirls with a hint of peppermint, and finally, a surprise burst of toasted marshmallow that lingers like a cozy campfire. The aroma? A heady mix of cocoa, melted chocolate, and a whisper of winter pine that makes the whole house feel like a chalet after a fresh snowfall. That sizzle when the chocolate hits the cream? Absolute perfection. I dare you to taste this and not go back for seconds.
What makes this version truly stand out is the balance between the classic macaron technique and a few bold twists that most recipes completely miss. Most recipes get the meringue ratio wrong, leading to cracked tops or soggy interiors. Here, I use cream of tartar to stabilize the egg whites, ensuring a glossy sheen and a perfect “foot” on each shell. I also fold in a small amount of cocoa powder directly into the dry mix, giving the shells a deep, velvety color without sacrificing the lightness you expect from a macaron. And the filling? It’s a hot‑chocolate ganache infused with peppermint, studded with mini marshmallows that melt just enough to create a dreamy texture.
But the real game‑changer? A quick chill‑then‑bake method that creates that coveted “skin” on the shells, locking in flavor and giving you that signature macaroon “puff” when they rise. This technique is pure magic and will make you wonder how you ever tolerated store‑bought versions. I’ll be honest — I ate half the batch before anyone else got to try it, and the rest disappeared in a flash. Picture yourself pulling this out of the oven, the whole kitchen smelling incredible, and the first bite sending shivers of delight down your spine. Let me walk you through every single step — by the end, you’ll wonder how you ever made it any other way.
What Makes This Version Stand Out
- Flavor Fusion: The peppermint‑infused ganache adds a festive zing that pairs perfectly with the deep cocoa shell, creating a taste profile that’s both nostalgic and novel.
- Texture Harmony: A crisp, airy shell meets a silky, melt‑in‑your‑mouth filling, while the marshmallows provide a subtle chew that keeps things interesting.
- Simplicity Meets Sophistication: Despite the macaron’s reputation for difficulty, this recipe uses straightforward techniques that even beginners can master.
- Unique Ingredient Twist: Adding cocoa powder to the almond flour not only deepens color but also intensifies chocolate flavor without extra sugar.
- Crowd‑Pleaser Factor: Guests often ask for the “secret recipe” and end up begging for the exact measurements—because it’s that good.
- Premium Ingredient Quality: Using high‑quality dark chocolate and fresh peppermint extract makes the difference between “good” and “unforgettable.”
- Cooking Method Mastery: The “rest‑then‑bake” technique creates the perfect skin, a hallmark of professional‑grade macarons.
- Make‑Ahead Magic: These bites keep beautifully for up to a week, and the ganache even gets richer as the flavors meld.
Inside the Ingredient List
The Flavor Base
Dark Chocolate (6 ounces): This is the heart of our ganache. Its high cocoa butter content ensures a glossy, fluid finish that hardens just enough to hold its shape. If you skip it, you’ll end up with a bland, watery filling that won’t set. Look for chocolate with at least 70% cacao for that deep, bittersweet flavor that balances the sweetness of the marshmallows. Pro tip: Chop the chocolate into uniform pieces to guarantee even melting.
Heavy Cream (0.5 cups): The cream creates the silky texture of the ganache and carries the peppermint flavor throughout. Using a lower‑fat milk will result in a thin, runny ganache that never sets. For the best consistency, heat the cream just to a simmer before pouring it over the chocolate—this “bain‑marie” style melt gives you a glossy sheen. If you’re dairy‑free, coconut cream works as a substitute, but expect a slight coconut undertone.
The Texture Crew
Almond Flour (1.5 cups): This gluten‑free flour gives macarons their signature lightness and delicate crumb. If you use regular flour, the shells become dense and lose that airy lift. Always sift the almond flour at least twice to avoid gritty texture. For a nut‑free version, you can substitute finely ground sunflower seed flour, though the flavor will shift slightly.
Mini Marshmallows (1 cup): These tiny clouds add a surprising burst of chewiness that contrasts the crisp shell. They also melt slightly during baking, creating pockets of caramelized sweetness. If you leave them out, you’ll miss the whimsical “marshmallow melt” that makes these macarons unforgettable. Look for marshmallows without added corn syrup for a cleaner flavor.
The Unexpected Star
Peppermint Extract (1 teaspoon): A little goes a long way. This oil‑based extract infuses the ganache with a cooling, festive note that cuts through the richness of the chocolate. Too much, and you’ll taste a medicinal after‑taste; stick to the measured amount. If you can’t find peppermint, a drop of vanilla extract can be used, but you’ll lose the holiday punch.
Cream of Tartar (0.25 teaspoon): This acid stabilizes the egg whites, giving them volume and shine. Skipping it can lead to a flat, uneven meringue that won’t hold its shape. It’s cheap, shelf‑stable, and a must‑have for any serious baker. If you’re out of it, a pinch of lemon juice works as a substitute.
The Final Flourish
Egg Whites (4 large): The lifeblood of any macaron. Fresh, room‑temperature egg whites whip up to a glossy, stiff peak that forms the shell’s structure. Using aged whites from the fridge can actually improve stability, but they must be brought to room temperature before whipping. If you accidentally get a yolk in there, the meringue will never reach the right consistency.
Granulated Sugar (1 cup) & Powdered Sugar (2 cups): The granulated sugar is folded into the meringue to sweeten and stabilize, while powdered sugar combines with almond flour and cocoa to form the dry base. Using the wrong type of sugar can cause grainy shells. Sift both sugars with the almond flour to ensure a smooth batter. If you’re low on powdered sugar, you can blend regular sugar in a food processor until it’s fine, but the texture may be slightly coarser.
Everything's prepped? Good. Let's get into the real action...
The Method — Step by Step
Separate the egg whites from the yolks, making sure no yolk contaminates the whites. Place the whites in a clean, dry mixing bowl—any grease will sabotage the meringue. Add the cream of tartar and begin whisking on medium speed until frothy. Increase to high speed and whisk until soft peaks form, then gradually add the granulated sugar, a spoonful at a time, until the meringue is glossy and holds stiff peaks. The mixture should look like a smooth, satin ribbon when you lift the whisk.
Kitchen Hack: If you’re worried about over‑whipping, stop the mixer when the meringue forms a “bow tie” shape—this signals it’s at the perfect stiffness.While the meringue rests, sift together almond flour, cocoa powder, and powdered sugar into a large bowl. Sifting twice removes any lumps and ensures a uniform texture, which is crucial for smooth shells. Once combined, set the dry mixture aside; you’ll be folding it into the meringue shortly. The cocoa adds a deep, luxurious color that makes these macarons look as good as they taste.
Now comes the “macaronage” step: gently fold the dry mixture into the meringue. Using a silicone spatula, scoop from the bottom of the bowl, turn the bowl over, and repeat. The batter should flow like lava—slow, steady, and glossy. If you over‑mix, the batter becomes too runny and the shells will spread; under‑mix, and they’ll be lumpy. The test? When you lift the spatula, the batter should form a thick ribbon that slowly folds back onto itself.
Watch Out: Over‑mixing is a silent killer; stop when the batter moves like a slow river, not a waterfall.Transfer the batter to a piping bag fitted with a ½‑inch round tip. Line two baking sheets with parchment or silicone mats. Pipe uniform circles—about 1.5 inches in diameter—spaced 1 inch apart. This uniformity ensures even baking and the iconic “feet” on each macaron. Once piped, tap the trays firmly against the counter three times to release any air bubbles.
Allow the piped shells to rest at room temperature for 30‑45 minutes, or until a thin skin forms on the surface. You can test this by gently touching the top; it should feel dry and not stick to your finger. This step is the secret to that perfect “puff” when they bake. If you’re in a humid environment, add a few minutes to the rest time; the skin will still form, just a bit slower.
Preheat your oven to 300°F (150°C). Place the trays in the middle rack and bake for 15‑18 minutes. The shells should have risen slightly, with a faint golden edge and a firm top that doesn’t wobble when touched. If the tops are still shiny and soft, give them another 2‑3 minutes—watch closely, because over‑baking dries them out.
While the shells cool, prepare the ganache. In a small saucepan, heat the heavy cream just to a simmer—tiny bubbles should form around the edges. Remove from heat and pour over the chopped dark chocolate in a heat‑proof bowl. Let sit for 1 minute, then whisk until smooth and glossy. Stir in the peppermint extract, then fold in the mini marshmallows while the ganache is still warm; they’ll soften just enough to create pockets of caramelized sweetness.
Kitchen Hack: Warm the ganache slightly before piping—this makes it flow more easily and prevents the shells from cracking under pressure.Once the shells are completely cool (touch them; they should feel room temperature), pair them by size. Pipe a generous dollop of ganache onto the flat side of one shell, then sandwich with its partner, pressing gently to spread the filling to the edges. The marshmallows will melt just enough to stick the shells together, creating a seamless finish. If a shell cracks, don’t panic—just trim the edges with a small serrated knife and use the piece as a decorative garnish.
Refrigerate the assembled macarons for at least 2 hours before serving. This resting period allows the flavors to meld and the shells to soften slightly, achieving that perfect bite where the shell yields to the creamy interior. When you’re ready, bring them to room temperature for 15 minutes, and enjoy the magical contrast of textures. That first bite? Pure bliss.
That's it — you did it. But hold on, I've got a few more tricks that'll take this to another level. Keep reading, because the next section is where the pro tips live, and trust me, they’ll make your next batch even more legendary.
Insider Tricks for Flawless Results
The Temperature Rule Nobody Follows
Macarons are temperature‑sensitive creatures. The ideal oven temperature hovers around 300°F (150°C), but every oven has its quirks. Use an oven thermometer to verify the actual heat inside—most home ovens run hotter than the dial suggests. If the shells are browning too quickly, lower the temperature by 10‑15 degrees and extend the bake time by a couple of minutes. This gentle heat ensures the interior sets without a burnt exterior.
Why Your Nose Knows Best
During the resting phase, you’ll notice a faint, sweet aroma as the shells dry. That scent is your cue that the skin has formed. If you’re in a humid kitchen and the smell is weak, give the shells a few extra minutes. Trust your nose; it’s more reliable than a timer when it comes to the “dry skin” test.
The 5‑Minute Rest That Changes Everything
After piping, let the shells sit for exactly five minutes before the long rest. This short pause allows the batter to settle, reducing the risk of air bubbles that cause uneven peaks. Skipping this micro‑rest often leads to “mountain” shells that rise unevenly and crack on top.
Marshmallow Melt Mastery
If you love an extra gooey center, gently toast the mini marshmallows over a flame before folding them into the ganache. The caramelized flavor adds depth, turning a simple marshmallow note into a toasted, nutty surprise. A friend tried this once and ended up with a caramel‑marshmallow swirl that stole the show at a holiday party.
The Final Chill Before Assembly
Refrigerate the shells for at least 30 minutes before adding the ganache. This firming step prevents the shells from cracking under the weight of the filling. If you’re in a rush, a quick 10‑minute blast in the freezer works, but be careful not to freeze the shells solid—just enough to stiffen them.
Creative Twists and Variations
This recipe is a playground. Here are some of my favorite ways to switch things up:
White Chocolate & Cranberry
Swap the dark chocolate for white chocolate and fold in dried cranberry pieces into the ganache. The tartness of the cranberries cuts through the sweetness, creating a festive red‑and‑white combo perfect for Christmas.
Spiced Chai Infusion
Add a pinch of ground cinnamon, cardamom, and ginger to the dry mixture, and replace peppermint extract with a splash of chai concentrate. The result is a warm, aromatic bite that feels like a hug in a shell.
Nutty Espresso Crunch
Mix finely ground espresso beans into the almond flour and stir chopped hazelnuts into the ganache. The coffee adds a bitter edge that balances the chocolate, while the hazelnuts give a satisfying crunch.
Salted Caramel Swirl
Create a salted caramel sauce and swirl it into the ganache before folding in the marshmallows. The salty caramel adds a sophisticated contrast to the sweet chocolate‑peppermint base.
Vegan Delight
Replace the egg whites with aquafaba (the liquid from a can of chickpeas), use coconut cream instead of heavy cream, and choose a vegan dark chocolate. The texture remains airy, and the flavor stays true to the original.
Storing and Bringing It Back to Life
Fridge Storage
Place the assembled macarons in an airtight container and store them in the refrigerator for up to 5 days. The cool environment keeps the ganache firm and the shells from drying out. Before serving, let them sit at room temperature for about 15 minutes to regain their softness.
Freezer Friendly
For longer storage, freeze the macarons in a single layer on a parchment‑lined tray, then transfer them to a zip‑top bag. They’ll keep for up to 3 months. When you’re ready to enjoy, move them to the fridge to thaw overnight, then bring to room temperature. Adding a tiny splash of water to the ganache before reheating (microwave 10 seconds) revives the silky texture.
Best Reheating Method
If the shells have become a bit dry, gently steam them for 30 seconds over a pot of simmering water. The steam re‑hydrates the outer shell without making it soggy, restoring that delicate crunch. Alternatively, a quick 5‑second burst in a low‑heat oven (250°F) can bring back the glossy finish.