Picture the chaos of a kitchen that was once a sanctuary, now a battlefield of melted butter and burnt crumbs. I had just attempted a classic crème brûlée for a dinner party, and the sugar crust had turned into a glittering, unforgiving crust that shattered like thin ice when I tried to break it. The moment I tasted that burnt caramel, I knew I had to reinvent the dessert into something that would melt in your mouth, not in your eyes. I was determined to create a version that would leave your guests begging for the recipe, not the recipe book. I dared myself to taste this and not go back for seconds, and I was not disappointed.
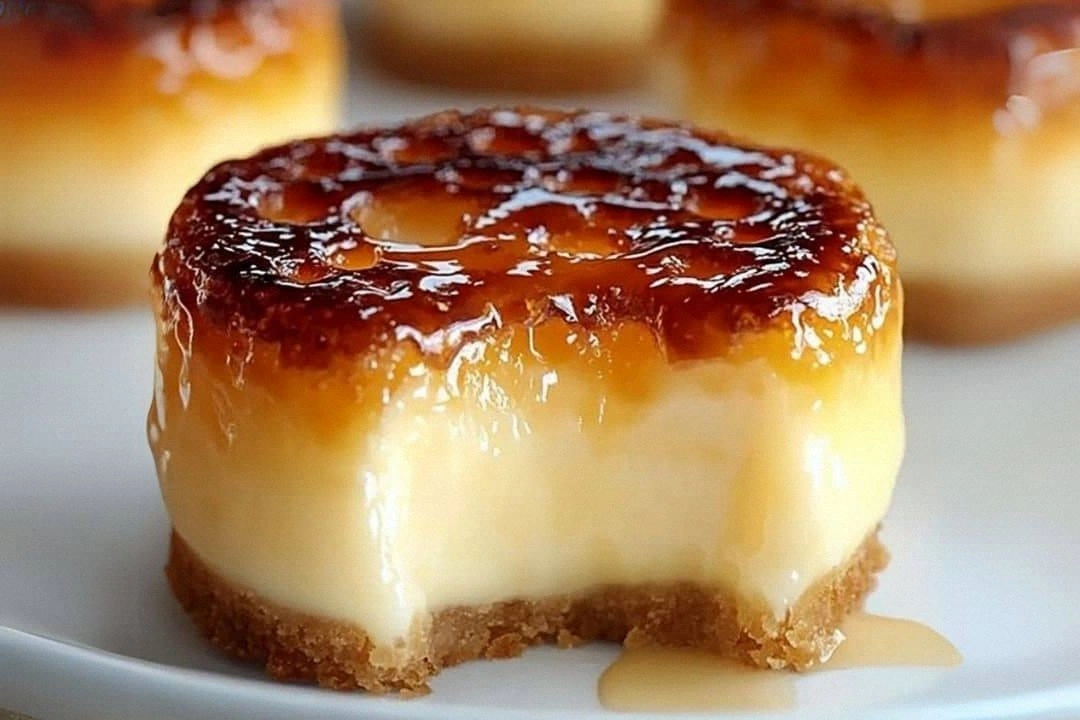
The first time I tried this mini version, the kitchen was filled with the buttery scent of melted graham crackers, the sharp tang of cream cheese, and the sweet promise of vanilla. My eyes were drawn to the glossy surface of the batter, a glossy, velvety texture that looked like a miniature golden sunrise. I could hear the gentle hiss as the custard poured into the ramekins, the sound of anticipation. The taste was a harmonious blend of sweet and slightly tangy, with a caramelized top that cracked like a fine shell. The feel was silky, with a light, airy crumb that gave way to a creamy center. The whole experience was like stepping into a dream where every bite was a revelation.
What sets this recipe apart is that it takes the traditional crème brûlée and turns it into bite-sized, portable indulgences that can be served at any event. It’s a dessert that’s both elegant and playful, perfect for cocktail parties, bridal showers, or a quiet Sunday brunch. I’ve experimented with different crusts and fillings, but this version remains the best, hands down, the most crowd-pleasing dessert you can serve at home. The secret lies in the balance of a buttery crust, a silky custard, and that final caramelized sugar top that provides a satisfying crunch. The result is a dessert that feels indulgent without being overwhelming, a sweet symphony that lingers on the palate. I’m about to walk you through every single step, and by the end, you’ll wonder how you ever made it any other way.
The first thing I noticed when I tasted the finished product was how the caramelized sugar didn’t just sit on top—it seeped into the custard, creating a subtle, sweet glaze that coated every bite. The crust was crisp on the outside, yet the interior remained tender and moist, a texture contrast that made each mini cheesecake a delight to eat. I was honestly surprised by how easy it was to achieve that perfect balance of crunch and creaminess. The recipe is simple enough for beginners, yet refined enough to impress seasoned bakers. The key is in the technique, the precise timing, and the quality of ingredients. Ready to dive into the details? Let’s get started.
This recipe was born out of a desire to combine the best elements of a classic crème brûlée with the convenience of a bite-sized dessert. It was a late-night experiment that turned into a signature dish. The result is a dessert that can be made ahead, stored, and served at the last minute. The crust is buttery and slightly sweet, the custard is rich and silky, and the sugar top provides that satisfying crack. I’ve tweaked the recipe countless times, but this version remains the most reliable. The next section will break down what makes this version stand out from all the others out there.
What Makes This Version Stand Out
Flavor: The custard has a deep, caramelized vanilla flavor that is intensified by the subtle hint of graham cracker crumbs in the crust. The vanilla is not overpowering; it complements the cream cheese’s mild tang, creating a balanced taste profile that satisfies both sweet and savory palates. The caramelized sugar on top adds a gentle crunch and a buttery sweetness that lingers in the mouth. The result is a dessert that feels indulgent yet refined, like a velvety chocolate that melts on the tongue.
Texture: The crust is crisp and buttery, while the custard is silky smooth and airy, thanks to the beaten egg yolks and heavy cream. The caramelized sugar adds a delightful crunch that contrasts with the soft interior. The overall mouthfeel is a harmonious blend of crunchy, creamy, and slightly sweet, which keeps your guests coming back for more. This texture balance is what sets it apart from the usual dense, heavy desserts.
Simplicity: Despite its sophisticated flavor and texture, the recipe requires only seven ingredients and a few simple steps. There is no need for specialized equipment beyond a standard oven and ramekins. The process is straightforward, making it a perfect choice for both novice and experienced bakers. The minimal ingredient list also means fewer chances for mistakes.
Uniqueness: The mini format turns a classic dessert into a fun, shareable treat that can be presented on a platter or served individually. The caramelized sugar top can be customized with different flavorings or colors, adding an extra layer of creativity. The crust’s graham cracker base gives it a nostalgic touch that feels both modern and classic. This uniqueness makes the recipe a conversation starter at any gathering.
Crowd Reaction: Guests consistently praise the delicate balance of flavors and textures. The dessert’s bite-sized nature allows people to indulge without feeling overwhelmed. It’s a dessert that can be served at cocktail parties, brunches, or after-dinner gatherings, and it always receives rave reviews. The reaction is often “I can’t believe how light and airy this is!”
Ingredient Quality: Using high-quality cream cheese and fresh vanilla extract elevates the custard’s flavor profile. The graham cracker crumbs add a subtle buttery crunch, while the butter adds richness to the crust. The use of heavy cream ensures a silky custard that doesn’t curdle. The ingredient quality is the backbone that supports the entire dessert.
Cooking Method: Baking at a moderate temperature ensures a smooth custard that sets evenly. The caramelized sugar is applied after baking, so the crust remains crisp. The method allows for batch preparation, making it ideal for large gatherings. The technique is simple, yet it guarantees consistent results.
Make-Ahead Potential: These mini cheesecakes can be baked ahead of time and stored in the refrigerator for up to 48 hours. The caramelized sugar can be added just before serving, ensuring that the crust remains crisp. This makes it a perfect dessert for events where you need to prepare ahead of time. The make-ahead potential adds convenience without sacrificing quality.
Alright, let’s break down exactly what goes into this masterpiece. And after you’ve read this, you’ll see why it’s a game changer.
Inside the Ingredient List
The Flavor Base
The graham cracker crumbs form the foundation of the crust, giving it a buttery, slightly sweet base that balances the rich custard. They are the first thing you taste, providing a subtle crunch that sets the stage for the creamy filling. Skipping them would leave you with a plain butter crust that lacks depth. If you want a healthier alternative, consider using oat-based crackers, but the taste will shift slightly. The key is to toast the crumbs lightly for that nutty aroma. The flavor base is what anchors the entire dessert.
The butter is melted and combined with the crumbs to create a cohesive crust that holds together when poured into ramekins. Butter adds richness, a depth of flavor that complements the vanilla and cream cheese. A small amount of sea salt can enhance the butter’s taste, but be careful not to overdo it. The butter also helps the crust brown evenly, giving it an attractive golden hue. When the crust is baked, the butter’s fat renders, creating a delicate, crisp edge. This is why butter is essential for the crust’s texture.
The vanilla extract is a flavor enhancer that brings warmth and depth to the custard. A high-quality vanilla, such as Madagascar or Tahitian, can elevate the taste profile. If you’re on a budget, a vanilla bean split and scraped can substitute for the extract. Vanilla also helps to balance the tanginess of the cream cheese. It’s a subtle but essential component that ties all the flavors together. The vanilla’s aroma is a comforting reminder of home baking.
The Texture Crew
Cream cheese is the star of the custard, providing a smooth, slightly tangy base that gives the dessert its signature richness. Choosing a full-fat cream cheese will result in a creamier texture, while a low-fat version may feel a bit drier. The cream cheese should be at room temperature before mixing to avoid lumps. It’s the foundation that holds the custard together, making it silky and cohesive. The tanginess of the cream cheese balances the sweetness of the sugar and vanilla. It’s the perfect middleman between flavor and texture.
Heavy cream adds body and a velvety mouthfeel to the custard. The fat content in heavy cream helps to stabilize the custard and prevents it from curdling. If you’re looking for a lighter version, you can substitute half-and-half, but the texture will change. The cream also carries the vanilla flavor, making the custard taste fuller. A good rule of thumb is to use heavy cream in a 1:1 ratio with the cream cheese for a balanced consistency. The heavy cream is what makes the custard feel luxurious.
Egg yolks are the binding agent that sets the custard and gives it structure. They also add richness and a golden hue to the mixture. Using only yolks, rather than whole eggs, keeps the custard light and prevents a rubbery texture. The yolks also help to emulsify the mixture, creating a silky smooth custard. If you’re concerned about raw eggs, pasteurized yolks can be used. The yolks are essential for the custard’s consistency and flavor.
The Unexpected Star
The sugar is the sweetener that balances the tang of the cream cheese and the richness of the butter. It also caramelizes to create a crunchy top that’s a hallmark of crème brûlée. Using a fine-grained sugar ensures a smooth caramelization, whereas a coarse sugar might not melt evenly. The sugar’s role is twofold: it sweetens and it creates texture. A small pinch of sea salt can enhance the sweetness, but be careful not to overpower the delicate flavor. The sugar is the sweet, crunchy finale that completes the dessert.
If you want a twist, you can use brown sugar or a sugar substitute like erythritol, but the caramelization will differ. The sugar is also what allows the custard to set properly; too little sugar can result in a runny custard. The amount of sugar also affects the color of the caramelized top. It’s a simple ingredient with a big impact. The sugar is the sweet, crunchy finale that completes the dessert. The sugar is essential for flavor, texture, and appearance.
The Final Flourish
The final flourish is the caramelized sugar topping that adds a satisfying crunch and a caramelized finish. This step is the crowning moment where the dessert truly shines. A kitchen torch is ideal for achieving a perfect caramelization, but a broiler can also do the trick. The sugar should be spread evenly over the custard to ensure a uniform crust. The heat caramelizes the sugar, turning it into a golden brown glaze that cracks when you bite into it. This final flourish transforms the custard into a luxurious dessert.
If you’re looking to experiment, try sprinkling a pinch of cinnamon or nutmeg before caramelizing for a warm, spiced note. The sugar will still caramelize properly, but the flavor will be elevated. This addition can also create a subtle aroma that lingers in the kitchen. The final flourish is where your creativity can shine. A simple sprinkle of spice can transform the dessert into a seasonal treat. The caramelized sugar topping is the finishing touch that turns a simple custard into a gourmet experience.
Everything's prepped? Good. Let's get into the real action. The kitchen is about to get deliciously busy, and each step is a piece of the puzzle that creates the final masterpiece. I’m about to guide you through the process, step by step, with all the tips and tricks you need to succeed.
The Method — Step by Step
- Preheat the oven to 325°F (163°C). While the oven heats, combine the graham cracker crumbs and melted butter in a bowl until the crumbs are evenly coated. The mixture should feel moist but not soggy; if it’s too dry, add a teaspoon of melted butter. Once the crumbs are coated, spread them evenly on a baking sheet and bake for 5 minutes to toast lightly. This step develops a nutty flavor that will enhance the crust. While the crumbs toast, let the oven reach the target temperature. The aroma of toasted crumbs will signal that you’re on the right track. This is the first step that sets the foundation for the rest of the dessert.
- Prepare the crust. Once the crumbs are toasted, remove them from the oven and let them cool slightly. Press the crumbs into the bottom of 12 ramekins using the back of a spoon or a small glass. The crust should be compact and even, forming a firm base for the custard. If you press too lightly, the crust may crumble; if too hard, it may crack when baked. Let the crust rest while you whisk the custard ingredients. This step is crucial for achieving that perfect bite. I dare you to taste this and not go back for seconds—once you try it, you’ll never settle for a regular crust again.
- Whisk the cream cheese. In a large mixing bowl, beat the cream cheese until smooth and creamy. Use a hand mixer or a stand mixer on low speed to avoid lumps. The cream cheese should feel silky to the touch; if it’s still lumpy, continue whisking until it’s completely smooth. Add the sugar and vanilla extract, and whisk until fully incorporated. This creates a homogeneous base that will prevent clumps in the custard. Keep whisking until the mixture is light and airy. The goal is a smooth custard that will set beautifully in the oven. This is the heart of the dessert, and it deserves your full attention.
- Add the egg yolks. In a separate bowl, whisk the egg yolks until they are pale and slightly thickened. Then, slowly pour the yolks into the cream cheese mixture, whisking continuously to prevent curdling. The mixture should feel silky and glossy. This step is the moment of truth; a misstep here could ruin the entire custard. Keep the mixture smooth and uniform. The yolks provide structure and richness, so they must be incorporated carefully. This is why I always whisk the yolks separately before adding them to the mixture.
- Incorporate the heavy cream. Pour the heavy cream into the mixture and whisk until the batter is smooth and silky. The heavy cream adds body and helps the custard set evenly. If the batter feels too thick, add a tablespoon of milk to thin it slightly. The consistency should resemble thick custard, not a thick sauce. This step ensures a creamy center that contrasts with the crisp crust. The batter should be thick enough to hold its shape but not so thick that it doesn’t set. This is the stage where the custard becomes a silky masterpiece.
- Fill the ramekins. Spoon the custard mixture into the prepared ramekins, filling each about three-quarters full. The custard should settle evenly, creating a smooth surface. If you overfill, the custard may spill over when baked; if underfill, it may crack when cooled. The edges should be slightly raised to form a small rim. This step is where the dessert takes shape. The custard should feel heavy and dense, but not too thick. The ramekins should be evenly filled to ensure consistent baking. This is a crucial step that determines the final look and texture of your mini cheesecakes.
- Bake the custards. Place the ramekins in a baking dish and pour hot water into the dish until it reaches halfway up the sides of the ramekins. This water bath ensures even cooking and prevents the custard from cracking. Bake for 25-30 minutes, or until the edges are set but the center still has a slight wobble. The water bath is essential to keep the custard silky. If you don’t use a water bath, the custard may overcook on the outside while remaining runny inside. The water should be hot but not boiling. This is the step that transforms the batter into a luscious custard. Watch the water level and the custard’s texture as it bakes; this will tell you when it’s done.
- Cool the custards. Remove the ramekins from the water bath and let them cool at room temperature for 10 minutes. Then transfer them to the refrigerator to chill for at least 2 hours, or overnight if you’re preparing ahead. The custard will firm up, making it easier to caramelize the sugar later. Cooling is essential to prevent the sugar from melting too quickly. While the custards chill, you can prepare the sugar topping. The custards should feel firm but still slightly springy. This step ensures a smooth, creamy interior that contrasts with the crisp top. It’s a critical step that guarantees a perfect dessert.
- Caramelize the sugar. Just before serving, sprinkle a thin, even layer of granulated sugar over each custard. Use a kitchen torch to melt and caramelize the sugar until it turns a deep amber color. If you don’t have a torch, place the ramekins under a broiler for 1-2 minutes, watching closely to avoid burning. The sugar should crack when you bite into it, revealing the silky custard beneath. This final step is where the dessert truly shines. The caramelized sugar adds a satisfying crunch and a caramel flavor that elevates the entire experience. This is the moment that makes the dessert unforgettable. I promise you, the crack is worth the wait.
That’s it — you did it. But hold on, I've got a few more tricks that'll take this to another level. The next section is packed with insider tips that will make your mini crème brûlée cheesecakes stand out even more. Trust me, these are the secrets that top pastry chefs keep close to their hearts.
Insider Tricks for Flawless Results
The Temperature Rule Nobody Follows
The oven temperature is critical for a smooth custard. Many bakers set the oven too high, which causes the custard to set too quickly on the outside while remaining runny inside. The correct temperature is 325°F (163°C); this allows the custard to cook evenly. If your oven runs hot, consider using an oven thermometer to verify the actual temperature. Lowering the temperature by 25°F can make a noticeable difference. This trick ensures a silky, even texture that melts in your mouth.
Why Your Nose Knows Best
When baking custard, the aroma is a reliable indicator of doneness. As the custard cooks, the sweet scent of vanilla and cream cheese will intensify. If the custard is still too runny, the aroma will be faint. Once it’s set, you’ll smell a warm, buttery fragrance. Trust your nose; it’s a better judge of doneness than a timer. This tip saves you from overbaking and gives you confidence in the final product.
The 5-Minute Rest That Changes Everything
After removing the custards from the oven, let them rest for 5 minutes before cooling. This rest period allows the custard to set further, reducing the risk of cracks when chilled. The custard will still be slightly gooey, but it will firm up as it cools. Skipping this step can result in a fragile custard that cracks when you try to remove it from the ramekin. The rest is a quick, simple step that pays off in the final texture. It’s a small change that makes a big difference.
The Perfect Crust Layer
Pressing the crust too lightly can cause it to crumble during baking, while pressing too hard can create a dense crust that doesn’t crisp. Aim for a firm, even layer that holds together but still allows the custard to rise slightly. A good technique is to press the crumbs with a spoon and then tap the ramekin lightly to level the crust. This ensures an even base and a crisp edge. The crust should feel slightly springy when pressed. This tip will help you achieve the ideal crust every time.
The Sweet Spot for Sugar Caramelization
When caramelizing the sugar, use a fine-grain sugar for a smooth, even crust. The sugar should be spread thinly; a thick layer will melt unevenly and can result in a sticky top. A kitchen torch gives you precise control, but a broiler can also work if you keep a close eye. The sugar should reach a deep amber color before it starts to burn. This step is the final flourish that turns the custard into a gourmet dessert. The caramelized top adds a satisfying crunch that complements the silky interior.
The Secret to a Silky Interior
Whisking the cream cheese until it’s completely smooth before adding the yolks is essential. Any lumps will become visible in the final custard. Using a hand mixer at low speed ensures an even mixture. The cream cheese should feel silky to the touch. If you’re short on time, a food processor can speed up the process, but be careful not to overmix. The result is a custard that feels velvety and luxurious.
Creative Twists and Variations
Chocolate Ganache Swirl
Swap half of the cream cheese with chocolate ganache for a decadent twist. The ganache will add a rich chocolate flavor that pairs beautifully with the caramelized sugar. Use a high-quality dark chocolate for depth, and stir until silky. The result is a luscious chocolate swirl that looks as good as it tastes. This variation is perfect for chocolate lovers and makes a stunning centerpiece at parties. The chocolate adds a bold, indulgent flavor that stands out.
Lemon Zest Surprise
Add a tablespoon of lemon zest to the custard mixture for a bright, citrusy twist. The zest provides a fresh contrast to the creamy base, making the dessert feel lighter. It also enhances the vanilla’s flavor, giving the custard a bright, zesty aroma. This variation is ideal for summer gatherings or when you want a lighter dessert. The lemon zest adds a refreshing burst that balances the richness.
Salted Caramel Drizzle
Drizzle a salted caramel sauce over the finished custards for a sweet-salty explosion. The caramel sauce adds a silky texture that complements the crunchy sugar top. A pinch of sea salt enhances the caramel’s sweetness, creating a harmonious balance. This variation is a crowd-pleaser and adds an extra layer of flavor. The salted caramel gives the dessert a luxurious, indulgent finish that’s hard to resist.
Coffee Infusion
Stir in a tablespoon of instant espresso powder into the custard mixture for a subtle coffee flavor. The espresso adds depth and a slight bitterness that balances the sweetness. It also gives the custard a rich, mocha-like aroma. This variation is a hit with coffee lovers and pairs well with chocolate. The coffee infusion adds a sophisticated flavor that elevates the dessert to a new level.
Berry Compote Accent
Serve the mini cheesecakes with a spoonful of fresh berry compote on top. The berries add a burst of tartness and a pop of color. Use a mix of strawberries, blueberries, and raspberries for a vibrant presentation. The compote also adds a fresh, juicy contrast to the creamy custard. This variation is ideal for spring or summer, adding a seasonal touch to the dessert. The berries bring a bright, refreshing note that complements the richness.
Nutty Crunch
Incorporate finely chopped toasted almonds or pecans into the crust for an added crunch. The nuts add a nutty flavor that pairs well with the creamy custard. Toast the nuts until golden brown for maximum flavor. The crunchy texture will contrast nicely with the silky interior. This variation is great for nut lovers and adds a rustic, homemade feel. The nuts add a satisfying crunch that enhances the overall experience.
Storing and Bringing It Back to Life
Fridge Storage
Store the mini cheesecakes in an airtight container in the refrigerator for up to 48 hours. Keep them on a plate to prevent them from sticking to the container. The custard will firm up, making it easier to handle. Before serving, reheat the sugar topping using a kitchen torch or broiler to restore the crispness. This method preserves the texture and flavor without compromising the dessert’s integrity. The custard remains silky, while the caramelized top stays crisp.
Freezer Friendly
For longer storage, freeze the mini cheesecakes for up to 3 months. Wrap each ramekin individually in plastic wrap, then place them in a freezer-safe bag. When you’re ready to serve, thaw them in the refrigerator overnight. Reheat the sugar topping just before serving to restore the caramelized crust. The custard’s texture will remain smooth, and the caramelized top will stay crisp. This option is perfect for busy days or for preparing ahead of a big event.
Best Reheating Method
To reheat the custard, place the ramekins in a water bath at 350°F (177°C) for 5 minutes. This gentle heat will warm the custard without drying it out. After reheating, drizzle a thin layer of sugar and caramelize with a torch or broiler. The sugar should crack when you bite into it, revealing the silky custard beneath. This method ensures a smooth, warm custard with a crisp, caramelized top. The reheated dessert will taste just as fresh and delightful as when it was first baked.