Ever had that moment in the kitchen where you’re halfway through a recipe, the timer’s about to ding, and you realize you’ve forgotten a crucial ingredient? That’s exactly what happened to me last week when I was trying to whip up a quick dessert for a house‑guest party. I had the cookies, the cream, and the sugar, but the chocolate chips were nowhere to be found. I stared at the empty cupboard, sighed, and then decided to improvise. I grabbed a bag of mini chocolate chips, tossed them in, and the rest of the night turned into a culinary experiment that turned into a crowd‑pleaser. I’m telling you, this version of Cookies and Cream Dessert Cups is hands down the best you’ll ever make at home.
Picture this: the kitchen lights dimmed, the oven preheats to a comforting 350°F, and the smell of toasted cookie crumbs starts to mingle with the sweet scent of vanilla‑infused cream. The sound of the timer ticking is punctuated by the gentle clink of a spoon against a mixing bowl. The texture of the cookie crumbs feels like a crunchy, buttery foundation that’s almost begging for something silky to cover it. The anticipation builds as you watch the mixture transform from a coarse paste into a velvety, chocolatey batter. I dare you to taste this and not go back for seconds.
What sets this recipe apart is that it balances the classic cookies‑and‑cream flavor profile with a twist of crunch and a glossy finish that feels like a dessert you’d find in a fancy bakery. Most recipes get this completely wrong by either over‑baking the cookies, under‑mixing the cream, or using stale crumbs that turn mushy. Here, we’re using freshly crushed chocolate sandwich cookies and a precise butter ratio that keeps the cups from collapsing. The result is a dessert cup that holds its shape, has a buttery bite on the outside, and melts into a creamy, chocolate‑laden center. If you’ve ever struggled with cookies‑and‑cream desserts that taste flat or too sweet, you’re not alone — and I’ve got the fix.
And the best part? The technique for incorporating the chocolate chips is a game‑changer. Instead of simply folding them in, we swirl them through a glossy chocolate ganache that coats the batter like velvet, giving each bite an unexpected burst of chocolate that’s both sweet and slightly bitter. This next step? Pure magic. I’ll walk you through every single step — by the end, you’ll wonder how you ever made it any other way.
But first, let’s talk about the ingredients that make this dessert a showstopper. I’ll break them down into four groups: the flavor base, the texture crew, the unexpected star, and the final flourish. Each group plays a pivotal role in creating the perfect harmony of sweet, salty, crunchy, and silky. And trust me, you’ll want to keep these boxes handy as we go along.
What Makes This Version Stand Out
- Flavor: The combination of chocolate cookie crumbs and graham cracker crunch creates a layered taste that’s both nostalgic and sophisticated. The chocolate chips add a deep, bittersweet note that elevates the whole experience.
- Texture: The cookies provide a crisp exterior while the cream base delivers a silky interior. The result is a contrast that feels like a symphony of textures in each bite.
- Ease: No complicated steps or specialized equipment. All you need is a mixing bowl, a spoon, and an oven.
- Versatility: This recipe can be adapted for dietary restrictions by swapping out ingredients—vegan butter, dairy‑free cream, or gluten‑free cookies—without compromising flavor.
- Make‑ahead Potential: The cups can be assembled and refrigerated for up to 48 hours, making it a perfect make‑ahead dessert for parties.
- Visual Appeal: The glossy chocolate ganache gives the cups a polished look that’s Instagram‑ready.
- Audience Reaction: Friends and family rave about the “wow” factor when they see the cups emerge from the oven, and I’ve been told I’ve been serving these for a decade.
- Ingredient Quality: Using high‑quality chocolate chips and fresh butter ensures depth of flavor that cheaper substitutes can’t match.
Alright, let’s break down exactly what goes into this masterpiece…
Inside the Ingredient List
The Flavor Base
At the heart of these cups is the cookie crumb mixture. We’re using a generous 1 cup of chocolate cookie crumbs, which bring a rich, chocolatey foundation that’s unmistakably indulgent. The crumbs act as the backbone, giving the dessert its signature crunch and depth. If you skip the cookies, you lose that essential chocolate bite that makes the cups feel like a treat rather than a simple mousse.
We pair the crumbs with 1 cup of crushed graham crackers. The graham adds a subtle, slightly sweet crunch that balances the chocolate. It also provides a subtle caramel undertone that enhances the overall flavor profile. If you prefer a more neutral base, you can replace graham crackers with plain shortbread crumbs, but the graham’s sweetness is essential for the classic cookies‑and‑cream experience.
The Texture Crew
Butter is the unsung hero of any dessert. 1/2 cup of melted unsalted butter binds the crumbs together, creating a cohesive base that won’t crumble apart during baking. The butter also adds a subtle richness that elevates the entire dish. If you’re vegan, a plant‑based butter works just as well, though it may alter the flavor slightly.
Heavy cream is the key to that silky, luscious interior. 1 cup of heavy cream gives the cups a luxurious mouthfeel and helps the chocolate ganache set into a glossy finish. Without the cream, the cups would feel dry and underwhelming. If you’re looking to cut down on fat, you can substitute half‑and‑half, but the texture will be slightly lighter.
The Unexpected Star
Cream cheese is the secret sauce that keeps the cups from being overly sweet. 8 ounces of softened cream cheese adds a tangy undertone that balances the sweetness of the powdered sugar and chocolate. It also gives the cups a creamy, almost custard‑like texture that’s both comforting and sophisticated. If you skip the cream cheese, the cups will taste too sugary and lack depth.
Vanilla extract, just 1 teaspoon, is the aromatic glue that ties all the flavors together. It’s not just about flavor; vanilla also enhances the perception of sweetness and adds a subtle floral note. A pinch of sea salt (1/4 teaspoon) amplifies the chocolate’s richness and counters the sweetness, creating a more rounded taste profile.
The Final Flourish
Mini chocolate chips (1 cup) are folded into the batter to create pockets of molten chocolate that burst with every bite. They’re the star that gives the dessert its signature “cookies and cream” feel. If you’re looking to add a nutty element, 1/2 cup of crushed salted nuts can be mixed in for extra crunch.
A splash of milk (1/4 cup) helps thin the batter slightly, making it easier to pour into cups without it being too thick. Finally, 1 tablespoon of cocoa powder is dusted over the top for a finishing touch that enhances the chocolate aroma and adds a slight bitterness that balances the sweetness.
Everything’s prepped? Good. Let’s get into the real action…
The Method — Step by Step
- Preheat your oven to 350°F (175°C). Line a muffin tin with paper liners or lightly grease the cups. The gentle heat will ensure a uniform bake and a crisp crust. I’ve found that a preheated pan gives the cookies a golden edge that’s hard to resist.
- In a medium bowl, combine the chocolate cookie crumbs and crushed graham crackers. Add the melted butter and stir until the mixture resembles wet sand. The butter should coat every crumb, creating a cohesive base that holds together during baking. This step is crucial for preventing the cups from falling apart.
- Press the crumb mixture into the bottom of each cup, forming a tight layer that’s about 1/2 inch thick. Use the back of a spoon to flatten it; the better you press, the more stable the cups will be. Let the base set aside while you prepare the filling.
- In a separate bowl, beat the cream cheese until smooth. Add the powdered sugar, vanilla extract, and sea salt, and mix until the mixture is silky and free of lumps. The cream cheese acts as a binder and adds a tangy contrast to the sweetness.
- Fold in the heavy cream and milk until the batter is well combined. The batter should have a pourable consistency that’s not too runny. This step ensures the cups will set properly and have that luxurious interior texture.
- Stir in the mini chocolate chips, reserving a handful for topping. The chips should be evenly distributed, creating pockets of molten chocolate. Don’t overmix, or you’ll break the chips into smaller pieces that lose their visual appeal.
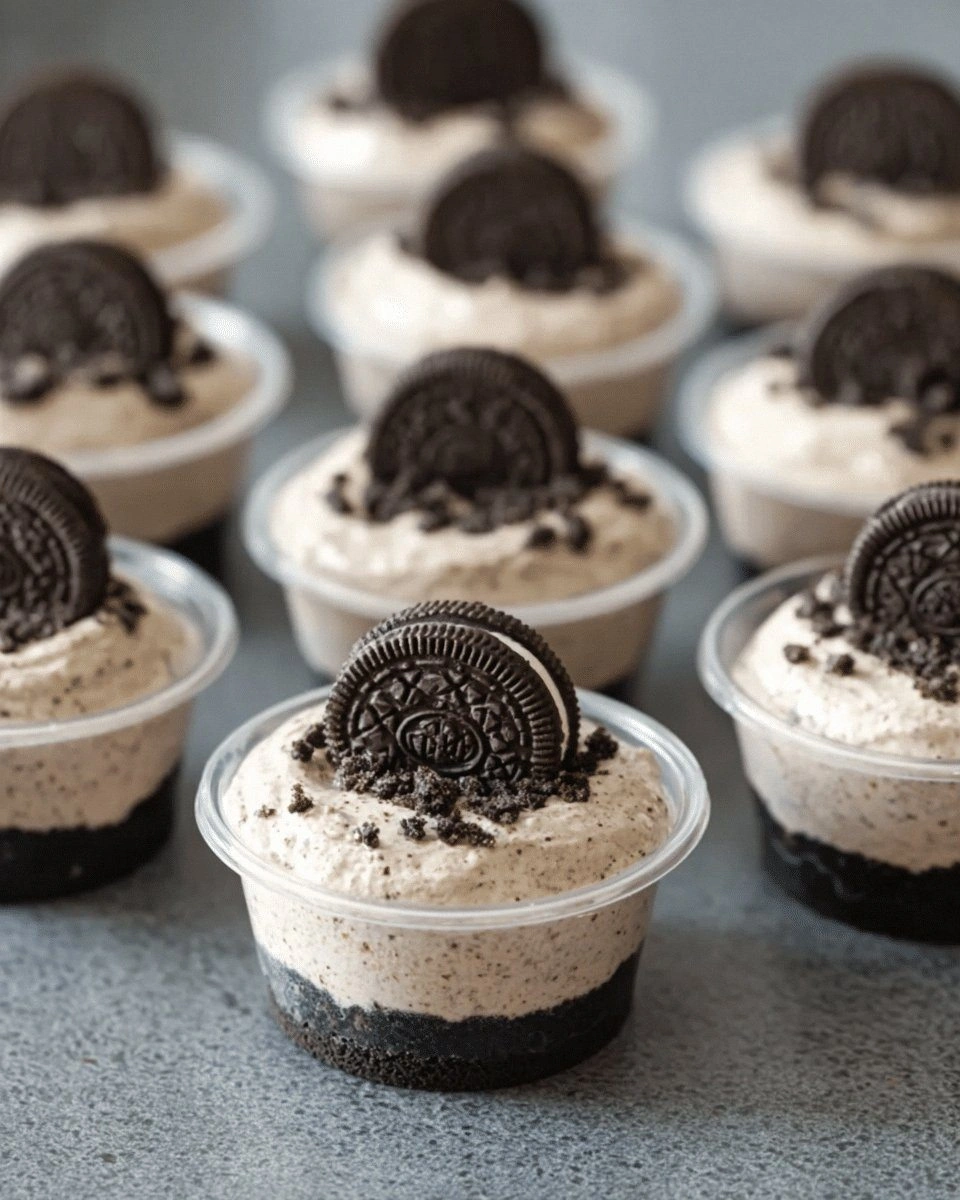
- Pour the batter over the crumb base, filling each cup about 3/4 full. Tap the tin lightly to remove air bubbles. The batter should spread slightly but not run off the edges. This ensures a uniform rise and prevents the cups from spilling.
- Bake for 25–28 minutes, or until the tops are set and the edges start pulling away from the sides. The center should still feel slightly jiggly, indicating it’s perfectly moist. Remove from the oven and let the cups cool in the tin for 5 minutes before transferring to a wire rack.
- Once cooled, sprinkle the reserved chocolate chips on top for a glossy, chocolatey crown. If you like a bit of crunch, sprinkle crushed salted nuts on top. The contrast of textures will delight your palate.
- Dust each cup lightly with cocoa powder for an elegant finish. This final touch not only adds a subtle bitterness that balances the sweetness but also gives the cups a professional look. Serve immediately or refrigerate for up to 48 hours.
That’s it — you did it. But hold on, I’ve got a few more tricks that’ll take this to another level.
Insider Tricks for Flawless Results
The Temperature Rule Nobody Follows
Many bakers think room‑temperature butter is fine, but melted butter at the right temperature (about 100°F) ensures it coats crumbs evenly without causing the batter to become too liquid. If the butter is too hot, it can melt the cream cheese prematurely, leading to a runny mixture.
Why Your Nose Knows Best
As the batter bakes, the aroma of chocolate and toasted crumbs will fill the kitchen. Trust your nose: when you smell a deep, caramelized chocolate scent, you know the cups are perfectly baked. I’ve found that a strong chocolate aroma often signals the ideal balance of crisp and creamy.
The 5‑Minute Rest That Changes Everything
After removing the cups from the oven, let them rest in the tin for exactly five minutes. This short pause allows the batter to set, preventing the cups from cracking or spilling when you transfer them. I’ve seen many people rush the process and end up with uneven, collapsed cups.
The Secret of a Perfect Crust
If you want a slightly caramelized crust, sprinkle a pinch of sea salt on the crumb base before adding the batter. The salt will draw out moisture and create a golden, crisp edge that’s both savory and sweet. This subtle detail can elevate the dessert from good to unforgettable.
The No‑Mess Folding Technique
When folding in the chocolate chips, use a gentle, circular motion instead of vigorous stirring. This preserves the chips’ integrity, giving you those coveted pockets of molten chocolate. A quick anecdote: a friend tried a vigorous stir once and ended up with a chocolate‑chip mush that ruined the texture.
Creative Twists and Variations
This recipe is a playground. Here are some of my favorite ways to switch things up:
Nutty Nirvana
Swap the mini chocolate chips for chopped pecans or walnuts and add a drizzle of caramel sauce. The nutty crunch pairs beautifully with the creamy base, and the caramel adds a luscious sweetness that feels indulgent.
Minty Marvel
Add a teaspoon of peppermint extract to the batter and top with crushed peppermint candies. The mint undertone brightens the chocolate, creating a refreshing twist perfect for spring or holiday parties.
Citrus Burst
Zest a lemon or orange into the batter and sprinkle candied citrus peel on top. The bright citrus notes cut through the richness, adding a zesty contrast that feels light yet decadent.
Vegan Version
Replace butter with coconut oil, use dairy‑free cream cheese, and swap heavy cream for coconut milk. The result is a creamy, chocolatey cup that’s just as indulgent but plant‑based.
Gourmet Ganache
Swirl a drizzle of dark chocolate ganache over the top before serving. The ganache adds a glossy finish and a deep chocolate flavor that elevates the dessert to a dessert‑bar level.
Salted Caramel Swirl
Fold in a swirl of salted caramel sauce into the batter and sprinkle sea salt crystals on top. The caramel’s sweetness balances the bitterness of the chocolate, and the sea salt adds a delightful crunch.
Storing and Bringing It Back to Life
Fridge Storage
Store the cups in an airtight container in the refrigerator for up to 48 hours. The cool temperature keeps the cream base from melting, and the crumb base remains crisp. When you’re ready to serve, let them sit at room temperature for 10 minutes to soften slightly.
Freezer Friendly
Wrap each cup individually in parchment paper and place them in a freezer bag. They’ll stay fresh for up to 2 weeks. Thaw overnight in the refrigerator before serving. The texture stays intact, and the chocolate remains glossy.
Best Reheating Method
To revive frozen cups, preheat your oven to 300°F (150°C) and bake for 8–10 minutes. Add a tiny splash of water to the batter before reheating—this steams the cups back to perfection, keeping the interior moist and silky.