I remember the night I almost ruined my entire dinner because I tried to impress my friends with a fancy appetizer that turned out bland and soggy. The kitchen smelled like burnt onions, the table was a mess, and my friends were politely laughing as they tried to swallow the disappointment. That night, I vowed to create something that would not only taste incredible but also look like a masterpiece that would make my friends gasp. Fast forward to today, and I’m about to unveil the ultimate Crispy Bacon Mozzarella Popper—a snack that marries gooey cheese, smoky bacon, and a sweet‑spicy glaze into a single, bite‑size explosion of flavor.
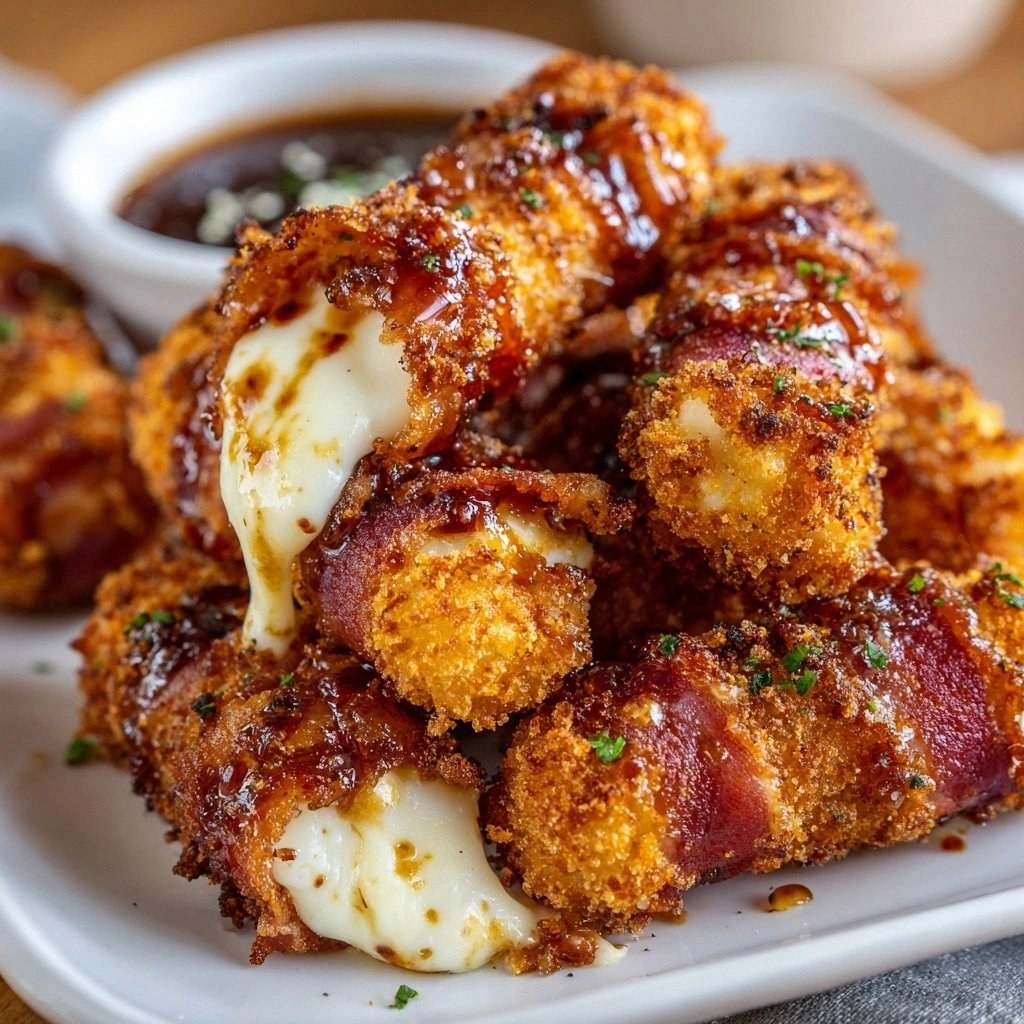
Picture this: you’re standing in your kitchen, the oven preheated to 400°F, and the air is thick with the aroma of bacon sizzling. The sound of the bacon crackling is music to your ears, and the sight of mozzarella sticks glistening with a golden glaze promises a crunch that shatters like thin ice. The first bite is a symphony of textures—the crisp bacon, the molten cheese, and the caramelized glaze that coats the mozzarella like velvet. The flavors dance on your tongue, a sweet‑savory harmony that feels like a hug wrapped in a blanket of comfort.
What makes this version stand out from every other bacon‑cheese recipe out there is the meticulous balance of sweetness and spice, the use of high‑quality ingredients, and a technique that ensures every popper is a bite‑size work of art. I dare you to taste this and not go back for seconds—trust me, it will haunt your cravings for days. I’ll be honest, I ate half the batch before anyone else got to try it, and I still have crumbs on my shirt. Most recipes get this completely wrong by over‑baking or under‑seasoning, but here’s what actually works. Picture yourself pulling this out of the oven, the whole kitchen smelling incredible, and your friends begging for the recipe.
Okay, ready for the game‑changer? Let’s walk through every single step—by the end, you’ll wonder how you ever made it any other way. From the precise way to coat the mozzarella sticks to the exact glaze ratio that caramelizes without burning, every detail is fine‑tuned to deliver perfection. The next part? Pure magic. And now the fun part: the moment you’ll feel like a culinary wizard with a secret weapon in your pantry. Stay with me here—this is worth it.
What Makes This Version Stand Out
- Flavor: The glaze combines brown sugar and honey for a caramelized sweetness that balances the smoky bacon and salty mozzarella, creating a taste profile that’s both comforting and sophisticated.
- Texture: Each popper delivers a crunchy bacon shell, a molten mozzarella core, and a glaze that forms a crisp, golden crust—an orchestra of textures in every bite.
- Ingredient Quality: Using thick‑cut bacon for maximum crunch and premium mozzarella sticks for melt‑ability guarantees a premium experience without the need for fancy sauces.
- Ease: No complex marinades or doughs—just a handful of pantry staples, a quick oven bake, and a drizzle of glaze. Perfect for last‑minute entertaining.
- Make‑Ahead: Assemble the poppers ahead of time, refrigerate, and finish baking just before serving. Ideal for busy schedules.
- Crowd Reaction: Friends can’t stop raving about how the sweet glaze cuts through the richness of the bacon and cheese, making it a hit at parties.
- Versatility: The base recipe can be tweaked for vegan, keto, or low‑sugar versions without sacrificing flavor.
- Visual Appeal: The glossy glaze and vibrant bacon make for a stunning presentation that looks as good as it tastes.
Inside the Ingredient List
The Flavor Base
Brown sugar and honey form the sweet heart of the glaze. The brown sugar caramelizes, giving the glaze depth and a slightly nutty undertone, while the honey adds floral notes that lift the overall flavor. If you’re watching calories, you can swap honey for maple syrup; the result will be slightly richer but still perfectly balanced.
The Texture Crew
Mozzarella sticks are the star of the show; they provide that gooey, melty goodness we all crave. Thick‑cut bacon adds a savory crunch that pairs perfectly with the cheese. Together, they create a contrast of soft and crisp that satisfies the palate. If you’re on a low‑carb diet, consider using cheese sticks made from a blend of mozzarella and provolone for a slightly firmer bite.
The Unexpected Star
Garlic powder and black pepper are the subtle performers that elevate the dish. Garlic powder brings depth and a hint of earthiness, while black pepper balances the sweetness of the glaze with a mild heat. Don’t skip them; they’re the unsung heroes that keep the flavors from becoming one‑dimensional.
The Final Flourish
A dash of black pepper is all you need to round out the glaze. The pepper’s piquancy cuts through the richness, ensuring each bite is balanced. If you’re a spice lover, feel free to add a pinch of cayenne for a subtle kick that will keep everyone coming back for more.
Everything’s prepped? Good. Let’s get into the real action. The process is simple, but the results are unforgettable. Each step is designed to maximize flavor and texture, so pay close attention and don’t skip any details.
The Method — Step by Step
- Preheat your oven to 400°F (200°C). Line a baking sheet with parchment paper to prevent sticking. This step ensures an even bake and a crisp bacon finish. The oven’s heat will also help the glaze caramelize beautifully.
- Wrap each mozzarella stick with a strip of bacon, securing it with a toothpick if necessary. Make sure the bacon covers the entire length of the stick to create a uniform shell. The bacon will not only add flavor but also protect the cheese from over‑browning.
- Place the wrapped sticks on the prepared baking sheet, leaving a little space between each. Bake for 12 minutes, or until the bacon is golden and crispy. Keep an eye on them; bacon can go from perfect to burnt quickly. If you want extra crispness, flip them halfway through the bake.
- While the sticks are baking, whisk together brown sugar, honey, garlic powder, and black pepper in a small saucepan. Heat over medium heat until the sugar dissolves and the glaze thickens slightly. The glaze should be pourable but not runny; it needs to coat the bacon without dripping.
- Watch Out: The glaze can scorch if the heat is too high. Keep it at a gentle simmer and stir constantly. If the glaze starts to darken too quickly, lower the heat. This step is crucial for achieving that golden caramelized finish without burning.
- Remove the poppers from the oven and let them cool for a minute. Then brush each popper with the glaze, ensuring an even coat. The glaze will set as it cools, forming a glossy, crunchy shell.
- Serve immediately while the bacon is still warm and the cheese is oozing. If you’re prepping ahead, let the poppers cool completely, then refrigerate in an airtight container for up to 24 hours. Reheat in a 350°F oven for 5 minutes to revive the crispness.
- Optional: Garnish with chopped fresh parsley or a sprinkle of smoked paprika for an added pop of color and flavor. This finishing touch elevates the dish from simple snack to show‑stopping appetizer.
That’s it—you did it. But hold on, I’ve got a few more tricks that will take this to another level. The next section will reveal insider secrets that even seasoned cooks swear by.
Insider Tricks for Flawless Results
The Temperature Rule Nobody Follows
Many people bake at 375°F, but 400°F is the sweet spot for bacon crispness and cheese melt. The higher temperature ensures the bacon reaches that golden, buttery finish while the cheese stays soft. If you’re using a convection oven, reduce the temperature by 25°F to avoid over‑browning.
Why Your Nose Knows Best
Trust your nose when the glaze starts to bubble and emit a caramel aroma. That’s the cue that the sugar is caramelizing properly. If you smell burnt sugar, lower the heat immediately. Your nose is the best judge of when the glaze is just right.
The 5‑Minute Rest That Changes Everything
After brushing the glaze, let the poppers rest for exactly five minutes. During this time, the glaze sets into a crisp shell, and the cheese inside remains molten. Skipping this step can result in a sticky, uneven coating that clings to the spoon.
The Secret to a Non‑Sticky Bacon Wrapper
If your bacon tends to stick to the parchment paper, lightly spray the paper with cooking spray before placing the poppers. Alternatively, use a silicone baking mat for a non‑stick surface that’s easy to clean.
The Quick‑Freeze Trick
If you’re preparing a large batch, freeze the bacon‑wrapped sticks on a parchment‑lined tray before baking. This prevents them from sticking together and allows you to bake individual poppers on demand.
Creative Twists and Variations
This recipe is a playground. Here are some of my favorite ways to switch things up:
Spicy Chipotle Glaze
Swap the honey for a chipotle‑infused honey or add a dash of chipotle powder to the glaze. The smoky heat pairs beautifully with the bacon and adds a modern twist to the classic flavor.
Cheddar‑Filled Popper
Replace the mozzarella sticks with sharp cheddar sticks for a stronger cheese flavor. The cheddar melts into a gooey center that’s richer and more savory.
Vegan Version
Use plant‑based mozzarella and vegan bacon strips. Keep the glaze the same, or add a splash of soy sauce for umami. The result is a cruelty‑free version that still satisfies the craving for gooey, savory bites.
Low‑Carb Edition
Use a low‑carb cheese stick and substitute the honey with a sugar‑free sweetener. Reduce the glaze slightly to keep the sugar content low while still achieving a caramelized finish.
Herb‑Infused Popper
Add fresh rosemary or thyme to the glaze for an aromatic twist. The herbs complement the bacon’s smokiness and add a fresh, earthy note.
Dessert‑Style Popper
Drizzle a thin layer of chocolate sauce over the glazed poppers after baking. The combination of sweet chocolate, honey glaze, and cheese creates an unexpected dessert that’s still savory enough to be a party hit.
Storing and Bringing It Back to Life
Fridge Storage
Store leftover poppers in an airtight container at room temperature for up to 2 days. They’ll stay crisp if you keep them on a paper towel to absorb excess moisture. Reheat in a 350°F oven for 5 minutes to revive the crunch.
Freezer Friendly
Freeze the poppers in a single layer on a parchment‑lined tray, then transfer to a freezer bag once solid. They can be stored for up to 3 months. When ready to serve, bake directly from the freezer for 8–10 minutes, no need to thaw.
Best Reheating Method
The oven is the king for reheating—preheat to 350°F, place the poppers on a baking sheet, and bake for 5 minutes. If you’re in a hurry, microwave for 30 seconds on high, but the result will be softer. Add a splash of water before reheating to steam the cheese back to meltiness.