Remember that night when the stove exploded, the rice boiled over, and the chicken turned to charcoal? I was staring at a ruined dinner while my friends laughed at my kitchen chaos. That disaster sparked a quest for a foolproof, one‑pot meal that would rescue my evenings and never leave me scrambling again.
I wanted a dish that smells like a summer picnic, tastes like home‑cooked comfort, feels like a hug, and looks like a plated masterpiece. Imagine a golden‑brown chicken skin crackling, steam swirling like a fragrant cloud, and the sound of a gentle sizzle that tells you everything is just right. The first bite should be a burst of umami, the second a whisper of citrus, and the third a lingering warmth that keeps you reaching for more.
This isn’t just another “rice and chicken” recipe; it’s a culinary revelation that turns a humble rice cooker into a flavor laboratory. Every component is chosen for its ability to marry texture and aroma, creating a dish that feels like a celebration in a pot. The secret sauce? A touch of soy, a dash of thyme, and a splash of lemon that lifts the whole flavor profile.
What makes this version a game‑changer is that it works on any rice cooker, from the basic to the smart. No pre‑cooking, no constant stirring, no fear of over‑cooking. It’s the kind of recipe that turns a rushed weekday into a relaxed, satisfying meal that feels like you’re treating yourself.
Let me walk you through every single step—by the end, you'll wonder how you ever made it any other way. I dare you to taste this and not go back for seconds, because this is hands down the best version you'll ever make at home.
What Makes This Version Stand Out
- Flavor: The combination of soy, thyme, and lemon creates a layered umami that coats each grain like velvet, leaving a lingering citrus finish that keeps the palate excited.
- Texture: The rice stays fluffy yet slightly firm, while the chicken develops a crisp exterior that shatters like thin ice when you bite through it, delivering a satisfying crunch.
- Simplicity: All the action happens in one pot—no separate pans, no extra dishes, just a handful of ingredients that you probably already have.
- Time‑saving: From prep to plate, the entire process takes less than 45 minutes, making it the ultimate solution for busy nights.
- Make‑ahead potential: The dish keeps well in the fridge for up to 4 days and freezes beautifully, so you can batch‑cook and enjoy a gourmet meal without the daily effort.
- Versatility: Whether you’re a chicken connoisseur or a vegetarian, the recipe’s core structure can be swapped for tofu, shrimp, or even a plant‑based protein.
Alright, let's break down exactly what goes into this masterpiece...
Inside the Ingredient List
The Flavor Base
Long‑grain white rice: The backbone of the dish, it absorbs the savory broth and keeps the meal light. Choosing a high‑quality rice like Basmati or Jasmine adds subtle aroma and a slightly floral note. If you skip rice, you lose the comforting heart of the dish.
Low‑sodium chicken broth: It’s the liquid that brings everything together, providing depth without overpowering the natural flavors of the chicken. A homemade broth would be even better, but a good store‑bought version works just fine. If you skip broth, the rice will dry out and taste bland.
Lemon juice: A splash of citrus brightens the dish and cuts through the richness of the chicken. It also prevents the rice from becoming too sticky by adding acidity. If you skip it, the dish will feel heavier and less vibrant.
The Texture Crew
Chicken thighs: The choice of bone‑in, skin‑on thighs ensures juicy meat that stays tender while developing a crisp, caramelized skin. If you use boneless or skinless, the dish will be drier and less flavorful. The thighs also provide a nice contrast to the soft rice.
Carrots: They add natural sweetness, crunch, and a pop of color. Their fibers hold up well during cooking, maintaining texture. Skipping carrots removes a layer of flavor and visual appeal.
Bell pepper: Provides a subtle peppery bite and vibrant color that makes the dish look as good as it tastes. If you omit it, you lose that bright, sweet undertone that balances the savory notes.
The Unexpected Star
Garlic: Minced garlic infuses the rice cooker with a fragrant aroma that permeates every grain. It’s the secret that ties the savory elements together. If you skip garlic, the dish will feel flat and less complex.
Olive oil: A splash of olive oil helps the chicken brown evenly and prevents sticking. It also adds a subtle fruity undertone. Skipping oil will result in a less golden, more soggy finish.
The Final Flourish
Thyme: Dried thyme brings earthy depth and a hint of pine. It complements the chicken’s natural flavor and balances the acidity of the lemon. If you skip thyme, the dish will lack that aromatic complexity.
Salt & pepper: Essential for seasoning, they elevate every ingredient. Salt draws out moisture, while pepper adds a subtle heat. Skipping them will leave the dish bland.
Soy sauce: Adds umami and a touch of saltiness that deepens the broth’s flavor. It also helps the rice cook evenly by breaking down starches. Without soy sauce, the dish will feel less savory.
Everything's prepped? Good. Let's get into the real action...
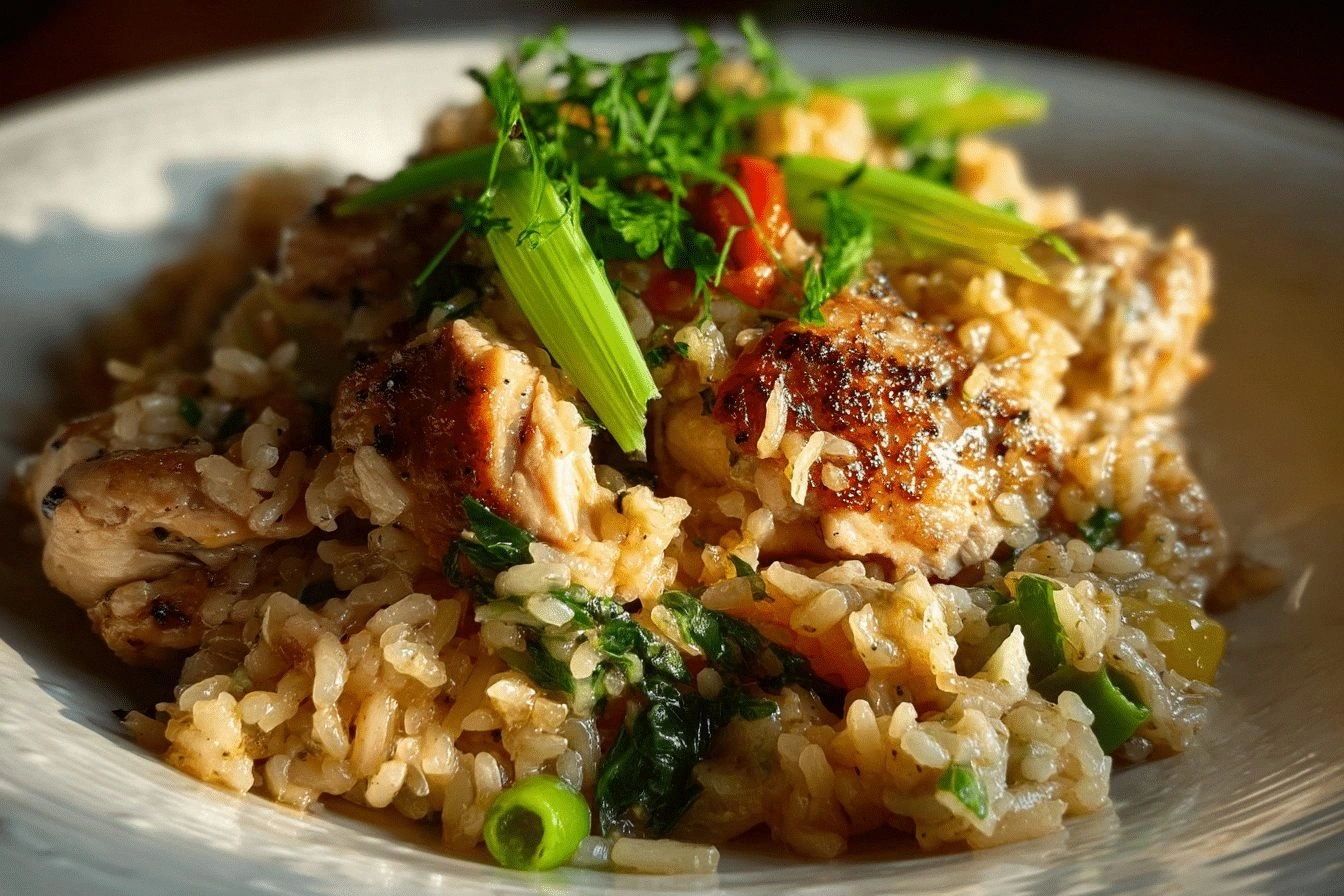
The Method — Step by Step
- Prep the aromatics: Dice the onion, slice the carrots, dice the bell pepper, and mince the garlic. Toss them into a bowl and set aside. This step ensures a uniform distribution of flavor throughout the pot.
- Brown the chicken: Heat the olive oil in the rice cooker’s inner pot on the “Sauté” setting (if available). Add the chicken thighs skin‑side down, letting them sear until golden brown, about 4 minutes per side. The seared skin locks in juices and gives the dish a crispy texture.
- Add aromatics and seasonings: Sprinkle the salt, pepper, thyme, and soy sauce over the browned chicken. Stir to coat the meat evenly. Then add the diced onion, carrots, bell pepper, and minced garlic, letting them sauté for 2 minutes until fragrant.
- Layer the rice: Spread the rinsed rice evenly over the chicken and vegetables. Avoid stirring; this allows the rice to absorb liquid uniformly and prevents sticking.
- Pour in the broth and lemon: Add the chicken broth and a generous splash of lemon juice. Gently swirl the pot to distribute the liquid, but keep the rice layer intact.
- Cook the pot: Close the lid and set the rice cooker to the “Cook” setting. Let the machine work its magic for about 30 minutes. The timer will beep when the rice is done and the chicken is tender.
- Let it rest: Once the cooker signals completion, let the dish sit covered for 10 minutes. This rest period lets the steam finish cooking the rice and the chicken, ensuring every bite is juicy.
- Fluff and serve: Fluff the rice with a fork, gently lift the chicken off the bottom, and serve hot. Garnish with fresh parsley or a drizzle of extra lemon if desired.
That’s it — you did it. But hold on, I've got a few more tricks that'll take this to another level...
Insider Tricks for Flawless Results
The Temperature Rule Nobody Follows
Even the best rice cooker can suffer from uneven heat if you use a low‑quality pot. Switch to a heavy‑bottomed inner pot or add a small amount of water to the bottom before adding the rice; this creates a vapor barrier that ensures even cooking.
Why Your Nose Knows Best
The aroma is your best judge of doneness. If you smell a subtle nutty scent from the rice, it’s ready. If you still detect raw chicken or raw rice, give it a few more minutes.
The 5‑Minute Rest That Changes Everything
Resting the pot after cooking allows the steam to redistribute, preventing the rice from sticking to the bottom. It also lets the chicken absorb the final burst of juices, making every bite succulent.
Keep the Lid Closed, Even When You’re Distracted
Every time you lift the lid, you lose heat and steam. If you’re multitasking, set a timer so you can safely pause without opening the cooker.
Add a Touch of Heat for a Kick
A pinch of crushed red pepper flakes or a dash of hot sauce can elevate the dish for those who love a little spice. Just remember to balance it with the lemon to keep the flavor profile bright.
Serve with a Fresh Green Side
A quick sauté of spinach or a cucumber salad adds a crisp contrast that cleanses the palate and brightens the plate.
Creative Twists and Variations
This recipe is a playground. Here are some of my favorite ways to switch things up:
Thai Twist
Swap the soy sauce for fish sauce, add a splash of coconut milk, and sprinkle Thai basil on top. The result is a fragrant, slightly sweet, and savory dish that transports you to a Thai street market.
Mediterranean Flair
Replace the thyme with oregano, use sun‑dried tomatoes, and finish with a drizzle of olive oil and a squeeze of lemon. The dish becomes a vibrant, herb‑laden delight reminiscent of a sunny Mediterranean kitchen.
Spicy Cajun Kick
Add Cajun seasoning, a handful of sliced jalapeños, and a splash of Worcestershire sauce. The result is a bold, smoky dish that pairs perfectly with a cool yogurt dip.
Vegan Variation
Use tofu or tempeh instead of chicken, and replace the chicken broth with vegetable stock. The dish remains hearty, and the tofu absorbs the savory sauce beautifully.
Smoky Chipotle Edition
Add chipotle powder or adobo sauce to the broth, and garnish with fresh cilantro. The smoky heat pairs wonderfully with the mild rice and tender chicken.
Lemon‑Garlic Fusion
Increase the lemon juice and add a handful of fresh lemon zest. The bright citrus notes elevate the dish into a light, refreshing meal perfect for summer evenings.
Storing and Bringing It Back to Life
Fridge Storage
Cool the dish completely, then transfer to an airtight container. Store in the fridge for up to 4 days. The flavors deepen, making it even more delicious.
Freezer Friendly
Divide the meal into portions, wrap tightly in foil, and place in a freezer bag. Freeze for up to 3 months. Reheat in the microwave or on the stovetop, adding a splash of water to rehydrate the rice.
Best Reheating Method
Reheat on the stovetop with a drizzle of olive oil, stirring gently until hot. Alternatively, microwave on medium power for 2 minutes, then stir and heat for an additional minute.