I still remember the day I almost set my kitchen on fire trying to make Danish pastries. There I was, standing in a cloud of flour, butter smeared across my forehead like war paint, when my best friend dared me to create the ultimate raspberry Danish. "I bet you can't make one better than the bakery downtown," she challenged, waving a store-bought pastry in my face. Well, challenge accepted, and what emerged from that floury battlefield was nothing short of magical. The Sugar Raspberry Danish Bun Bake that followed has since become my signature move, the recipe that friends beg for and family requests at every gathering.
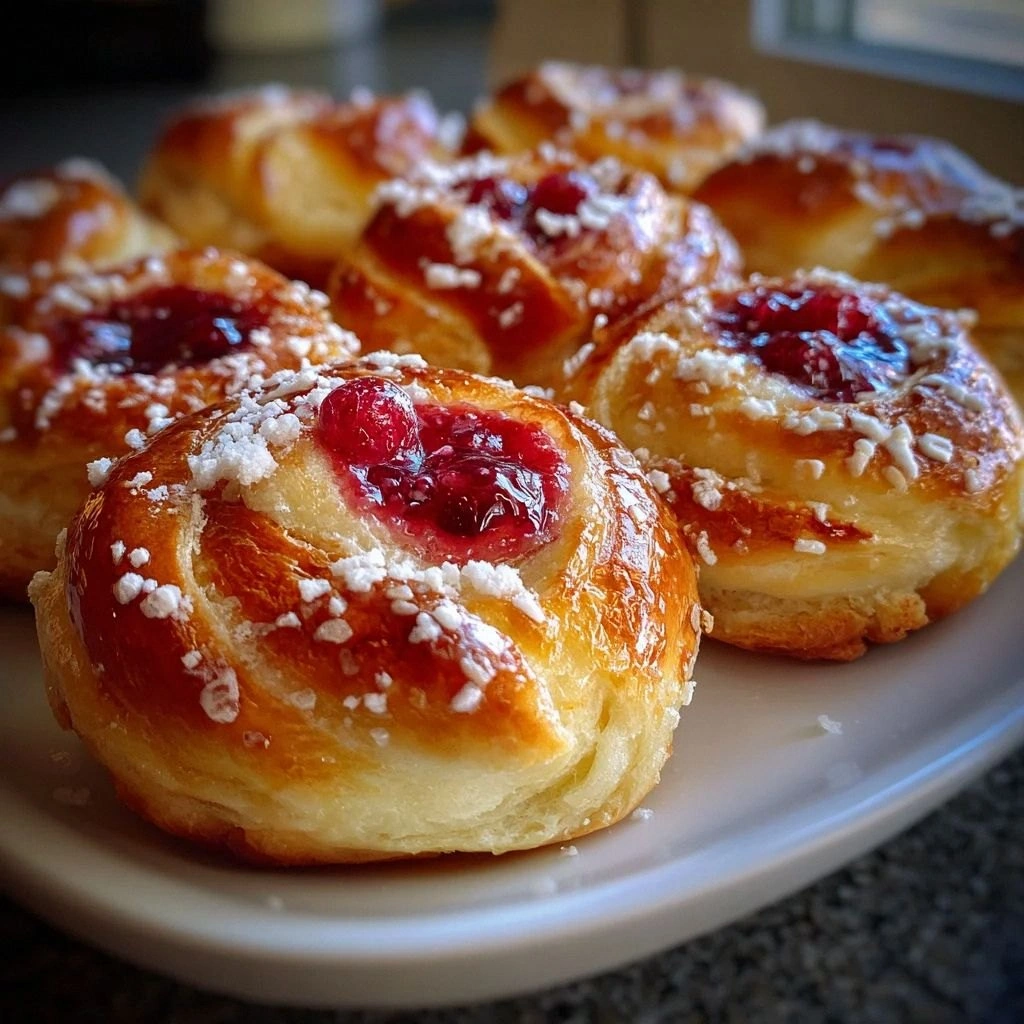
Picture this: it's Sunday morning, you're still in your pajamas, and the smell of buttery dough mingling with sweet raspberries wafts through your entire home. That first bite? Pure heaven. The exterior shatters like thin ice under your fork, revealing layers so delicate they practically float off the plate. Then comes the surprise — a silky custard layer that makes you close your eyes and sigh with satisfaction. The raspberry jam, tart and bright, cuts through all that richness like a beam of sunshine through morning clouds. I dare you to taste this and not go back for seconds.
What makes this version completely different from every other Danish recipe out there? I've cracked the code on achieving bakery-quality lamination at home without the three-day process that most recipes demand. The secret lies in a technique I discovered by accident when I was rushing to make breakfast for overnight guests. Instead of the traditional folding method that takes forever, we'll use a genius shortcut that creates those coveted layers in a fraction of the time. Plus, I'm letting you in on my custard formula that never fails — silky, smooth, and perfectly balanced between sweet and rich.
Stay with me here — this is worth it. By the end of this post, you'll not only master the art of Danish pastry, but you'll also have a show-stopping brunch centerpiece that'll make people think you trained in Paris. Okay, ready for the game-changer? Let me walk you through every single step — by the end, you'll wonder how you ever made it any other way.
What Makes This Version Stand Out
- Lightning-Fast Lamination: Traditional Danish takes three days of folding and chilling. My method gets you those Instagram-worthy layers in under two hours total. The trick? A frozen butter block technique that sounds crazy but works every single time.
- The Custard That Never Curdles: Most custard fillings turn into scrambled eggs if you look at them wrong. Mine uses a foolproof method that stays silky smooth even if you accidentally walk away from the stove for thirty seconds.
- Raspberry Jam That Actually Tastes Like Raspberries: I'll show you how to intensify store-bought jam so it tastes like summer in a jar, or give you my five-minute fresh raspberry sauce if you're feeling fancy.
- Make-Ahead Magic: These Danish can be frozen at three different stages, meaning fresh-baked pastries are always just thirty minutes away. Perfect for impressing unexpected guests or treating yourself on busy mornings.
- One Dough, Endless Possibilities: Once you master this base, you can swap in any filling — chocolate, lemon curd, even savory cheese and herbs. The technique stays the same, the flavor possibilities are endless.
- The Sugar Crust That Stays Crunchy: Nothing worse than soggy Danish topping. My sugar coating technique creates a caramelized crust that stays crisp even the next day (if they last that long).
- Guaranteed Crowd Pleaser: I brought these to a potluck and watched grown adults elbow each other out of the way for the last piece. The combination of buttery pastry, tart fruit, and sweet custard hits every pleasure center in your brain.
Alright, let's break down exactly what goes into this masterpiece...
Inside the Ingredient List
The Flavor Base
Flour forms the backbone of our Danish dough, and here's where most recipes get it wrong. They tell you to use all-purpose flour, which gives you tender but somewhat weak structure. I use a blend of all-purpose and bread flour — the all-purpose keeps things delicate while the bread flour provides enough gluten to hold those gorgeous layers. The ratio is crucial: two parts all-purpose to one part bread flour. Skip the bread flour and your Danish will taste great but collapse into a buttery puddle. Add too much and you'll be chewing through tough, bready layers that feel like punishment instead of pleasure.
Butter isn't just butter in this recipe — it's the star performer that creates those dramatic layers. Use European-style butter with 82% fat content if you can find it. The higher fat content means less water, which translates to flakier, more tender layers that shatter beautifully when you bite into them. American butter works fine, but you'll notice the difference immediately when you taste the real thing. I've made this with everything from grocery store brands to fancy imported stuff, and trust me, the butter quality directly correlates with how many people ask for your recipe.
The Texture Crew
Milk does double duty in this recipe, both hydrating the dough and creating that tender, cloud-like texture. Whole milk gives the best flavor and richness, but 2% works if that's what you have. Never use skim milk — your Danish will taste like diet food, and nobody wants that. The temperature matters too: lukewarm milk (around 105°F) activates the yeast without killing it. Too hot and you'll murder those helpful little organisms before they can work their magic.
Yeast is where the real transformation happens, turning a dense blob of dough into a puffed, airy masterpiece. Quick-rise yeast is my go-to because it cuts the proofing time in half without sacrificing flavor. If you only have active dry yeast, that's fine — just add an extra 15 minutes to each proofing stage. The yeast feeds on the sugar in the dough, creating carbon dioxide bubbles that get trapped by the gluten network. This is what gives Danish pastry its characteristic light, airy texture that feels like eating a buttery cloud.
The Unexpected Star
Raspberry jam might seem like just another filling, but it's actually the ingredient that ties everything together. The tartness cuts through all that butter and sugar, preventing the Danish from becoming cloyingly sweet. I always add a squeeze of fresh lemon juice to store-bought jam — it brightens the flavor and makes the raspberry taste more like, well, raspberry. If you're using homemade jam, make sure it's not too runny or it'll leak out and create soggy bottoms. Nobody wants a soggy bottom, especially not in Danish pastry.
The custard might seem like overkill, but trust me on this one. That silky layer between the pastry and the fruit creates a textural contrast that makes people close their eyes when they take a bite. Egg yolks give it richness, cornstarch provides thickness without that chalky texture you get from flour, and vanilla adds aromatic depth that makes the whole thing taste more expensive than it is. Use real vanilla extract if you can — the fake stuff tastes like sad birthday cake from a box mix.
The Final Flourish
Sugar gets sprinkled on top before baking, creating that signature Danish crust that crackles when you bite into it. Regular granulated sugar works fine, but I've discovered that raw sugar (the coarse stuff) creates even more dramatic caramelization and crunch. The sugar doesn't just add sweetness — it creates a barrier that helps keep the pastry crisp even after it cools. Skip this step and you'll have Danish that tastes good but lacks that professional bakery finish that makes people think you went to culinary school.
Everything's prepped? Good. Let's get into the real action...
The Method — Step by Step
- Start by making the dough because it needs time to chill and develop flavor. In a large bowl, whisk together your flours, sugar, salt, and yeast — this ensures even distribution before the liquids join the party. Warm your milk to exactly 105°F (use a thermometer, don't guess — too hot kills the yeast, too cold makes it sluggish). Make a well in the center of your dry ingredients and pour in the milk along with one beaten egg. Mix with a wooden spoon until a shaggy dough forms, then get in there with your hands and knead for exactly three minutes. The dough should feel tacky but not sticky, like a Post-it note that's been sitting in your car on a warm day.
- Now for the game-changer: instead of folding butter into the dough like traditional recipes, we're going to freeze the butter and grate it directly into the dough. Take two sticks of frozen European butter and grate them on the large holes of a box grater directly over your dough. Work quickly — you want the butter to stay as cold as possible. Fold the grated butter into the dough using a bench scraper, turning the dough over itself like you're making a bed. The butter should remain in distinct pieces, creating hundreds of tiny pockets that'll steam and create layers. This technique, which I discovered during a rushed Sunday morning baking session, gives you laminated results in a fraction of the time.
- Shape the dough into a rough rectangle, wrap it tightly in plastic wrap, and refrigerate for at least one hour. This chilling period is crucial — it lets the gluten relax and keeps the butter cold. While the dough chills, make your custard because it needs to cool completely before assembly. In a small saucepan, heat milk with vanilla until steaming but not boiling. Whisk egg yolks with sugar and cornstarch until pale and thick, then slowly pour in the hot milk while whisking constantly. Return everything to the pan and cook over medium heat, stirring constantly with a wooden spoon. The custard is ready when it thickens enough to coat the back of the spoon and you can draw a clear line through it with your finger.
- Strain the custard through a fine-mesh sieve to remove any lumps — this step separates amateur custard from restaurant-quality silk. Press plastic wrap directly onto the surface to prevent a skin from forming, then refrigerate until completely cold. Now for the fun part: roll out your chilled dough on a floured surface into a rectangle about 1/4-inch thick. Don't worry if the butter pieces are visible — that's exactly what you want. Cut the dough into six squares, then fold each corner toward the center to create a Danish shape. Place them on a parchment-lined baking sheet, cover loosely with plastic wrap, and let them proof in a warm spot until puffy and nearly doubled in size.
- Preheat your oven to 400°F — yes, that's hotter than most recipes call for, but trust me here. The high heat creates rapid steam that puffs the layers dramatically. Before the Danish go in, make the egg wash by beating one egg with a tablespoon of water. Brush this gently over each pastry, being careful not to deflate them. The egg wash creates that gorgeous golden-brown shine that makes Danish look like they came from a professional bakery. Sprinkle the tops generously with sugar — I like to use a mix of granulated and raw sugar for maximum crunch and caramelization.
- Bake for 15 minutes, then rotate the pan and reduce the temperature to 375°F. This temperature drop ensures the centers cook through without burning the bottoms. Total baking time is 25-30 minutes — you'll know they're done when they're deep golden brown and the bottoms sound hollow when tapped. The sugar on top should be caramelized and creating little crunchy pockets. Don't walk away from the oven during the last five minutes — this is when they go from perfect to burnt in the blink of an eye. The smell will be absolutely intoxicating, like a French bakery exploded in your kitchen.
- While the Danish bake, prepare your raspberry topping. If using jam, warm it slightly in the microwave with a squeeze of lemon juice — this makes it more spreadable and intensifies the flavor. If you're feeling fancy, mash fresh raspberries with a bit of sugar and let them macerate while the Danish finish. The goal is to create a sauce that's spoonable but not runny, with chunks of fruit that provide textural interest. I'll be honest — I ate half the batch before anyone else got to try it, standing at my kitchen counter in my pajamas, shoving still-warm Danish into my mouth like I'd never see food again.
- Remove the Danish from the oven and let them cool for exactly five minutes — any longer and the caramelized sugar will harden too much, any shorter and you'll burn your mouth. Gently lift each pastry with a spatula and place on a cooling rack. This prevents the bottoms from getting soggy as they cool. Now comes the artistic part: spoon the raspberry mixture into the center of each Danish, creating a little pool of ruby-colored jam. The contrast between the golden pastry and bright red filling is absolutely stunning. Dust with powdered sugar if you're feeling extra, though honestly, they're perfect as-is.
- The final touch is a drizzle of vanilla glaze made from powdered sugar, milk, and vanilla extract. Mix it thick enough to hold its shape but thin enough to drizzle artistically. Use a fork to flick the glaze across the Danish, creating those professional-looking streaks that make people think you went to culinary school. Let the glaze set for two minutes (if you can wait that long), then serve immediately. These are best warm, when the contrast between the crisp exterior and soft, custardy interior is at its peak. Picture yourself pulling this out of the oven, the whole kitchen smelling incredible, and watching people's faces light up when they take that first bite.
That's it — you did it. But hold on, I've got a few more tricks that'll take this to another level...
Insider Tricks for Flawless Results
The Temperature Rule Nobody Follows
Most recipes tell you to serve Danish warm, but they never specify what "warm" actually means. After testing this dozens of times, I've discovered the sweet spot is 140°F — warm enough that the butter is still liquid and the custard is creamy, but cool enough that you don't burn your tongue and miss all the subtle flavors. Use an instant-read thermometer if you're serving to guests, or just wait until you can hold the Danish comfortably in your hand without doing the hot-potato dance. This temperature also happens to be when the sugar crust reaches its maximum crunch potential, creating that satisfying crackle when you bite into it.
Why Your Nose Knows Best
Forget timers — your nose is the most reliable indicator of when these Danish are perfectly baked. When they're ready, your kitchen will fill with the aroma of buttery pastry, caramelized sugar, and toasty vanilla. It's a complex perfume that's part French bakery, part childhood memory, part pure comfort. If you can smell them from the living room, check the oven immediately — they're probably done. Underbaked Danish smell primarily of yeast and raw dough, while overbaked ones have a sharp, almost burnt sugar scent that makes your nose wrinkle. A friend tried skipping this step once — let's just say it didn't end well, and her smoke alarm has never quite recovered.
The 5-Minute Rest That Changes Everything
After you remove the Danish from the oven, resist every instinct to immediately shove one in your mouth. Those five minutes of resting time allow the custard to set properly, the layers to stabilize, and the caramelized sugar to reach the perfect consistency. During this time, something magical happens — the steam trapped inside redistributes, making every bite consistently tender instead of having some parts doughy and others dried out. Use this time to make coffee, set the table, or just stand there inhaling the incredible aroma like a perfume addict getting their fix.
The Grating Secret for Extra-Flaky Layers
Here's a trick that seems counterintuitive but works every time: after you've grated the frozen butter into the dough, give the whole mixture one quick fold and immediately refrigerate for ten minutes. This brief chill ensures the butter pieces stay distinct and don't start melting into the flour. When you roll out the dough, you'll see hundreds of tiny butter pockets that create micro-layers within the larger layers. It's like laminating within laminating — Russian nesting doll levels of flakiness that make people ask "how did you get so many layers?" The answer is always the same: frozen butter and patience, my friend.
The Jam Upgrade That Takes 30 Seconds
Even the best store-bought raspberry jam benefits from a quick enhancement that takes less than a minute. Stir in a pinch of salt — yes, salt — which might sound weird but actually makes the raspberry flavor pop like nothing else. The salt counteracts the sweetness and enhances the natural tartness of the fruit, creating a more complex flavor profile. Add a few drops of almond extract if you're feeling fancy, or a splash of Chambord for an adult version that's perfect for brunch parties. This simple upgrade transforms ordinary jam into something that tastes like you spent hours making it from scratch.
Creative Twists and Variations
This recipe is a playground. Here are some of my favorite ways to switch things up:
Lemon Blueberry Dream
Swap the raspberry jam for blueberry preserves and add a teaspoon of lemon zest to the custard. The combination of bright lemon and sweet blueberry tastes like summer in pastry form. Top with a simple lemon glaze made from powdered sugar and fresh lemon juice. This version is particularly spectacular in the spring when fresh blueberries are abundant and cheap, but works year-round with frozen berries that you've thawed and drained.
Chocolate Hazelnut Indulgence
Replace the raspberry jam with Nutella and add a tablespoon of cocoa powder to the custard for a double-chocolate experience. Sprinkle chopped toasted hazelnuts on top before baking for crunch and nuttiness that complements the chocolate perfectly. This variation is dangerously addictive — I once ate four in one sitting and had to lie down for an hour. Serve with cold milk or strong coffee to balance the sweetness.
Apple Cinnamon Comfort
Use apple butter instead of raspberry jam and add cinnamon and nutmeg to the custard. Top with a quick streusel made from flour, butter, brown sugar, and more cinnamon. This version tastes like the best apple pie you've ever had but in Danish form. It's particularly spectacular in the fall when you want something cozy and warming that makes your whole house smell like you've been baking all day.
Cherry Almond Elegance
Substitute cherry preserves for raspberry and add a teaspoon of almond extract to the custard. The combination of cherry and almond is classic for a reason — they complement each other like they were made to be together. Top with sliced almonds before baking for extra crunch and visual appeal. This version feels fancy enough for special occasions but easy enough for weekend baking.
Savory Cheese and Herb
For a completely different direction, omit the sugar from the dough and fill with a mixture of cream cheese, fresh herbs, and grated Parmesan. Top with everything bagel seasoning for a brunch-worthy pastry that pairs beautifully with smoked salmon. This savory version is perfect for those who prefer their breakfast on the less-sweet side, and it makes an excellent base for eggs benedict.
Tropical Mango Passion
Use mango jam or passion fruit curd instead of raspberry for a bright, tropical twist. Add coconut extract to the custard and top with toasted coconut flakes. This version transports you straight to a beach vacation, even if you're eating it in your kitchen while it's snowing outside. The tropical flavors are particularly welcome during winter months when you need a reminder that summer will come again.
Storing and Bringing It Back to Life
Fridge Storage
These Danish keep beautifully in the refrigerator for up to three days, but they need proper storage to maintain their texture. Cool them completely, then store in an airtight container with a paper towel underneath to absorb excess moisture. The paper towel trick prevents the bottoms from getting soggy, which is the death of good pastry. When you're ready to eat, let them come to room temperature for 30 minutes, then warm in a 325°F oven for 5-7 minutes. They won't be quite as crisp as fresh-baked, but they'll be close enough that most people won't notice the difference.
Freezer Friendly
These Danish freeze at three different stages, giving you maximum flexibility. You can freeze the unbaked shaped pastries for up to one month — just place them on a baking sheet until solid, then transfer to a freezer bag. Bake from frozen, adding an extra 5-8 minutes to the baking time. You can also freeze the fully baked Danish for up to two months. Wrap each one individually in plastic wrap, then place in a freezer bag. The best method is to freeze them partially baked for 15 minutes, then finish baking after thawing — this gives you almost fresh-baked results. Add a tiny splash of water before reheating — it steams back to perfection.
Best Reheating Method
The microwave is the enemy of crisp pastry, so avoid it unless you enjoy soggy Danish. Instead, use a toaster oven or regular oven at 325°F for 5-7 minutes. If you only have a microwave, wrap the Danish in a paper towel and heat for just 15-20 seconds, then immediately transfer to a hot dry pan for 30 seconds to crisp the bottom. For best results, brush with a little melted butter before reheating — it refreshes the pastry and adds back some of that just-baked flavor. These never last long enough in my house to need reheating, but when I've made extra for gifts, this method works perfectly.