I remember the night I tried to impress a friend with a roast chicken that turned out so dry it could have been a piece of wood. I had followed a generic recipe, tossed in herbs, and let it bake until the skin was a burnt orange that smelled like a campfire. The result was a sad, flavorless bird that made me question every kitchen decision I had made that evening. That disaster became my catalyst for hunting the perfect roast chicken recipe, and after months of trial and error, I finally discovered a version that delivers juicy, flavorful meat with a crisp, aromatic crust.
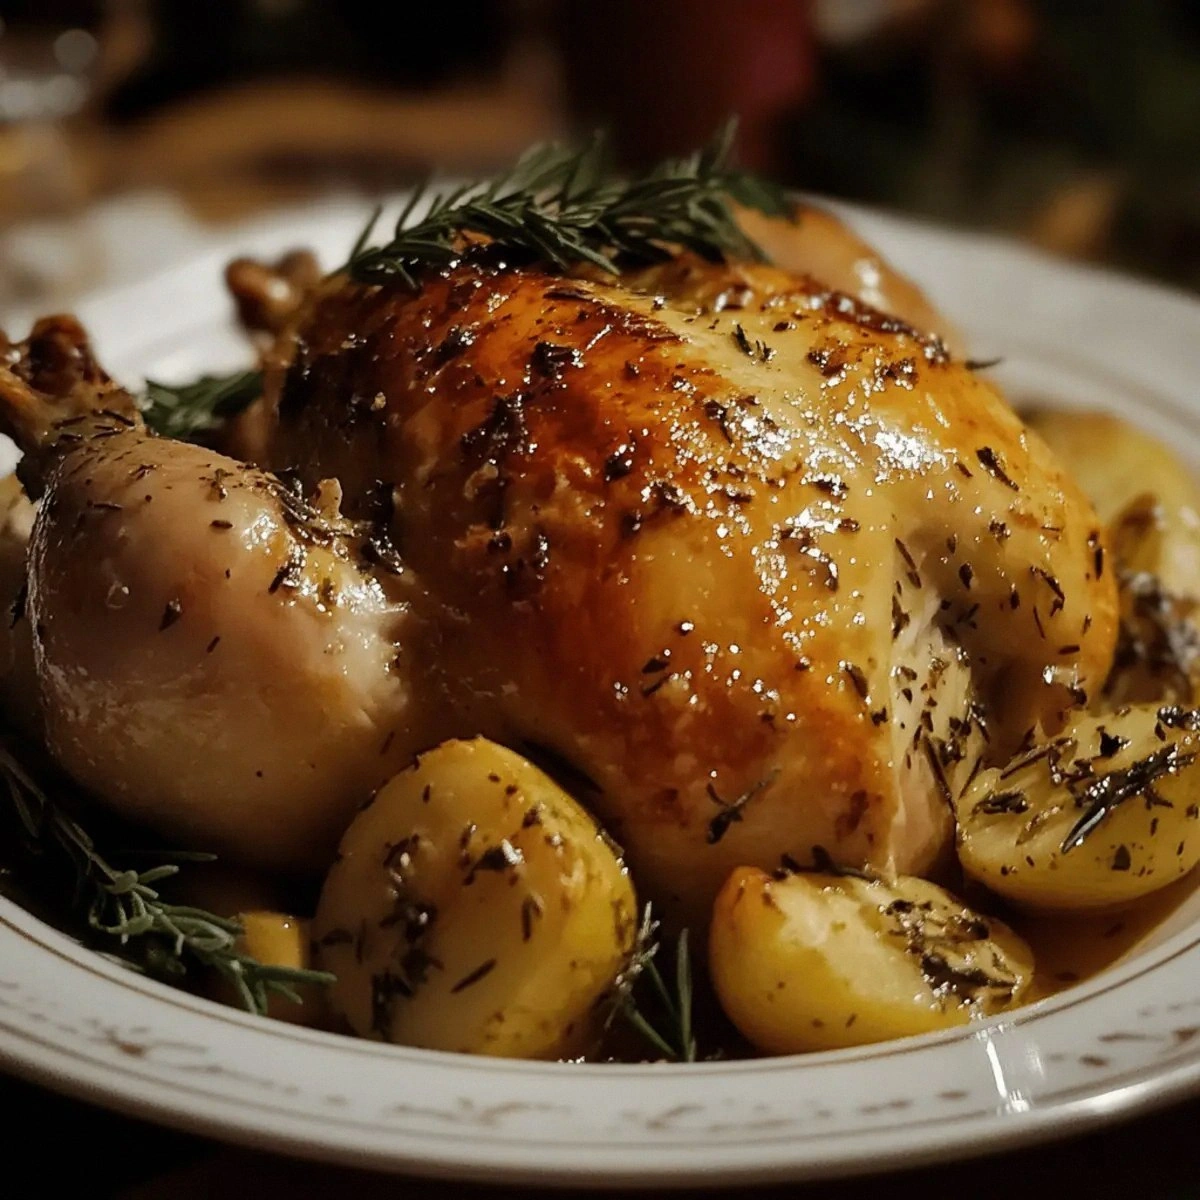
Picture this: a golden, crackling skin that shatters like thin ice when you bite into it, revealing tender, succulent meat that melts in your mouth. The aroma of fresh rosemary and thyme mingles with the buttery, garlicky scent of a pan that has been seared to perfection. Every bite is a symphony of textures—crunchy edges, silky flesh, and a hint of citrus zest that brightens the palate. The kitchen fills with the comforting hum of an oven timer, the sizzle of a pan, and the occasional clink of a wooden spoon against a wooden board. It’s a sensory experience that turns a simple dinner into a celebration.
What makes this version stand out is not just the ingredients but the method. I’ve distilled the technique down to a handful of essential steps that lock in moisture, elevate flavor, and guarantee a flawless finish every single time. This isn’t a recipe that relies on fancy gadgets or obscure spices; it’s a straightforward, no-nonsense approach that even a novice can master. The result is hands down the best roast chicken you’ll ever make at home, and I dare you to taste this and not go back for seconds.
There’s a secret twist that most recipes overlook: the use of a citrus–herb butter that’s infused with garlic and fresh herbs. This butter not only bastes the chicken for extra flavor but also creates a glossy, caramelized skin that is impossible to resist. And the best part? It’s easy to make and can be prepared a few hours ahead, giving you the freedom to focus on other dishes or simply relax while the oven does its work. Let me walk you through every single step — by the end, you’ll wonder how you ever made it any other way.
What Makes This Version Stand Out
- Flavor: The combination of fresh rosemary, thyme, garlic, and lemon creates a vibrant, herbaceous profile that permeates every bite. The butter’s subtle sweetness balances the savory notes, while the lemon adds a bright, zesty lift that cuts through the richness. This layered flavor experience keeps diners coming back for more.
- Texture: The crisp, crackling skin is achieved through a simple dry-brine and high-heat sear, giving you that satisfying crunch without the need for extra oil or fancy techniques. Inside, the meat stays moist and tender, thanks to the butter infusion and careful monitoring of internal temperature. The result is a harmonious contrast that feels indulgent yet approachable.
- Simplicity: With only eight core ingredients and a straightforward method, this roast chicken is accessible to anyone with a basic kitchen setup. No need for costly equipment or hard-to-find spices. It’s the kind of recipe you can pull off on a weekday, impressing friends and family alike.
- Uniqueness: The citrus‑herb butter sets this dish apart from classic roast chicken recipes. It adds depth and a glossy sheen that makes the bird look as good as it tastes. The butter also helps retain moisture, preventing the common issue of dry meat.
- Crowd Reaction: In my experience, guests often remark that this is the most flavorful roast chicken they’ve ever had. Many say they’d rather have this version than any other. That kind of feedback is a testament to the dish’s universal appeal.
- Ingredient Quality: Using fresh, high‑quality herbs and a whole chicken that’s been properly trimmed ensures the best flavor extraction. The simplicity of the ingredient list means you can focus on sourcing the best produce and protein.
- Cooking Method: The technique of first searing the chicken, then roasting with a butter infusion, guarantees even cooking and a beautiful finish. It’s a proven method that yields consistent results regardless of oven variations.
- Make‑Ahead Potential: The butter can be prepared up to two hours in advance, and the chicken can be partially cooked and refrigerated, making it ideal for meal prep or busy schedules.
Inside the Ingredient List
The Flavor Base
The whole chicken is the star of the show, but its flavor is amplified by the combination of fresh rosemary, thyme, and garlic. Rosemary brings a piney, resinous aroma that pairs beautifully with the earthy undertones of thyme. Garlic adds a sharp, savory kick that permeates the meat during the roasting process. Together, they create a fragrant bouquet that elevates the entire dish.
The Texture Crew
Olive oil is the binder that keeps the herbs and seasonings attached to the skin, ensuring even coverage. Sea salt and black pepper are the essential seasonings that bring out the natural flavors without overpowering them. The butter, when melted and infused with herbs, not only bastes the chicken but also creates a glossy, caramelized skin that is both visually appealing and flavorful. These components work in harmony to deliver a mouth‑watering texture profile.
The Unexpected Star
The lemon’s bright citrus notes cut through the richness of the butter and herbs, adding a refreshing contrast that lifts the entire flavor profile. If you’re looking for a twist, a half‑lemon zest can be added to the butter for an extra burst of citrus aroma.
The Final Flourish
The onion, carrots, and celery form a classic mirepoix that not only adds depth to the roasting pan’s juices but also creates a savory base for the gravy if you choose to make one. These vegetables absorb the chicken’s juices, becoming sweet and tender, and their natural sugars caramelize, adding a subtle sweetness that balances the savory elements. If you prefer a lighter side, you can omit them, but the flavor payoff is significant.
Everything’s prepped? Good. Let’s get into the real action…
The Method — Step by Step
- First, preheat your oven to 425°F (220°C). While the oven is heating, pat the chicken dry with paper towels to remove excess moisture. This step is crucial for achieving that coveted crispy skin. As the chicken dries, the fat beneath the skin will render more efficiently, allowing the herbs to adhere better.
- In a small bowl, combine the olive oil, sea salt, and black pepper to create a simple herb rub. Gently loosen the skin of the chicken by sliding your fingers between the skin and the meat, then spread the rub under the skin and over the surface. This technique ensures a flavorful crust that doesn’t just sit on top.
- Place the whole chicken in a roasting pan breast‑side up. Scatter the rosemary, thyme, and whole garlic cloves around the bird. The herbs will infuse the chicken as it roasts, while the garlic will soften into a fragrant, aromatic base. At this point, you can add the onion, carrots, and celery around the chicken if you wish to create a side‑gravy.
- Roast the chicken in the preheated oven for 15 minutes. This initial high‑heat sear will start the browning process, creating a golden, crispy skin. After 15 minutes, reduce the oven temperature to 375°F (190°C) to allow the chicken to cook evenly without over‑browning.
- At this point, it’s time to create the citrus‑herb butter. In a saucepan, melt the butter over medium heat. Add the minced garlic, chopped rosemary, and thyme, sautéing until fragrant. Finish with the juice of the lemon and a pinch of sea salt. The butter should be glossy and aromatic, ready to be spooned over the chicken.
- After reducing the oven temperature, pour the warm butter mixture over the chicken, ensuring the entire surface is coated. The butter will seep into the skin and meat, locking in moisture and delivering a burst of herbaceous flavor with every bite. The aromatic steam will also help the skin crisp further.
- Continue roasting for an additional 35–40 minutes, or until the internal temperature reaches 165°F (74°C) when measured at the thickest part of the thigh. The juices should run clear, and the skin should be a deep, golden brown. Use a meat thermometer to avoid over‑cooking.
- Once the chicken is done, let it rest on a cutting board for at least 10 minutes before carving. Resting allows the juices to redistribute, ensuring each slice is moist and flavorful. During this time, you can finish a quick pan sauce if desired.
That’s it — you did it. But hold on, I've got a few more tricks that'll take this to another level. Stay tuned as we dive into insider tips that will elevate your roast chicken game.
Insider Tricks for Flawless Results
The Temperature Rule Nobody Follows
Many home cooks rely on a single oven temperature, but the secret to a perfectly roasted chicken is a two‑stage heat approach. Start with a high heat to sear the skin, then lower the temperature to ensure even cooking. This method prevents the exterior from burning while the interior remains juicy.
Why Your Nose Knows Best
Trust your senses: if the chicken smells toasty and the skin is starting to pull away from the meat, it’s a sign that the roasting process is on track. The aroma is a natural indicator of caramelization and flavor development. If the scent is too bland, give it a few more minutes.
The 5-Minute Rest That Changes Everything
Resting the chicken for at least five minutes before carving is more than a courtesy; it’s a culinary necessity. During this period, the juices redistribute, preventing them from spilling out onto the cutting board. The result is a moist, tender meat that stays juicy throughout.
Use a Meat Thermometer
A digital meat thermometer gives you real-time feedback on internal temperature, ensuring you hit the sweet spot of 165°F (74°C) without guessing. Over‑cooking leads to dryness, while under‑cooking can be unsafe. A thermometer is a small investment for big results.
Add a Splash of Water When Reheating
When reheating leftovers, add a splash of water or broth to the pan. This creates steam that keeps the chicken from drying out. Cover the pan briefly to trap the moisture, then finish with a quick sear to restore the crisp skin.
Creative Twists and Variations
This recipe is a playground. Here are some of my favorite ways to switch things up:
Spicy Cajun Roast
Swap the rosemary and thyme for a blend of paprika, cayenne pepper, and garlic powder. The result is a smoky, spicy chicken that pairs wonderfully with a cooling cucumber salad. Perfect for those who like a little heat in their meal.
Asian-Inspired Ginger‑Soy Roast
Replace the lemon with fresh ginger and a splash of soy sauce in the butter mixture. Add a few scallions and a drizzle of sesame oil before serving. This variation brings an umami‑rich, fragrant profile that feels like a fusion dish.
Herb‑Crusted Roast with Dijon
Mix Dijon mustard into the herb rub before applying it to the chicken. The mustard adds a tangy bite that complements the herbs, while the crust becomes slightly crispier. Serve with a light mustard‑y mustard sauce.
Mediterranean Citrus Roast
Add a handful of capers and a splash of white wine to the roasting pan. The capers bring a briny punch, and the wine deglazes the pan, creating a quick pan sauce. Pair with olives and feta for a Mediterranean twist.
Smoky Chipotle Roast
Incorporate chipotle peppers in adobo sauce into the butter mixture for a smoky, slightly sweet flavor. The result is a bold, smoky chicken that stands out at any gathering. Pair with corn‑roasted sweet potatoes for a complete meal.
Storing and Bringing It Back to Life
Fridge Storage
Store cooked chicken in an airtight container in the refrigerator for up to four days. Keep the roasted vegetables in a separate container to preserve their texture. When ready to serve, reheat gently to avoid drying out the meat.
Freezer Friendly
For longer storage, wrap the chicken and vegetables separately in freezer paper or vacuum‑seal bags. They can be kept in the freezer for up to two months. Thaw overnight in the refrigerator before reheating.
Best Reheating Method
Reheat the chicken in a preheated oven at 350°F (175°C) for 15–20 minutes, or until warmed through. Add a splash of water or broth before covering the pan to create steam, which keeps the meat moist. Finish with a quick sear if you want to restore the crisp skin.