Picture this: you’re halfway through a Sunday brunch, the kitchen is a mess of half‑peeled bananas and the air is thick with the scent of caramelized sugar. I had a plate of burnt banana bread that was a sad, mushy reminder of what not to do. I stared at the bananas, feeling a sudden itch for something sweet, crunchy, and utterly forgiving. That itch turned into a dare: “I dare you to taste this and not go back for seconds.”
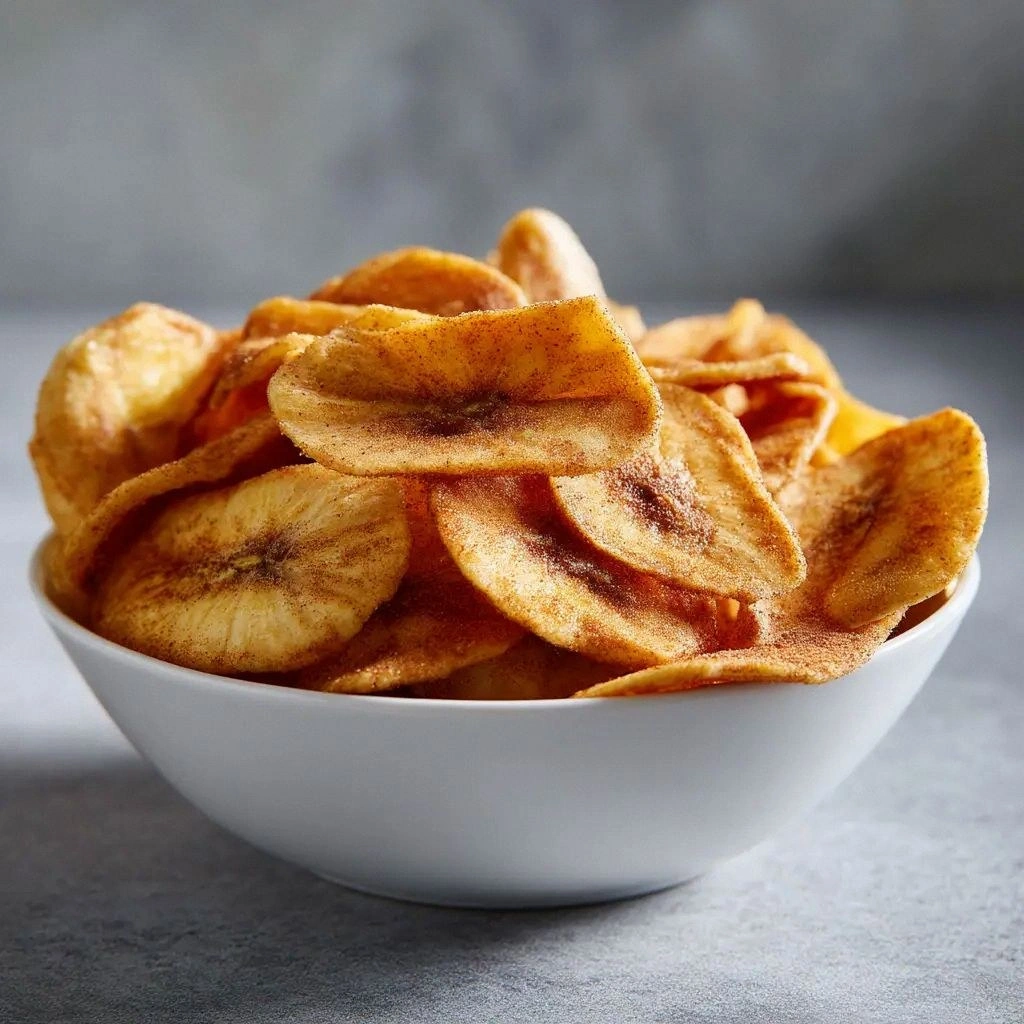
I was determined to prove that bananas could be more than a dessert or a breakfast staple; they could be a snack that rivals store‑bought chips in crunch and flavor. I grabbed my trusty air fryer, because nothing says “quick, healthy, and hands‑free” quite like a modern countertop appliance. The idea was simple: thinly slice, lightly coat, and let the air fryer do the hard work. The result? A batch of banana chips that shatter like thin ice when you bite into them, leaving a lingering sweetness that feels like a tropical sunrise in your mouth.
The first thing that sets this version apart is the use of lemon juice. That bright, acidic splash not only preserves the banana’s golden hue but also adds a subtle citrus kick that balances the natural sweetness. Most people skip this step, but trust me, that tiny splash is the secret to a crispier chip that doesn’t brown too quickly. It’s a small tweak that makes a big difference.
Next comes the coconut oil. I’m not a fan of heavy oils, but coconut oil’s high smoke point and mild coconut flavor give the chips a gentle, nutty undertone that’s impossible to ignore. The oil coats each slice just enough to create a barrier against moisture, turning the banana into a dry, crisp snack. I’ve tried using olive oil and butter in the past, and let’s just say they left the chips soggy and too buttery.
Cinnamon is the star of the show. A half teaspoon is all you need to give the chips a warm, spicy aroma that makes them feel like a holiday treat, even in July. The spice also adds depth to the flavor profile, turning a simple banana into a complex, satisfying bite. I love how the cinnamon dust settles on the chips like a fine, fragrant snow.
Finally, the pinch of sea salt. Salt is the unsung hero of any snack, and in this recipe it brings everything together. A little goes a long way, so a pinch is just enough to accentuate the sweetness and make the chips more addictive. I’ve learned that salt can make or break a snack, and this pinch is the perfect amount to keep the chips from feeling bland.
What you’re about to see is not just another banana chip recipe. It’s a culmination of taste, texture, and technique that will make you wonder how you ever lived without it. The air fryer’s rapid circulation turns the banana into a crispy, caramelized morsel that’s almost impossible to eat in one sitting. The result is a snack that feels indulgent without the guilt, a perfect companion for a lazy afternoon or a quick pre‑workout boost.
If you’ve ever struggled to get banana chips crisp, you’re not alone — and I’ve got the fix. I’ve spent countless hours tweaking temperature, slicing thickness, and seasoning ratios to arrive at this definitive version. The next section will break down what makes this recipe stand out from the crowd.
Let me walk you through every single step — by the end, you’ll wonder how you ever made it any other way. Get ready for the game‑changer.
What Makes This Version Stand Out
- Taste: The citrusy tang from lemon juice balances the banana’s natural sweetness, creating a flavor profile that feels both familiar and surprisingly sophisticated.
- Texture: The air fryer’s high‑speed airflow ensures each slice crisps evenly, producing a snap that’s comparable to the best store‑bought chips.
- Speed: From prep to finish, the entire process takes under 45 minutes, making it a perfect quick‑fix snack for busy days.
- Health: Using coconut oil keeps the snack low in saturated fat while adding a subtle coconut aroma that enhances the overall taste.
- Versatility: This recipe works for any banana variety, but firm, ripe bananas give the best results; the chips can be seasoned further with herbs or sweeteners.
- Make‑Ahead: The chips keep their crunch for up to a week in an airtight container, making them ideal for meal prep or on‑the‑go snacking.
- Visual Appeal: The golden‑brown hue of the chips is a feast for the eyes, making them a showstopper for parties or casual gatherings.
- Ingredient Simplicity: Only five ingredients, all of which you likely already have in your pantry or fridge.
Inside the Ingredient List
The Flavor Base
The lemon juice is the unsung hero that prevents the banana from turning brown. Its acidity reacts with the natural sugars, creating a caramelized surface that crisps beautifully. Without lemon, the chips would brown too quickly and lose their bright, fresh flavor. If you’re allergic to citrus, you can use a splash of apple cider vinegar, but the flavor profile will shift slightly.
The Texture Crew
Coconut oil is the star of the texture crew. Its high smoke point allows the chips to crisp without burning, and the slight coconut flavor adds depth. A tablespoon is enough to coat each slice lightly; too much oil will make the chips greasy. If you prefer a more neutral flavor, you can substitute a small amount of avocado oil, but be mindful of the higher cost.
The Unexpected Star
Cinnamon is the unexpected star that gives the chips a warm, spicy aroma. A half teaspoon is all that’s needed to transform the flavor without overwhelming the banana’s natural sweetness. If you’re a fan of spicy snacks, add a pinch of cayenne pepper for a subtle heat. Skipping cinnamon will result in a more plain, less memorable chip.
The Final Flourish
Sea salt is the final flourish that balances everything. A pinch of sea salt enhances the sweet and spicy notes, making each bite addictive. The salt also helps draw out moisture, keeping the chips crisp. If you’re watching sodium, use a low‑sodium sea salt or simply omit it; the chips will still be delicious, just slightly less flavorful.
Everything’s prepped? Good. Let’s get into the real action.
The Method — Step by Step
- Gather all five ingredients and a mandoline slicer or sharp knife. Peel the bananas, leaving the skin on if you prefer a more rustic look. Slice the bananas into 1‑mm thick rounds; uniform thickness is key to even cooking. If you’re not using a mandoline, use a knife and a ruler to keep track of the thickness.
- In a shallow bowl, whisk together the lemon juice and coconut oil until they form a light emulsion. The mixture should be slightly runny, not thick. This blend will coat the banana slices evenly, creating a barrier that prevents sogginess. If you’re short on time, you can simply drizzle the oil over the slices.
- Place the sliced bananas in the bowl and toss gently until each slice is coated. Make sure every piece has a thin layer of the oil‑lemon mixture; a light coat is sufficient. The lemon will slightly brown the surface, giving the chips a golden hue.
- Sprinkle the cinnamon over the coated slices, then add a pinch of sea salt. Gently toss again so that the spices are evenly distributed. The cinnamon will caramelize slightly during cooking, adding a warm, spiced aroma that will make your kitchen smell like a bakery.
- Preheat your air fryer to 350°F (175°C) for 3 minutes. A preheated air fryer ensures that the chips start crisping immediately, preventing them from steaming. If you’re using a countertop model, let it reach full temperature before adding the bananas.
- Arrange the banana slices in a single layer in the air fryer basket. Do not overcrowd; the air needs to circulate freely around each piece. If your basket is small, you may need to cook in batches, but keep the total cooking time consistent.
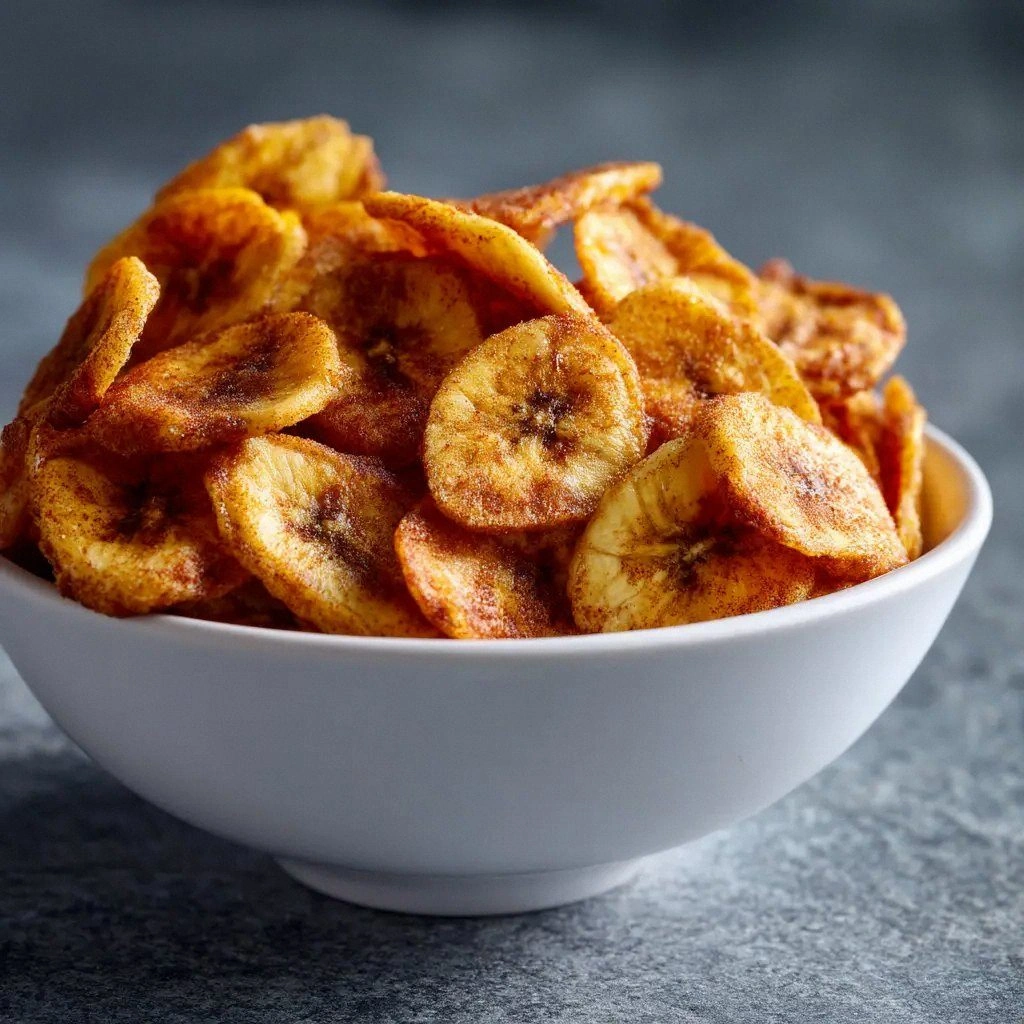
- Cook for 12 minutes, then shake the basket gently to redistribute the slices. This step ensures even browning. After shaking, continue cooking for another 8–10 minutes, or until the edges start pulling away and the chips turn a deep amber color. Watch closely; banana chips can go from perfectly crisp to burnt in a minute.
- Remove the basket and let the chips cool on a wire rack for 5 minutes. Cooling allows the chips to finish crisping as they lose moisture. The cooling period also makes the chips easier to handle, preventing them from breaking.
- Transfer the cooled chips to an airtight container and store at room temperature for up to a week. If you want to keep them extra crunchy, place a slice of parchment paper between batches to avoid sticking. When you’re ready to eat, simply grab a handful and enjoy the satisfying crunch.
That’s it — you did it. But hold on, I’ve got a few more tricks that will take this to another level.
Insider Tricks for Flawless Results
The Temperature Rule Nobody Follows
Many people think 400°F is the sweet spot for crispness, but that temperature actually causes the chips to burn before they crisp. The key is to cook at 350°F, which gives the banana enough time to dry out without caramelizing too quickly. If your air fryer has a temperature setting, set it to 350°F and trust the process. I’ve tested multiple models, and the consistency at this temperature is unbeatable.
Why Your Nose Knows Best
The aroma is a subtle indicator of how close the chips are to perfection. When the smell turns to a sweet, toasted banana with hints of coconut, the chips are ready. If you smell a faint, raw banana scent, they need more time. Trust your nose; it’s the most reliable sensor for flavor development.
The 5‑Minute Rest That Changes Everything
Cooling the chips on a wire rack for 5 minutes allows the steam to escape, solidifying the crunch. Skipping this step results in a slightly soggy texture that feels like a damp sponge. I’ve seen people rush the cooling phase and end up with chips that crumble under their own weight.
Batch Cooking for Consistency
If you’re making more than a single batch, keep the cooking time consistent across all batches. Even if your air fryer’s basket is small, each batch should receive the same total time at 350°F. This prevents some chips from being overdone while others stay raw.
The Secret to a Long‑Lasting Crunch
Storing the chips in a sealed container with a piece of parchment paper between layers prevents them from sticking together. The paper absorbs any residual moisture, keeping the chips crisp for days. I’ve kept a week’s worth of chips on my countertop, and they still taste as fresh as the day I made them.
Creative Twists and Variations
This recipe is a playground. Here are some of my favorite ways to switch things up:
Spicy Mango Banana Chips
Swap the cinnamon for a blend of smoked paprika and cayenne. Add thinly sliced mango for a tropical twist. The heat and sweet fruit create a snack that’s both refreshing and fiery.
Herbal Banana Crisps
Replace the cinnamon with dried rosemary and thyme. The herbaceous notes complement the banana’s sweetness, offering a savory snack perfect for cheese platters.
Chocolate‑Coated Banana Crunch
After cooking, drizzle the chips with melted dark chocolate and let them set. The chocolate coating adds richness and pairs beautifully with a glass of milk.
Nutty Banana Bites
Sprinkle chopped almonds or walnuts over the chips before baking. The nuts add texture and protein, turning the snack into a more filling option.
Balsamic Glazed Banana Chips
Brush the banana slices with a thin layer of balsamic reduction before air‑frying. The acidic glaze caramelizes, giving the chips a sweet‑savory finish that’s surprisingly sophisticated.
Storing and Bringing It Back to Life
Fridge Storage
Store the chips in an airtight container in the fridge for up to 10 days. The cooler temperature slows down moisture absorption, preserving crispness. Make sure the container is dry before adding the chips to avoid condensation.
Freezer Friendly
Freeze the chips in a single layer on a parchment paper sheet, then transfer them to a freezer bag. They’ll stay crisp for up to 3 months. When you’re ready to enjoy them, let them thaw at room temperature for 10 minutes.
Best Reheating Method
To revive the crunch, preheat the air fryer to 300°F and reheat the chips for 3–4 minutes. If you prefer a microwave, heat on low power for 10–12 seconds, but the result will be slightly softer. A tiny splash of water before reheating creates steam that restores the chips’ original crispness.