Picture this: I’m standing in my kitchen, a half‑finished batch of brownies in the oven, and the timer is ticking down to the last minute. I glance at the clock, take a deep breath, and realize that the whole room is already filled with the sweet, rich aroma of cocoa and butter. That moment was my culinary epiphany—one that turned a standard almond flour chocolate brownie into a show‑stopper. I dared myself to create a version that would make people gasp, and the result was a silky, fudgy treat that even the most skeptical chocoholics can’t resist.
When I first cracked the egg, I could almost taste the anticipation—an almost tangible buzz that comes from the promise of something extraordinary. The almond flour clumped together, forming a light, airy base that felt like a secret ingredient waiting to be revealed. I could hear the sizzle of the butter melting, a gentle hiss that whispered “this is going to be good.” And when the chocolate began to melt, it drizzled into the batter like velvet, coating every grain of almond flour with a glossy, irresistible sheen.
If you’ve ever tried a brownie that’s either too dense or too dry, you know the disappointment. This version flips that narrative. The almond flour gives it a tender crumb that practically melts in your mouth, while the cocoa powder brings depth without bitterness. The butter melts into the mix, creating a glossy finish that’s as beautiful as it is delicious. And the secret? A splash of sea salt that brings everything together, turning a simple dessert into a gourmet experience.
I’m not just talking about the taste—this is a full sensory experience. The first bite feels like a soft, chocolatey hug that leaves you craving more. The texture is a harmonious blend of fudgy and cake-like, with a subtle crunch from the almond flour. The finish is smooth, with a lingering hint of vanilla and sea salt. Let me walk you through every single step—by the end, you’ll wonder how you ever made it any other way.
What Makes This Version Stand Out
- Texture: The almond flour creates a moist, cake-like crumb that’s surprisingly light for a brownie, giving you that melt-in-your-mouth feel that’s hard to find in traditional recipes.
- Flavor: The combination of unsweetened cocoa and a touch of sea salt elevates the chocolate profile, allowing the natural sweetness of the almond flour to shine without overpowering.
- Simplicity: With just eight core ingredients, this recipe keeps the kitchen chaos at bay while delivering a professional‑grade result that feels homemade.
- Gluten‑Free: The almond flour base makes these brownies safe for gluten‑sensitive diners, without sacrificing the indulgent chocolate experience.
- Make‑Ahead: Once baked, these brownies keep their moisture and flavor for up to a week in the fridge, and they freeze well for longer storage.
- Versatility: Swap in your favorite dark chocolate chips or add a splash of espresso to tweak the flavor profile to your liking.
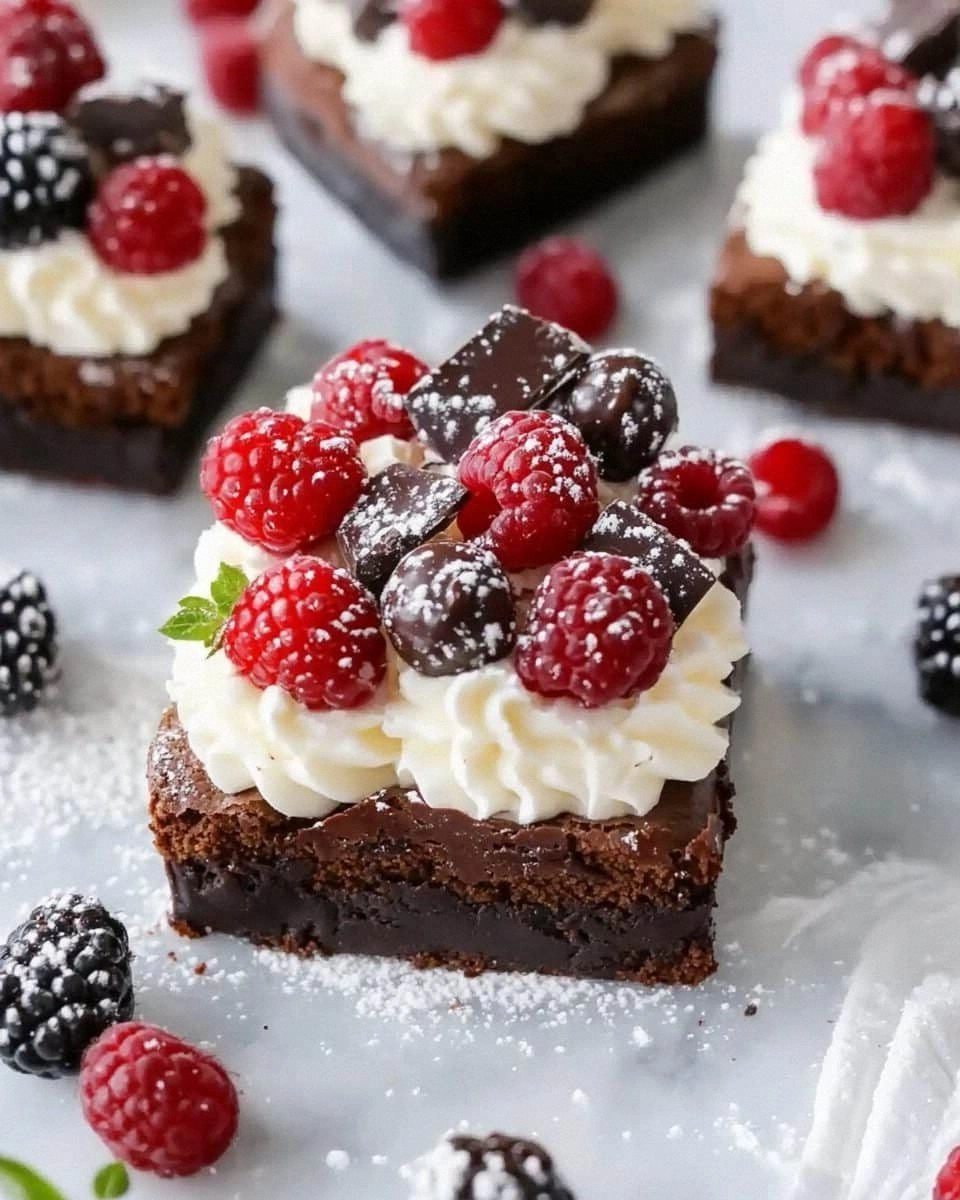
- Presentation: The glossy finish and slightly caramelized edges give a professional look that’s perfect for special occasions or a simple dessert plate.
- Health‑Friendly: With no refined flour or artificial additives, these brownies feel indulgent yet guilt‑free.
Inside the Ingredient List
The Flavor Base
Almond flour is the star of this recipe. It not only provides the structure but also adds a subtle nutty undertone that complements the cocoa. If you’re looking for a different texture, try blanched almond flour for a lighter bite. Skipping almond flour would turn this into a dense, heavy brownie that feels more like a brownie cake than a fudgy classic.
The Chocolate Crew
Unsweetened cocoa powder is the backbone of the chocolate flavor. It offers a rich, bittersweet profile that balances the natural sweetness of the almond flour. If you prefer a sweeter brownie, replace half of the cocoa with a cocoa‑sweetened chocolate bar, but be careful not to add extra sugar. The chocolate chips, when added, provide pockets of gooeyness that contrast beautifully with the cake‑like crumb.
The Sweetener
Granulated sugar keeps the batter from drying out and helps the brownies rise slightly, giving them that tender center. If you’re watching your carb intake, swap the sugar for a natural sweetener like maple syrup or a sugar‑free alternative; just remember to reduce the liquid slightly to maintain the batter’s consistency. Skipping sugar entirely will result in a bland, dry texture that’s far from the decadent experience we’re aiming for.
The Binding Elements
Eggs act as both binder and leavening agent, ensuring that the brownies hold together while still achieving a light rise. For a vegan version, replace the eggs with flaxseed meal mixed with water or a commercial egg replacer. The butter melts into the batter, creating a glossy finish and adding a buttery depth that’s hard to replicate with oil alone. A pinch of sea salt amplifies the chocolate flavor and balances the sweetness.
Everything’s prepped? Good. Let’s get into the real action and transform these ingredients into a masterpiece that will have your friends begging for the recipe.
The Method — Step by Step
- Preheat your oven to 350°F (175°C) and line a 9-inch square baking pan with parchment paper, leaving an overhang on the sides for easy removal. This step ensures even baking and a clean release. The parchment will also add a subtle crispness to the edges. While the oven warms, gather all your ingredients so everything is within arm’s reach.
- In a medium bowl, whisk together almond flour, unsweetened cocoa powder, baking powder, and sea salt. The dry mix should be smooth, with no clumps, to guarantee an even distribution of flavor. A fine sieve can help break up any lumps before you combine it with the wet ingredients.
- In a separate saucepan, melt the butter and chocolate chips together over low heat, stirring constantly. This creates a glossy, chocolatey base that will coat the almond flour beautifully. Keep an eye on the heat—high temperatures can scorch the chocolate, leaving a bitter aftertaste.
- Once melted, pour the butter‑chocolate mixture into the dry mix and stir until fully incorporated. The batter should be thick but pourable; if it’s too thick, add a splash of almond milk or water to loosen it slightly. The consistency will dictate how fudgy or cake‑like the brownies turn out.
- Beat the eggs in a separate bowl, then fold them into the batter one at a time, ensuring each addition is fully blended before adding the next. The eggs provide structure, so don’t rush this step. A well‑mixed batter will rise evenly and hold its shape.
- Fold in vanilla extract, then stir in the sugar. The sugar should dissolve into the batter, creating a smooth, uniform mixture. If you notice any granules, give the batter a quick whisk to break them up.
- Transfer the batter to the prepared pan, spreading it evenly with a spatula. The batter should reach the edges of the pan to create a consistent crust. Pat it down gently to remove any air pockets that could cause uneven baking.
- Bake for 25–30 minutes, or until the edges pull away from the pan and a toothpick inserted in the center comes out with a few moist crumbs. Overbaking will dry out the brownies; underbaking will leave them gooey. Keep a close eye on the timer to find that sweet spot.
- Once baked, remove from the oven and let cool in the pan for 10 minutes. This rest period allows the brownies to set, making them easier to cut. The brownies will continue to cook slightly from residual heat.
- After cooling, lift the brownies out of the pan using the parchment overhang. Slice into squares and serve immediately, or store them in an airtight container at room temperature for up to 3 days. For longer storage, refrigerate or freeze as detailed below.
That’s it— you did it. But hold on, I’ve got a few more tricks that’ll take this to another level and make your brownies even more unforgettable.
Insider Tricks for Flawless Results
The Temperature Rule Nobody Follows
Many bakers bake brownies at 375°F, but that high heat often leads to a dry center. I’ve discovered that 350°F gives a perfect balance: the edges caramelize while the center stays moist. If you’re using a convection oven, reduce the temperature by 25°F to avoid over‑browning.
Why Your Nose Knows Best
Smell is your best judge of doneness. When the brownies are ready, a warm, chocolatey aroma will fill the kitchen. If the smell feels more like raw cocoa, give them a few more minutes. Conversely, if it’s too buttery, you’ve likely overbaked.
The 5‑Minute Rest That Changes Everything
After removing the brownies from the oven, let them rest for exactly 5 minutes before cutting. This short pause allows the structure to set, preventing the squares from crumbling. It also gives the flavors a chance to meld, creating a richer taste.
The Perfect Parchment Trick
Using parchment paper with an overhang means you can lift the entire batch out of the pan without disturbing the edges. This technique is especially handy when you’re serving a crowd and want a flawless presentation. It also saves you from the frustration of peeling a sticky pan.
The Sweet‑Salt Balance
A pinch of sea salt doesn’t just add flavor—it enhances the chocolate’s depth. Think of it as a secret ingredient that brings out the best in the cocoa. If you’re sensitive to sodium, reduce the salt slightly, but don’t skip it entirely.
The Finish with a Splash of Water
If you’re reheating frozen brownies, add a splash of water to the pan before microwaving. The steam keeps them moist and prevents them from drying out. This trick works wonders for those who love a warm, gooey brownie straight from the fridge.
Creative Twists and Variations
This recipe is a playground. Here are some of my favorite ways to switch things up:
Nutty Explosion
Add a cup of chopped walnuts or pecans to the batter before baking. The nuts introduce a crunchy texture and a buttery flavor that pairs beautifully with chocolate. Keep the nuts dry to avoid sogginess.
Espresso Infusion
Stir in a tablespoon of instant espresso powder for a subtle coffee kick. Espresso deepens the chocolate flavor without adding liquid, making the brownies even richer. This version is perfect for coffee lovers.
Minty Delight
Fold in a teaspoon of peppermint extract and a handful of crushed candy cane pieces. The mint gives a refreshing contrast to the chocolate, while the candy canes add a festive crunch. Serve during the holidays for a twist on traditional brownies.
Coconut Crunch
Replace half of the almond flour with shredded coconut and add a tablespoon of coconut oil. This variation gives a tropical flavor profile and a chewy texture. The coconut also adds a subtle sweetness that balances the cocoa.
Salted Caramel Swirl
Swirl in a few spoonfuls of salted caramel sauce before baking. The caramel melts into the brownie, creating pockets of gooey sweetness that contrast with the chocolate. Sprinkle sea salt on top after baking for an extra burst of flavor.
Almond Butter Boost
Swap the regular butter for almond butter to intensify the nutty undertone. The almond butter also adds a creamy texture that complements the almond flour. This version is ideal for those who love a stronger almond flavor.
Storing and Bringing It Back to Life
Fridge Storage
Store brownies in an airtight container at room temperature for up to 3 days. For longer freshness, keep them in the refrigerator; they’ll stay moist and flavorful for up to a week. Let them come to room temperature before serving for the best texture.
Freezer Friendly
Wrap each brownie square individually in plastic wrap, then place them in a freezer bag. They’ll keep for up to 3 months. Thaw at room temperature or microwave for 10–15 seconds before serving. The texture remains tender and fudgy.
Best Reheating Method
Reheat frozen brownies in a preheated oven at 350°F for 10 minutes, or use a microwave on medium power for 30–45 seconds. Add a splash of water to the pan before microwaving to keep them moist. This technique revives the brownies without drying them out.