Picture this: you’re standing in a cramped kitchen, the fridge door swinging open like a guilty confession, and you’ve just realized the pantry is a barren wasteland of blandness. You’ve been scrolling through Pinterest for the last hour, hunting for a dish that screams “comfort” without the usual carb‑heavy, greasy guilt. Suddenly, a flash of inspiration—red bell pepper, a touch of chill, and a tortilla that’s both crisp and tender. That was the moment I decided to rewrite the tortilla playbook.
I was on a mission. The last time I tried a homemade tortilla, the result was a chewy, rubbery slab that barely held the salsa I had prepared. My taste buds were in a state of disarray, and I was convinced that tortillas were a culinary dead end. I didn’t know that a single ingredient, a slight tweak in technique, and a dash of daring could resurrect that humble flatbread into a masterpiece. This isn’t just another recipe; it’s a revelation that turns every bite into a memory.
The aroma that fills the kitchen as the pepper roasts is a warm, smoky whisper that beckons you to the stove. The first sizzle of the dough on the skillet is music—an audible promise that something delicious is about to happen. The texture of the finished tortilla feels like a buttery whisper against the tongue, the edges crisping to a golden amber that shatters like thin ice. The flavor profile is a harmonious blend of sweet roasted pepper, herbaceous basil, and a subtle heat from the fresh chili that lingers without overpowering. If you’ve ever felt that your tortilla game was stuck in the past, this recipe will rewrite the narrative.
What makes this version stand out? It’s the unexpected combination of roasted red pepper with a vibrant pesto-aioli blend, the precise balance of moisture and flour, and a technique that ensures each tortilla is a golden pocket of flavor. I dare you to taste this and not go back for seconds. Trust me—this is hands down the best version you’ll ever make at home. If you’ve ever struggled with making tortillas that aren’t too dry or too soggy, you’re not alone—and I’ve got the fix.
What Makes This Version Stand Out
- Flavor Fusion: The marriage of roasted red pepper, basil pesto, and a hint of chili creates a complex profile that elevates every bite. The sweet, smoky pepper contrasts beautifully with the herbaceous pesto, while the chili adds a gentle kick that lingers.
- Crisp Perfection: The dough’s hydration level is calibrated to produce a tortilla that’s crispy on the edges yet soft inside, avoiding the common rubbery texture of many homemade versions.
- Time Efficiency: From prep to plate, the entire process takes just 45 minutes, making it a perfect weeknight dinner that doesn’t feel rushed.
- Ingredient Integrity: Every component is chosen for its ability to complement the others—freshly roasted pepper, real basil pesto, and a homemade aioli that brings a silky finish.
- Make‑Ahead Friendly: The tortillas can be cooked in advance and reheated to preserve their crispness, which means you can focus on the rest of your meal.
- Versatility: While the base is a tortilla, the filling can be swapped for grilled chicken, sautéed veggies, or even a protein-packed bean mix, making it suitable for vegetarians and carnivores alike.
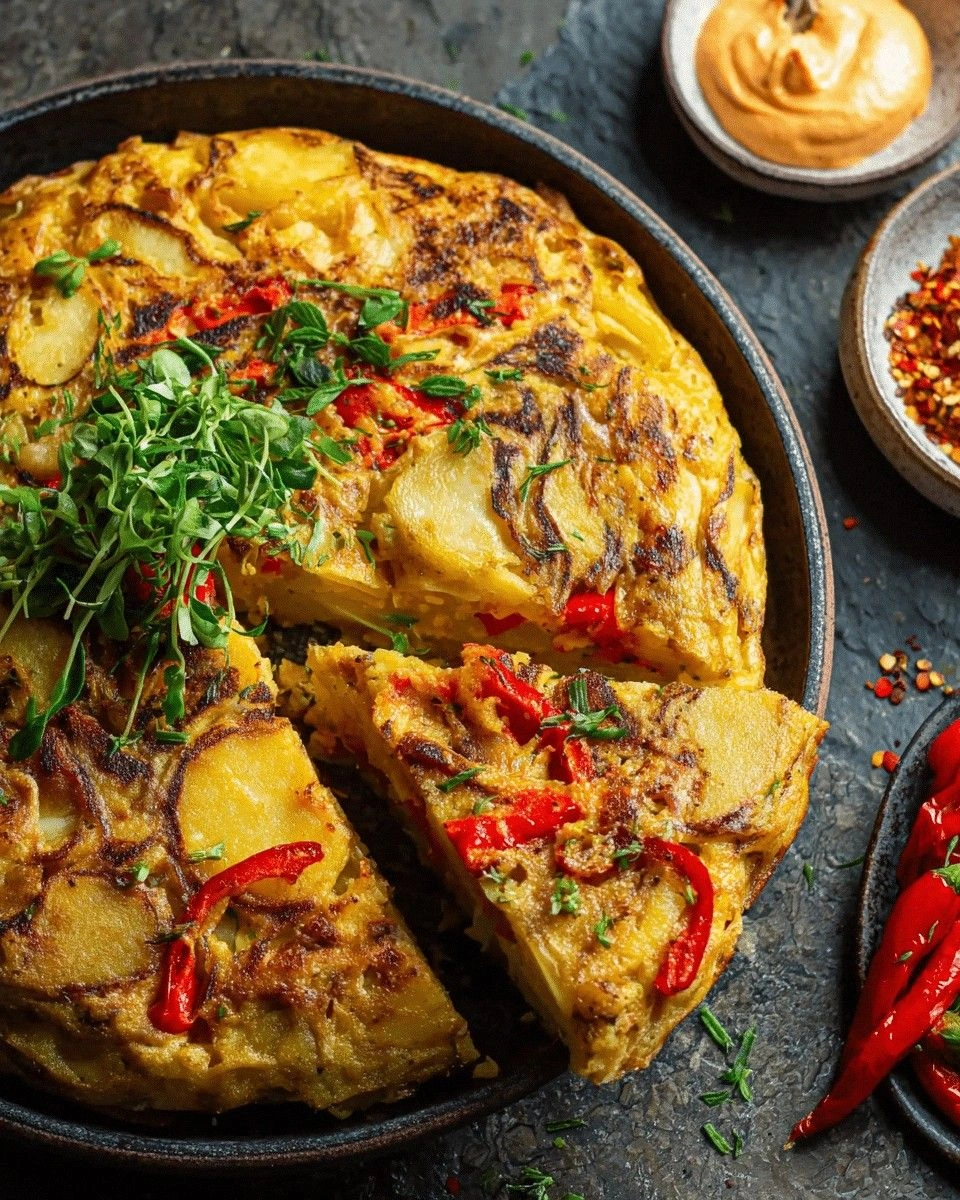
- Visual Appeal: The vibrant red of the pepper filling against the golden tortilla creates a dish that’s as stunning to look at as it is delicious.
- Community Buzz: Most recipes get this completely wrong. Here’s what actually works: the right amount of oil, the correct resting time, and the secret of adding a splash of water to the dough for optimal elasticity.
Inside the Ingredient List
The Flour Foundation
Flour isn’t just a binder; it’s the canvas that holds the tortilla together. The 2 cups of all-purpose flour give the dough the structure it needs to expand and hold its shape during cooking. A pinch of baking powder (½ tsp) introduces a subtle lift, preventing the tortillas from becoming too dense. If you’re craving a gluten-free alternative, swap the all-purpose flour for a 1:1 blend of rice flour and tapioca starch, but be mindful that the texture will shift slightly toward a more delicate crumb. Skipping the baking powder will leave the tortillas a tad heavier, but they’ll still hold up.
The Oil & Water Balance
Olive oil is the secret to that buttery mouthfeel. Three tablespoons of high‑quality extra‑virgin olive oil not only enrich the dough but also help the tortillas develop a golden crust. The ½ cup of warm water is the hydrating agent that activates the gluten, ensuring the dough is pliable and not dry. If you prefer a lighter version, reduce the oil to 2 tablespoons; the tortillas will be less rich but still flavorful. Be careful not to over‑hydrate; too much water makes the dough sticky and difficult to roll.
The Flavorful Core
Roasted red pepper is the star. When you roast the pepper at 425°F until the skin blisters, you unlock a sweet, smoky depth that can’t be replicated with raw pepper. Chop it finely and mix it with ½ cup basil pesto, ¼ cup garlic aioli, and 1 tablespoon minced fresh chili. The pesto adds a herbal brightness, while the aioli provides a silky, garlicky undertone. The chili introduces a subtle heat that lingers, and the lime juice (1 tablespoon) cuts through the richness, adding a citrusy zing. If you’re a spice lover, increase the chili to 2 tablespoons; if you’re a mild palate, reduce it to a pinch. A sprinkle of smoked paprika (1 teaspoon) brings an earthy warmth that ties all elements together.
The Finishing Touches
Fresh cilantro (1 tablespoon) adds a burst of green freshness, while a splash of olive oil (1 tablespoon) for frying the tortillas ensures they’re perfectly crisp. Optional: ¼ cup shredded cheddar cheese can be sprinkled on top of the filling before rolling, creating a melty, savory layer that’s a crowd‑pleaser. If you’re looking to keep the dish dairy‑free, omit the cheese or replace it with a plant‑based alternative. Each ingredient is carefully chosen to enhance texture, flavor, and visual appeal.
Everything’s prepped? Good. Let’s get into the real action.
The Method — Step by Step
- Roast the Pepper: Preheat your oven to 425°F (220°C). Place the whole red bell pepper on a baking sheet lined with parchment paper, skin side up. Roast for 20 minutes, turning once, until the skin blisters and blackens. Remove from the oven, let it cool for 5 minutes, then place it in a bowl, cover with plastic wrap, and steam for 10 minutes. This steamy bath loosens the skin. Peel off the charred skin, remove seeds, and finely chop the pepper. The smoky sweetness from this step is the foundation of the filling. Watch Out: If you roast the pepper too long, it can become overly charred and bitter.
- Prepare the Dough: In a large mixing bowl, combine 2 cups all‑purpose flour, ½ tsp baking powder, and 1 tsp salt. Drizzle in 3 tbsp olive oil and pour in ½ cup warm water. Mix until a shaggy dough forms. Kitchen Hack: Use a silicone spatula to fold the dough; this helps keep the flour from sticking to the bowl and gives the dough a smoother texture.
- Knead and Rest: Transfer the dough onto a lightly floured surface and knead for about 5 minutes until it’s smooth and elastic. Form the dough into a ball, place it back in the bowl, cover with a damp cloth, and let it rest for 15 minutes. Resting allows the gluten to relax, making the dough easier to roll out and preventing the tortillas from shrinking.
- Divide and Roll: After the rest, divide the dough into 8 equal portions (for 4 servings, you’ll have 2 tortillas per serving). Roll each portion into a 6‑inch circle using a rolling pin. The dough should be thin but not so thin that it tears. If you notice any cracks, dust the dough with a little flour before rolling.
- Cook the Tortillas: Heat a non‑stick skillet over medium‑high heat. Add 1 tbsp olive oil, swirl to coat. Place one tortilla in the skillet and cook for 1.5 minutes on each side, or until golden brown spots appear and the tortilla feels firm. Repeat with the remaining dough. The skillet should be hot enough that the tortilla sizzles upon contact—this is your cue that the heat is perfect.
- Assemble the Filling: In a bowl, combine the chopped roasted pepper, ½ cup basil pesto, ¼ cup garlic aioli, 1 tbsp minced chili, 1 tbsp lime juice, 1 tbsp chopped cilantro, and 1 tsp smoked paprika. Mix until well blended. The mixture should be smooth yet slightly chunky, offering a contrast of textures. If you prefer a thinner spread, add a splash of warm water or extra lime juice.
- Fill and Fold: Warm each tortilla in the skillet for a few seconds to make it pliable. Spread a generous amount of the pepper‑pesto mixture onto the center of each tortilla. Optional: sprinkle a small amount of shredded cheddar cheese on top of the filling. Fold the tortilla over the filling, then roll tightly to secure. If you like a crispier edge, press the seam with a spatula as you roll.
- Serve: Plate the rolled tortillas on a warmed dish. The heat should be such that the filling is slightly molten, while the tortilla remains crisp. Garnish with an extra sprinkle of cilantro or a wedge of lime for an extra burst of flavor. This dish is best enjoyed immediately, but if you need to hold it, keep it wrapped in foil and reheat in a hot skillet for 1 minute per side.
- Enjoy: Take a bite, feel the crunch of the tortilla, the silky sauce, the smoky pepper, and the subtle heat. If you’ve ever struggled with making tortillas that aren’t too dry or too soggy, you’re not alone—and I’ve got the fix. This next part? Pure magic. And now the fun part.
Insider Tricks for Flawless Results
The Temperature Rule Nobody Follows
Many people cook tortillas at high heat, which can lead to burnt edges and a dry center. I’ve discovered that maintaining a medium‑high heat (around 375°F) allows the tortillas to puff slightly, creating a soft interior while the edges crisp up beautifully. If your skillet is too hot, the dough will brown too quickly and shrink; if it’s too cool, the tortillas will remain pale and chewy.
Why Your Nose Knows Best
Before you add the chili, pause and inhale the aroma of the roasted pepper. The scent is a natural indicator of how caramelized the pepper is. If it smells sweet and smoky, you’re good to go. If it still has a raw, vegetal scent, give it a few more minutes in the oven. Your nose is a reliable judge of flavor depth.
The 5‑Minute Rest That Changes Everything
After rolling each tortilla, let it rest on a clean kitchen towel for 5 minutes before cooking. This short pause allows the dough to relax, preventing it from shrinking in the skillet. It also gives the filling a chance to settle, ensuring an even distribution of sauce.
The Secret of a Perfect Fold
When you fold the tortilla over the filling, press the seam gently with the heel of your palm. This simple pressure seals the tortilla, preventing the filling from spilling out during the first bite. A well‑sealed tortilla feels sturdy and delivers a balanced bite.
The Quick Chill for Make‑Ahead
If you’re preparing the tortillas a day ahead, wrap each in foil and refrigerate. When you’re ready to serve, reheat in a hot skillet for 1 minute per side. The foil keeps the tortillas from drying out, and the skillet restores their crispness.
Creative Twists and Variations
This recipe is a playground. Here are some of my favorite ways to switch things up:
Grilled Chicken Crunch
Swap the roasted pepper filling for shredded grilled chicken seasoned with cumin and smoked paprika. Add a handful of shredded lettuce for crunch. This variation turns the tortilla into a hearty lunch sandwich.
Vegan Delight
Omit the aioli and use a cashew‑based garlic sauce instead. Replace the cheddar cheese with vegan cheese shreds. The result is a plant‑powered, creamy, and satisfying tortilla that’s entirely dairy‑free.
Smoky Chipotle Twist
Introduce a tablespoon of chipotle in adobo sauce into the filling. The smoky heat pairs wonderfully with the roasted pepper, creating a deeper, more complex flavor profile. This version is perfect for those who love a bit of heat.
Mediterranean Medley
Add chopped sun‑dried tomatoes and kalamata olives to the filling. Finish with a drizzle of extra‑virgin olive oil and a pinch of oregano. The Mediterranean herbs elevate the dish with a briny, aromatic finish.
Breakfast Boost
Fill the tortillas with scrambled eggs, sautéed spinach, and a sprinkle of feta cheese. Serve with a side of fresh salsa. This variation transforms the dish into a flavorful breakfast or brunch option.
Sweet & Spicy Surprise
Incorporate a tablespoon of honey and a dash of cayenne pepper into the filling. The honey balances the heat, creating a sweet and spicy contrast that’s unexpected yet delicious.
Storing and Bringing It Back to Life
Fridge Storage
Store the cooked tortillas in an airtight container in the refrigerator for up to 3 days. Wrap them in parchment paper before placing in the container to prevent sticking. When ready to eat, reheat in a skillet over medium heat for 1–2 minutes per side, or microwave for 30 seconds and then finish in the skillet for crispness.
Freezer Friendly
For longer storage, place the tortillas on a baking sheet lined with parchment paper and freeze until solid. Transfer to a freezer bag and label with the date. They’ll keep for up to 2 months. To thaw, let them sit at room temperature for 30 minutes, then reheat as described above.
Best Reheating Method
The secret to reviving a cold tortilla is to add a tiny splash of water (about a teaspoon) to the skillet before reheating. The steam created by the water lifts the tortilla, making it soft inside while the heat crisps the exterior. This trick ensures every bite is as fresh as the first.