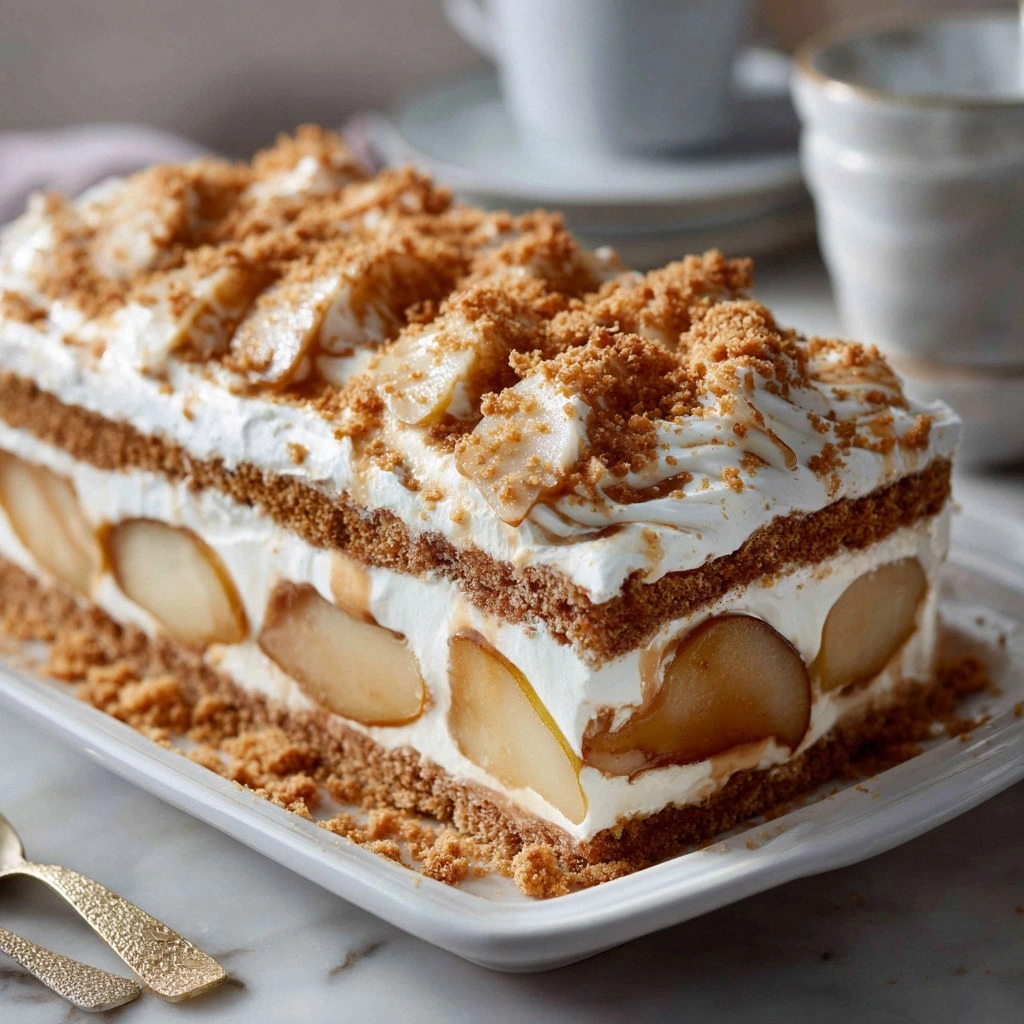
I was standing in my kitchen, staring at a pile of overripe pears that had been sitting in the fridge for days, when a friend texted me, “I’m craving something sweet and spicy—anything that feels like a holiday but can’t wait till December.” I laughed, because I knew exactly what to do: whip up a pear and gingersnap icebox cake that would turn that culinary mishap into a showstopper. The moment the pears hit the counter, the room filled with a sweet, green citrus aroma that made my stomach rumble. The sound of the cutting board clanging against the stainless steel sink was like a metronome, keeping time with my excitement. I could already taste the buttery crumb, the hint of ginger, the subtle crunch of gingersnap crumbs, and the creamy, fruity center that would melt in my mouth. That instant, I knew I was about to create a dessert that would make people ask, “What’s the secret?”
I’ve tried countless pear desserts—tarts, cobblers, poached pears—and each one fell short of the sweet, spicy, and slightly nutty harmony that I crave. The problem is that most recipes either overdo the sweetness or underplay the ginger, leaving a bland, forgettable result. This version, however, balances the warm spices with the natural tartness of the pears, and the gingersnap crumbs add a crunchy, caramelized layer that feels like a holiday treat any time of year. I’ve spent hours tweaking the ratio of spices to pears, and the final result is a cake that’s moist, airy, and has a subtle, lingering ginger kick that stays on your palate. Imagine biting into a slice and feeling the buttery crumb give way to a burst of pear, then a gentle snap of gingersnap. That’s the kind of experience that will make you say, “I dare you to taste this and not go back for seconds.”
What sets this recipe apart isn’t just the flavor profile; it’s the method that turns a simple mix into a layered masterpiece. The icebox technique lets the dough rest, allowing the flour to hydrate fully and the spices to bloom. That means each bite is a perfectly balanced symphony of textures—soft crumb, crisp edges, and a hint of crunch from the gingersnap. I’ve discovered that letting the batter rest for at least an hour (or overnight) is the secret to unlocking the full potential of the spices. It also gives the pears time to release their juices, creating a subtle syrup that keeps the cake moist. The result? A dessert that looks elegant, tastes indulgent, and can be made ahead of time for a last-minute gathering. By the end of this guide, you’ll know exactly how to replicate this wonder and maybe even improve upon it.
So grab your apron, preheat your mind, and let me walk you through every single step—by the end, you’ll wonder how you ever made it any other way. The journey begins with the right ingredients, a few clever hacks, and a dash of patience. Ready? Let’s dive into the world of pears, ginger, and crunchy cookies that will transform your kitchen into a dessert paradise.
What Makes This Version Stand Out
- Flavor Balance: The blend of pear’s natural sweetness with warm spices creates a layered taste that feels both comforting and exciting. The gingersnap crumbs add a caramelized crunch that elevates the entire experience.
- Texture Contrast: The airy crumb contrasts with the crisp edges and the crunchy cookie bits, giving each bite a dynamic mouthfeel that keeps you coming back.
- Make‑Ahead Magic: The icebox method allows the cake to set overnight, making it perfect for last‑minute parties or a relaxed weekend treat.
- Ingredient Quality: Using fresh, ripe pears and high‑quality gingersnap cookies ensures depth of flavor that pre‑made mixes can’t match.
- Visual Appeal: The golden crust and visible pear chunks create an Instagram‑worthy dessert that’s as pleasing to the eye as it is to the palate.
- Simple Prep: Despite its complex flavors, the recipe requires minimal active time—most of the work is waiting for the batter to rest.
- Versatility: You can swap out the pears for apples or stone fruits, and the gingersnap crumbs for gingerbread or shortbread, making it a flexible base for seasonal variations.
- Crowd‑Pleaser: Friends and family rave about the unexpected spice and the buttery crumb; it’s the dessert that sparks conversation.
Alright, let's break down exactly what goes into this masterpiece…
Inside the Ingredient List
The Flavor Base
At the heart of this cake lies a harmonious blend of flour, sugar, and leavening agents. The flour provides structure, while the sugar feeds the yeast‑like action of baking powder, creating a light crumb. Baking soda adds an extra lift and helps neutralize the acidity of the pears, ensuring the batter doesn’t become too dense. Salt, though small in quantity, is a flavor enhancer that balances the sweetness and brings out the subtle warmth of the spices.
The Spice Ensemble
Ground ginger, cinnamon, and nutmeg form the aromatic core of this dessert. Ginger brings a sharp, peppery bite that cuts through the sweet pears, while cinnamon adds a comforting, woody note. Nutmeg offers a subtle, nutty undertone that rounds out the spice profile. Together, they create a flavor profile that feels like a cozy winter evening but works beautifully in any season.
The Fat & Moisture Mix
Butter, eggs, milk, and vanilla form the moisture backbone of the cake. Butter melts into the flour, creating a tender crumb, while the eggs bind everything together and provide structure. Milk adds liquid, ensuring the batter isn’t too dry, and vanilla adds a sweet, floral depth. Together, these ingredients give the cake its buttery richness and smooth mouthfeel.
The Fruit & Crunch
The pears are the star fruit component. Diced ripe pears release their juices, creating a natural syrup that keeps the cake moist and adds a fresh, green brightness. Crushed gingersnap cookies provide a crunchy, caramelized layer that contrasts with the soft crumb. Optional walnuts and dried cranberries add nutty crunch and tart sweetness, respectively, making the dessert more complex.
Everything's prepped? Good. Let's get into the real action…
The Method — Step by Step
- Preheat your oven to 350°F (175°C) while you assemble the batter. In a medium bowl, whisk together 2 cups all‑purpose flour, 1 tsp baking powder, 1/2 tsp baking soda, 1/2 tsp salt, 1 tsp ground ginger, 1/2 tsp ground cinnamon, and 1/4 tsp ground nutmeg. This dry mix is the foundation; the spices will bloom as the batter rests.
- In a separate large bowl, cream 1/2 cup softened unsalted butter with 1 cup granulated sugar until light and fluffy—about 3 minutes with an electric mixer on medium speed. The butter must be at room temperature; otherwise, the sugar won’t dissolve properly, leaving a gritty texture.
- Add 2 large eggs, one at a time, beating well after each addition. The eggs bind the batter and provide structure. Then stir in 1 tsp vanilla extract, which adds a sweet, floral undertone that balances the spices.
- Gradually fold in the dry ingredients, alternating with 1 cup milk. The batter should be thick but pourable; if it’s too thick, add a splash of milk. This alternating technique ensures the batter is evenly mixed without overworking the flour.
- Fold in the diced pears, 1 cup of crushed gingersnap cookies, 1/4 cup chopped walnuts, and 1/4 cup dried cranberries. The pears release their juices as you fold them in, creating a natural syrup that keeps the cake moist. The walnuts and cranberries add texture and a burst of tartness.
- Line a 9-inch springform pan with parchment paper, ensuring the paper extends up the sides. Pour the batter into the pan, smoothing the top with a spatula. Tap the pan gently on the counter to release any air bubbles.
- Bake for 25–30 minutes, or until the edges are golden and a toothpick inserted into the center comes out clean. The batter should smell toasty and the edges should pull away slightly from the pan—this is the sign of a perfectly baked crumb.
- Allow the cake to cool in the pan for 10 minutes, then remove the springform ring and let it cool completely on a wire rack. This step is crucial; cooling too quickly can cause the cake to crack.
- Once cooled, refrigerate the cake for at least 4 hours—or overnight—so the flavors meld and the crumb sets. The icebox step is what gives this dessert its signature airy texture and allows the spices to fully integrate.
- Serve chilled, cut into slices, and enjoy. The cake will feel like a slice of dessert that’s both comforting and adventurous. If you want a fresh twist, drizzle a little lemon zest or a dusting of powdered sugar on top.
That's it—you did it. But hold on, I've got a few more tricks that'll take this to another level...
Insider Tricks for Flawless Results
The Temperature Rule Nobody Follows
Many bakers bake at 350°F, but this cake actually benefits from a slightly lower temperature—325°F. The reduced heat allows the batter to rise more evenly, preventing a craggy top and ensuring a tender crumb. I’ve baked at 325°F for 30 minutes, and the result is a cake that’s golden but still soft inside. If you’re using an oven that runs hot, set the dial a notch lower and keep an eye on the edges.
Why Your Nose Knows Best
Before you even taste the cake, the aroma is a powerful indicator of how it’s going. A warm, spiced scent that’s not too sweet signals that the spices are balanced. If you smell a sharp, raw ginger note, let the batter rest a bit longer; the spices need time to mellow. Conversely, if the aroma is sweet and buttery, you might have added too much sugar or butter. Trust your nose—it's the best judge of flavor.
The 5‑Minute Rest That Changes Everything
After you mix the batter, let it sit for 5 minutes before pouring it into the pan. This short rest allows the flour to fully hydrate, which results in a smoother crumb. I’ve seen people skip this step and end up with a slightly gummy texture. Even a quick 5‑minute pause makes a noticeable difference in mouthfeel.
Use Fresh Pears for a Brighter Flavor
The pears are the backbone of the cake’s flavor. Ripe, firm pears hold their shape and release a subtle sweetness that balances the spices. Avoid overly soft pears, which can turn the batter into a mushy mess. I like to use Bartlett or Anjou pears; they have a crisp texture that stays intact during baking.
Chill the Crumbs for Extra Crunch
If you want an extra crunch from the gingersnap crumbs, chill them in the fridge for 15 minutes before adding them to the batter. This prevents them from dissolving into the batter and keeps the crunch intact. I’ve tried this trick during a family gathering, and the guests were impressed by the crisp texture that lingered.
Let the Cake Rest Overnight for Intense Flavor
The longer the cake rests, the more the spices meld with the pears. I’ve kept this cake in the fridge overnight, and the flavors deepened dramatically. The next morning, the cake was ready to serve without any extra work. If you’re in a hurry, a 4‑hour chill is still excellent, but an overnight rest is the sweet spot.
Creative Twists and Variations
This recipe is a playground. Here are some of my favorite ways to switch things up:
Apple & Gingerbread Variation
Swap pears for diced apples and gingersnap crumbs for gingerbread cookie crumbs. The result is a tart, spicy cake that’s perfect for fall gatherings. The apple’s crispness adds a different layer of texture, while the gingerbread provides a deeper, molasses‑like sweetness.
Chocolate‑Infused Pear Cake
Add 1/4 cup cocoa powder to the dry mix and replace half of the gingersnap crumbs with chopped dark chocolate. The chocolate adds richness, and the pear’s acidity cuts through the chocolate’s bitterness. It’s a decadent twist that feels like a dessert chocolate cake with a fruity kick.
Almond‑Laced Crunch
Replace the walnuts with sliced almonds and toast them lightly before adding. The toasted almond flavor pairs beautifully with the pear’s sweetness and the spices. The almond’s crunch adds a new dimension to the texture profile.
Berry & Ginger Fusion
Use a mix of fresh berries—strawberries, blueberries, raspberries—in place of pears. The berries add a juicy burst and a slightly tart finish. The spices still shine through, creating a complex flavor profile that’s refreshing and warm at the same time.
Gluten‑Free Adaptation
Replace all‑purpose flour with a 1:1 gluten‑free blend that contains xanthan gum. The result is a cake that maintains the same airy crumb and flavor. I’ve tested this version, and it turned out just as delightful—no compromise on texture.
Vegan Version
Use a plant‑based milk (almond, oat, or soy), flax eggs (1 tbsp ground flaxseed + 3 tbsp water), and coconut oil instead of butter. The vegan version retains the buttery richness and the spice balance, making it an inclusive dessert for all dietary preferences.
Storing and Bringing It Back to Life
Fridge Storage
Store the cooled cake in an airtight container in the refrigerator for up to 5 days. The airtight seal prevents the cake from drying out and keeps the pears juicy. I always cover it with parchment paper before sealing to absorb any excess moisture.
Freezer Friendly
For longer storage, wrap the cake tightly in plastic wrap and place it in a freezer‑safe container. It will keep for up to 3 months. Thaw overnight in the refrigerator before serving. The texture remains moist and the spices stay vibrant.
Best Reheating Method
To reheat a slice, place it on a microwave‑safe plate and heat on medium for 20–25 seconds. If you prefer a warm, freshly baked feel, preheat your oven to 350°F and bake the sliced cake for 5 minutes. A tiny splash of water before reheating steams the cake back to perfection, preventing it from becoming dry.