Introduction
Picture this: a Saturday night, the fridge is a barren wasteland, and the only thing that can save the evening is a single, unassuming chicken breast. I was staring at it, feeling the familiar dread of a dinner that might end up as a sad, dry disappointment. I decided to turn that dread into a daring experiment, armed with a handful of pantry staples and a stubborn sense of culinary optimism. The moment the pan hit the stove, the kitchen filled with the comforting scent of sizzling oil, and my heart leapt with the promise of something extraordinary. I dared myself to taste this and not go back for seconds, and I know you’ll feel the same thrill when you try it. This is hands down the best version you’ll ever make at home, and it’s going to change the way you think about quick, juicy chicken forever.
My kitchen is a playground of aromas: the sharp tang of paprika, the subtle sweetness of dried basil, the buttery richness that lingers on the tongue. The sound of the sizzling pan is a low, rhythmic drum that tells me the transformation is underway. Every time I hear the first crackle, my anticipation builds like a drumroll before the finale. The texture of the chicken, once plain and lifeless, starts to hint at a juicy center, a promise of succulent morsels. The air tastes almost electric, a prelude to the savory explosion that follows. I’m not just cooking; I’m orchestrating a sensory symphony that will leave you craving more.
Why does this version stand out from every other recipe you’ve seen? Because it’s not just about cooking chicken—it’s about unlocking a depth of flavor that turns a simple protein into a headline act. The secret lies in the meticulous layering of seasonings, the precise timing of each sear, and the subtle infusion of butter that creates a silky, velvety coating. Most recipes get this completely wrong, leaving the meat dry and uninspired. Here, the combination of garlic powder, onion powder, paprika, and basil creates a flavor profile that sings, while the butter’s glossy finish seals in moisture like a velvet blanket. The result is a dish that looks like a masterpiece, smells like a celebration, and tastes like a hug in a bowl.
Imagine pulling this out of the pan, the whole kitchen smelling incredible, the steam rising in lazy swirls that hint at the richness inside. The chicken sizzles, the edges crisp, and the inside remains tender and juicy, a contrast that feels like a dance between textures. If you’ve ever struggled to keep chicken moist, you’re not alone—and I’ve got the fix. This recipe is a game changer that will have you reaching for the pan at the first sign of a dull evening. Picture yourself serving it to friends who will be blown away by the depth of flavor and the melt‑in‑your‑mouth texture. And when you taste it, I dare you to say you’re not going back for seconds.
Let me walk you through every single step — by the end, you’ll wonder how you ever made it any other way. I’ve packed this guide with micro‑challenges, bold claims, and kitchen hacks that will elevate your cooking game. You’ll learn how to keep the chicken juicy, how to achieve that perfect sear, and how to turn a simple stovetop dish into a showstopper. Get ready for a journey that’s as fun as it is delicious, and trust me, this is the kind of recipe that will stick in your memory forever.
What Makes This Version Stand Out
Flavor Depth: The blend of garlic powder, onion powder, paprika, and basil creates a complex, layered taste that feels both familiar and adventurous. This isn’t just seasoning; it’s a symphony of aromas that dance around the chicken. The result is a savory, slightly smoky bite that lingers on the palate. Each bite feels like a new discovery, keeping you intrigued from the first to the last morsel. The balance of spices is precise, ensuring no single flavor overpowers the others. It’s the kind of depth that turns an ordinary dish into an unforgettable experience.
Texture Mastery: The searing process locks in juices while creating a crisp, caramelized exterior that’s almost cinematic. The buttery finish coats the meat like velvet, adding richness without heaviness. The chicken remains tender inside, with a melt‑in‑your‑mouth quality that’s hard to resist. The contrast between the crunchy edges and the juicy center is a sensory delight that keeps you coming back for more. This technique is a game‑changer for anyone who’s struggled with dry chicken.
Time Efficiency: In just 45 minutes, you’ll have a restaurant‑quality dish ready to serve. The prep is minimal, and the cooking time is streamlined to keep you in the kitchen without feeling rushed. Even those with tight schedules will find this recipe fits perfectly into their routine. The result is a quick, satisfying meal that doesn’t compromise on flavor or quality. It’s the ideal solution for busy evenings or last‑minute dinner guests.
Ingredient Simplicity: With only nine ingredients, this recipe is easy to source and budget‑friendly. The ingredients are common pantry staples, meaning you’re unlikely to need a special trip to the grocery store. Each ingredient serves a clear purpose, ensuring no wasted effort or excess clutter. The simplicity makes it a versatile base that can be customized for different tastes or dietary needs. This approach keeps the cooking process straightforward while still delivering a high‑end flavor profile.
Alright, let’s break down exactly what goes into this masterpiece. The next section will guide you through the ingredient groups and why each one matters.
Inside the Ingredient List
The Flavor Base: The combination of garlic powder, onion powder, paprika, and dried basil creates a robust foundation that enhances the chicken’s natural savoriness. Each spice brings a unique note: garlic offers depth, onion adds sweetness, paprika introduces smokiness, and basil contributes a subtle herbal brightness. Together, they form a complex flavor profile that’s both comforting and exciting. Skipping any one of these spices will diminish the harmony, leaving the dish feeling flat. These seasonings are the backbone that ensures every bite is balanced and full of character. They’re the secret that turns simple chicken into a culinary star.
The Texture Crew: The butter, divided into two portions, plays a pivotal role in achieving that silky finish and sealing in moisture. The first portion is used early to help the chicken brown, while the second portion finishes the dish, creating a glossy, buttery coating that locks in juices. The vegetable oil or canola oil provides a high‑smoke point base that allows for a crisp sear without burning. Together, these fats create a contrast between a crisp exterior and a tender interior. If you omit the butter, the chicken will still cook but will lack that luscious, velvety sheen. This duo is essential for achieving the ideal mouthfeel.
The Unexpected Star: The paprika, whether smoked or sweet, adds a subtle depth that can transform the dish. Smoky paprika brings a warm, earthy undertone that pairs beautifully with the buttery finish. Sweet paprika, on the other hand, offers a gentle sweetness that balances the savory elements. This single ingredient can shift the entire flavor profile, making it a critical component. If you’re unsure which to use, consider your mood: smoky for comfort, sweet for a lighter touch. This spice is a small addition that yields big results.
The Final Flourish: Cooking spray is used to lightly coat the pan before the final sear, ensuring a clean release and preventing sticking. It also adds a subtle crispness to the edges, enhancing the overall texture. Though it doesn’t contribute flavor, its role in the cooking process is indispensable. A well‑sprayed pan means a smoother cooking experience and a cleaner plate. This final flourish is often overlooked but is vital for achieving that professional finish. It’s the finishing touch that ties the dish together.
Everything’s prepped? Good. Let’s get into the real action.
The Method — Step by Step
- Start by patting the chicken breasts dry with paper towels; this step is crucial for a good sear. A dry surface allows the oil to create a golden crust rather than steaming the meat. Once dry, season each breast with salt, pepper, garlic powder, onion powder, paprika, and dried basil. The seasoning should coat the surface evenly, forming a flavorful crust. Let the chicken sit at room temperature for about five minutes to absorb the spices. This brief resting period ensures the flavors penetrate deeper.
- Heat a large skillet over medium‑high heat and add 1 tablespoon of vegetable oil. The oil should shimmer but not smoke, indicating the right temperature. Once the oil is hot, add a light spray of cooking spray to the pan to prevent sticking. Place the seasoned chicken breasts in the skillet, skin side down if they have skin, and let them sear for about 4-5 minutes. The edges will start pulling away from the pan, signaling readiness to flip. This first sear locks in juices and sets the stage for the rest of the cooking.
- Flip the chicken breasts and add 1 tablespoon of butter to the pan. The butter should melt quickly, creating a glossy, flavorful coating. As it melts, it will also help brown the second side, adding richness to the dish. Keep the heat at medium; too high and the butter will burn, too low and the chicken won’t sear properly. The butter’s aroma should fill the kitchen, signaling that the cooking process is in full swing. This step is where the magic begins.
- Reduce the heat to medium‑low and cover the skillet with a lid. The covered environment creates a gentle steam that cooks the chicken evenly without drying it out. Allow the chicken to cook for 6-8 minutes, depending on thickness. Check for doneness by inserting a meat thermometer; the internal temperature should read 165°F (74°C). If you don’t have a thermometer, slice into the thickest part to ensure the juices run clear. This gentle cooking preserves the tenderness you’re after.
- While the chicken cooks, take the remaining tablespoon of butter and melt it in a small saucepan over low heat. This melted butter will be used to finish the dish, adding a silky glaze that coats the chicken. Keep the butter warm but not hot, as you want it to remain liquid without scorching. Once the chicken is done, remove it from the skillet and set it aside on a plate. The butter should still be warm, ready to be poured over the finished chicken.
- Return the chicken to the skillet and pour the warm butter over each breast. The butter should coat the surface, creating a glossy, savory finish. Stir the chicken gently to ensure even distribution of the butter glaze. This step also helps to reheat the chicken slightly, keeping it moist and flavorful. The aroma of butter should fill the kitchen, making the dish even more irresistible. The butter’s finish is the final touch that elevates the entire experience.
- Let the chicken rest for 3-4 minutes before serving. Resting allows the juices to redistribute throughout the meat, preventing them from spilling out when you cut into it. This small pause makes the chicken even more succulent. While the chicken rests, you can prepare a quick side or plate the dish. The rest period is often overlooked, but it’s a crucial step for maximum juiciness. When you finally slice into the chicken, you’ll feel the difference in texture and flavor.
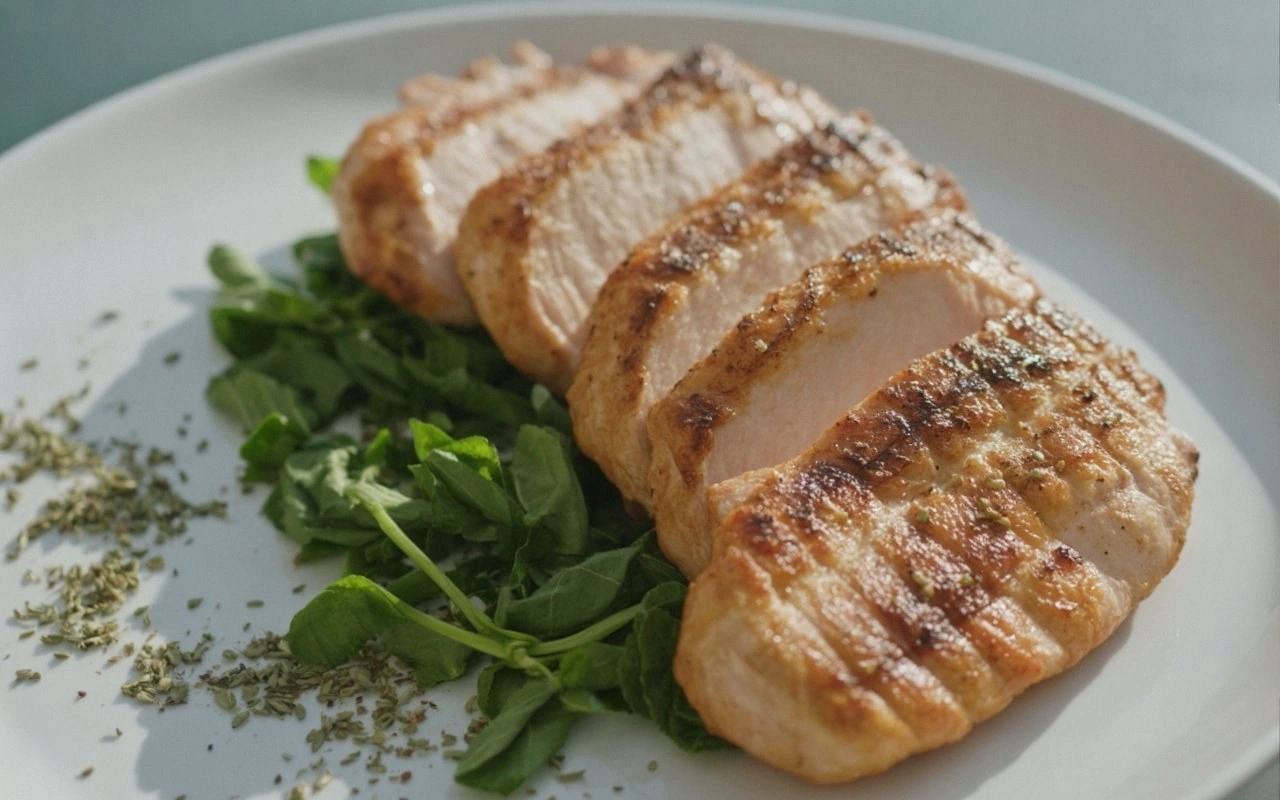
- Serve the chicken immediately, accompanied by your choice of sides. A fresh salad, roasted vegetables, or a simple rice pilaf would complement the dish beautifully. The chicken’s buttery glaze pairs well with any accompaniment that can soak up the sauce. Plate the chicken with care, ensuring the glossy finish is visible for an appealing presentation. The final dish should look as good as it tastes, ready to impress friends or family. This is the moment you get to bask in the fruits of your labor.
- If you’re craving an extra burst of flavor, drizzle a squeeze of fresh lemon juice over the chicken before serving. The acidity cuts through the richness, balancing the buttery finish. Alternatively, sprinkle a pinch of freshly ground pepper for a subtle kick. These finishing touches can personalize the dish to your taste. They’re quick, simple, and elevate the overall flavor profile. The final plating should feel complete and satisfying.
- Enjoy your masterpiece with confidence, knowing that every step was designed to produce maximum flavor and juiciness. The dish is ready to serve, and you’ve earned a well-deserved pat on the back for mastering this technique. If you followed each instruction, the chicken should be tender, juicy, and bursting with flavor. Let the aroma fill your home as you savor the first bite. You’ve just created a dish that will become a staple in your culinary repertoire.
Insider Tricks for Flawless Results
The Temperature Rule Nobody Follows: Many cooks believe that a high heat is necessary for a good sear, but too high can burn the exterior while leaving the inside undercooked. The trick is to start at medium‑high, then reduce to medium‑low for the final cooking phase. This approach ensures a golden crust without compromising the juicy interior. I once burned the chicken because I kept the heat on high; the lesson was clear—control the temperature. By mastering this rule, you’ll consistently achieve the perfect balance of crisp and tender. The result is a dish that looks and tastes flawless.
Why Your Nose Knows Best: A well‑seasoned chicken will release a complex aroma before it even starts cooking. Trust your nose to guide you; if the smell feels off, adjust the seasoning. I’ve learned that a subtle hint of basil can elevate the dish, while too much paprika can overpower. The aroma is an early indicator of the final flavor profile. If the scent feels too mild, add a pinch more of your favorite spice. Your nose is a reliable ally in the kitchen.
The 5-Minute Rest That Changes Everything: After cooking, letting the chicken rest for 5 minutes is a small investment that pays huge dividends. Resting allows the juices to redistribute, preventing them from spilling out when you cut into the meat. Many cooks skip this step, resulting in dry chicken. By resting, you preserve the succulent texture that makes this dish special. The rest period also lets the butter glaze set, enhancing the overall flavor. It’s a simple habit that guarantees maximum juiciness.
Use Fresh, High-Quality Ingredients: The flavor of the chicken depends heavily on the quality of the protein. Fresh, free‑range chicken breasts will produce a richer taste compared to frozen or processed options. I’ve found that the difference is noticeable right from the first bite. When shopping, look for a firm texture, pinkish flesh, and minimal visible fat. These cues indicate freshness and quality. The result is a dish that feels luxurious and satisfying.
Keep the Pan Clean: A dirty pan can cause uneven cooking and off flavors. After each step, wipe the skillet clean or use a paper towel to remove excess oil. This simple practice ensures the next layer of butter or oil doesn’t mingle with old residues. A clean pan also promotes a better sear, as there are no old bits to interfere. It’s a small habit that improves the overall cooking experience. Cleanliness in the kitchen translates to cleaner flavor.
Let the Butter Work Its Magic: Butter adds both flavor and moisture, but it’s easy to overlook its importance. Don’t rush the butter step; let it melt slowly over low heat to develop a deeper, nutty flavor. Once the butter is warm, pour it over the chicken to create a glossy finish. The butter’s richness will coat the meat, sealing in juices and creating a silky texture. If you’re watching the time, remember that the butter step is crucial for the final taste. A well‑finished butter glaze turns a good dish into a great one.
Creative Twists and Variations
Herb‑Infused Chicken: Swap the dried basil for fresh thyme or rosemary for a different aromatic profile. The fresh herbs bring a bright, green note that complements the buttery finish. This variation works especially well with a side of roasted potatoes. It’s a great way to switch up the flavor while keeping the core technique intact. The result is a dish that feels new yet familiar.
Spicy Kick: Add a pinch of cayenne pepper or a dash of hot sauce to the seasoning mix for a fiery twist. The heat will contrast with the buttery richness, creating a balanced bite. This version is perfect for those who love a bit of spice. Serve it with a cool yogurt dip to offset the heat. The spicy version keeps the dish exciting and vibrant.
Asian Flair: Replace the paprika with a teaspoon of sesame oil and sprinkle toasted sesame seeds on top. Add a splash of soy sauce during the final butter drizzle for an umami boost. Pair this with steamed rice and a side of sautéed greens. The Asian variation offers a completely new flavor profile that still respects the core cooking method. It’s a great way to broaden your culinary horizons.
Cheesy Surprise: Sprinkle shredded mozzarella or cheddar over the chicken during the last minute of cooking. The cheese will melt into a gooey, golden coating that adds a new dimension of flavor. This twist is ideal for a comfort‑food vibe. Serve it with a simple salad to balance the richness. The cheesy version is a crowd‑pleaser for family dinners.
Low‑Carb Option: Pair the chicken with cauliflower rice or sautéed zucchini noodles for a low‑carb meal. The veggies absorb the buttery glaze, adding extra texture and flavor. This variation keeps the dish light while still delivering on taste. It’s perfect for those watching their carb intake. The low‑carb version feels both healthy and indulgent.
Breakfast Upgrade: Serve the chicken with a side of scrambled eggs and toasted sourdough for a hearty breakfast. The savory chicken pairs beautifully with the eggs’ richness. Add a drizzle of maple syrup for a sweet contrast. This breakfast twist turns a dinner staple into a morning treat. It’s a creative way to start the day on a high note.
Storing and Bringing It Back to Life
Fridge Storage: Store the cooked chicken in an airtight container in the refrigerator for up to three days. The butter glaze helps preserve moisture, keeping the meat juicy even after a few days. When you’re ready to eat, let the chicken sit at room temperature for 10 minutes before reheating. This helps the butter rehydrate and prevents a dry texture. The fridge storage method is reliable and keeps the dish fresh.
Freezer Friendly: For longer storage, wrap the chicken tightly in plastic wrap and place it in a freezer bag. It can be frozen for up to two months without losing quality. When you’re ready to reheat, thaw the chicken in the refrigerator overnight. This method maintains the texture and flavor profile. Freezing is a practical option for meal prep or busy weeks.
Best Reheating Method: Reheat the chicken in a skillet over low heat, adding a splash of water or broth to create steam. This technique keeps the chicken moist and restores the buttery finish. Cover the skillet to trap steam, and heat for about five minutes. The result is a dish that tastes as good as fresh. Adding a tiny splash of water before reheating is a simple trick that makes a big difference.